CONNECTIONS
2. Video monitor TV | 3. Wired remote control |
If you are using a video monitor TV (equipped with a video input terminal), use the accessory coaxial cable to connect VIDE O OUT terminal on
In this case, audio outputs on
To use the optional remote control unit
For more information please follow instruction on the optional remote control unit
FRONT PANEL FACI LITIES
®
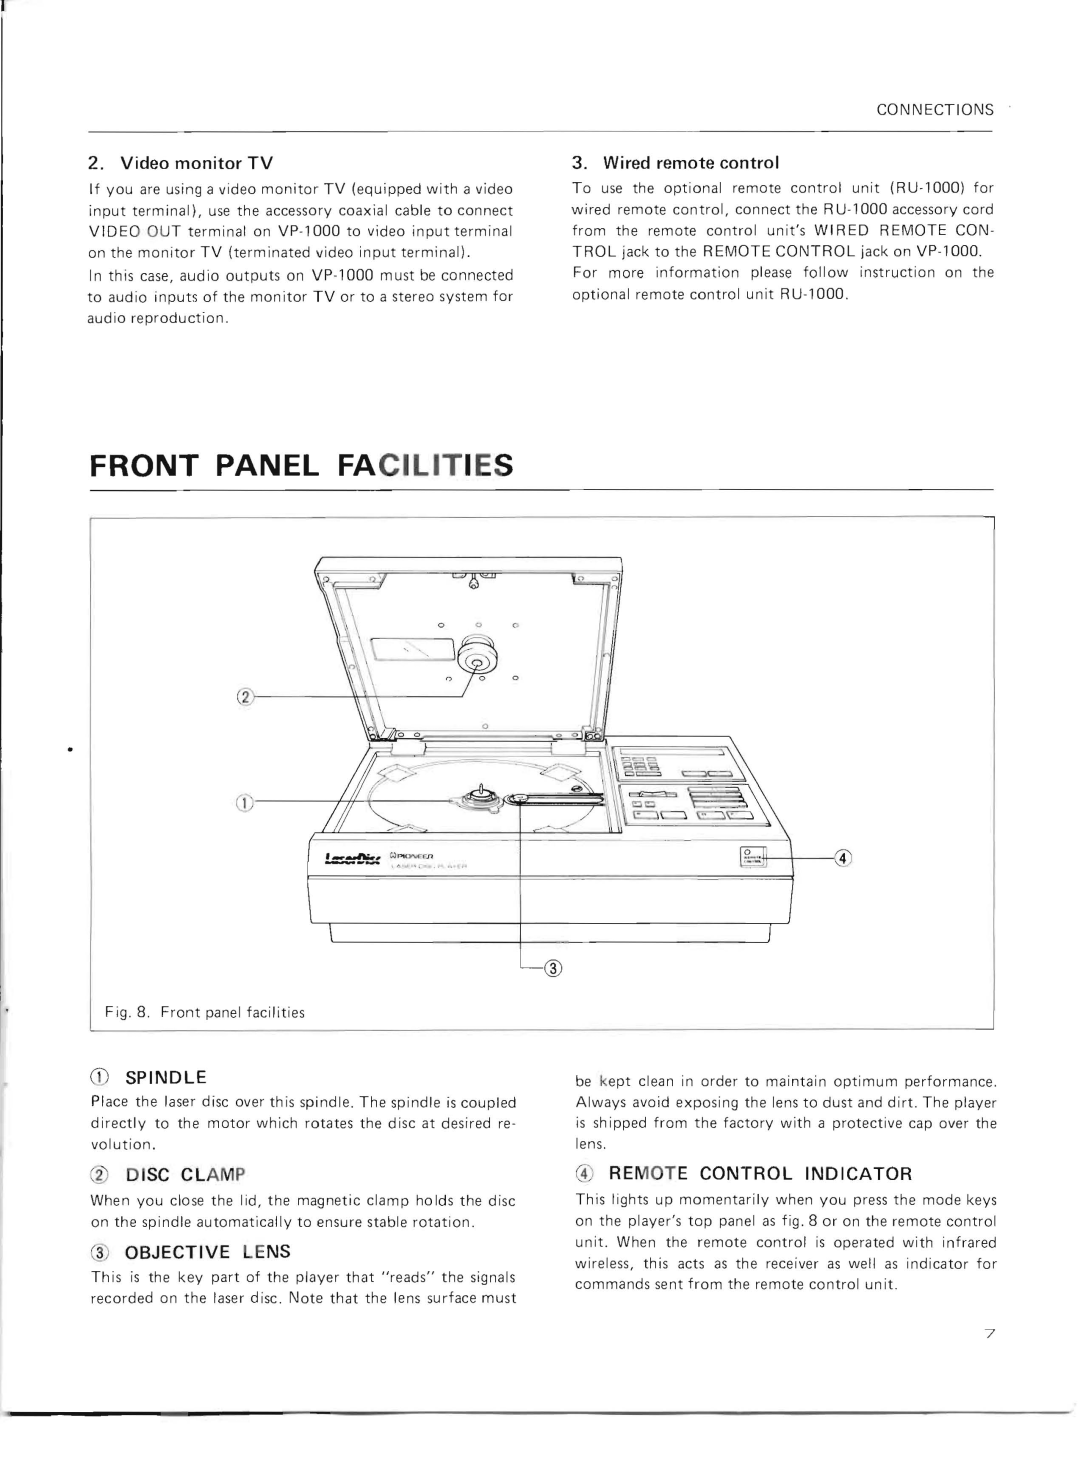
Fig .8. Front panel facilities
CD SPINDLE | be kept clean in order to maintain optimum performance. |
Place the laser disc over this spindle. The spindle is coupled | Always avoid exposing the lens to dust and dirt. The player |
directly to the motor which rotates the disc at desired re | is sh ipped from the factory with a protective cap over the |
volution. | lens. |
®DI SC CLA MP
When you close the lid, the magnet ic clamp holds the disc on the spindle automatically to ensure stable rotation.
®OBJECTIVE LE NS
Th is is the key part of the player that "reads" the signals record ed on the laser disc. Note that the lens surface must
@RE MOT E CONTROL INDICATOR
This lights up momentarily when you press the mode keys on the player's top panel as fig. 8 or on the remote control unit. When the remote control is operated w ith infrared wireless, this acts as the receiver as well as indicator for commands sent from the remote control unit.
7
