DM925™ Digital Mailing System Operating Guide
SV62207 Rev. B 9 - 3
Tape Maintenance Tape maintenance consists of installing a new tape roll.
The digital mailing system uses gummed oradhesive tape. A red stripe
appears along its edge approximately 36 inches from the end to indicate a
low tape condition. Replace the tape when the stripe appears. To order new
tape, refer to Chapter 11, Supplies and Options in this guide.
You can install a new roll before the system actually runs out of tape, or if
the system runs out of tape and the message “Out of Tape” appears on the
display.
Installing a New
Tape Roll
1. Open the main cover.
2. Remove the old tape core.
3. Push the feed lever to the left and remove any tape scraps from the
feeding area. Release the lever.
4. Tear of the end of the new roll tape to leave a straight edge.
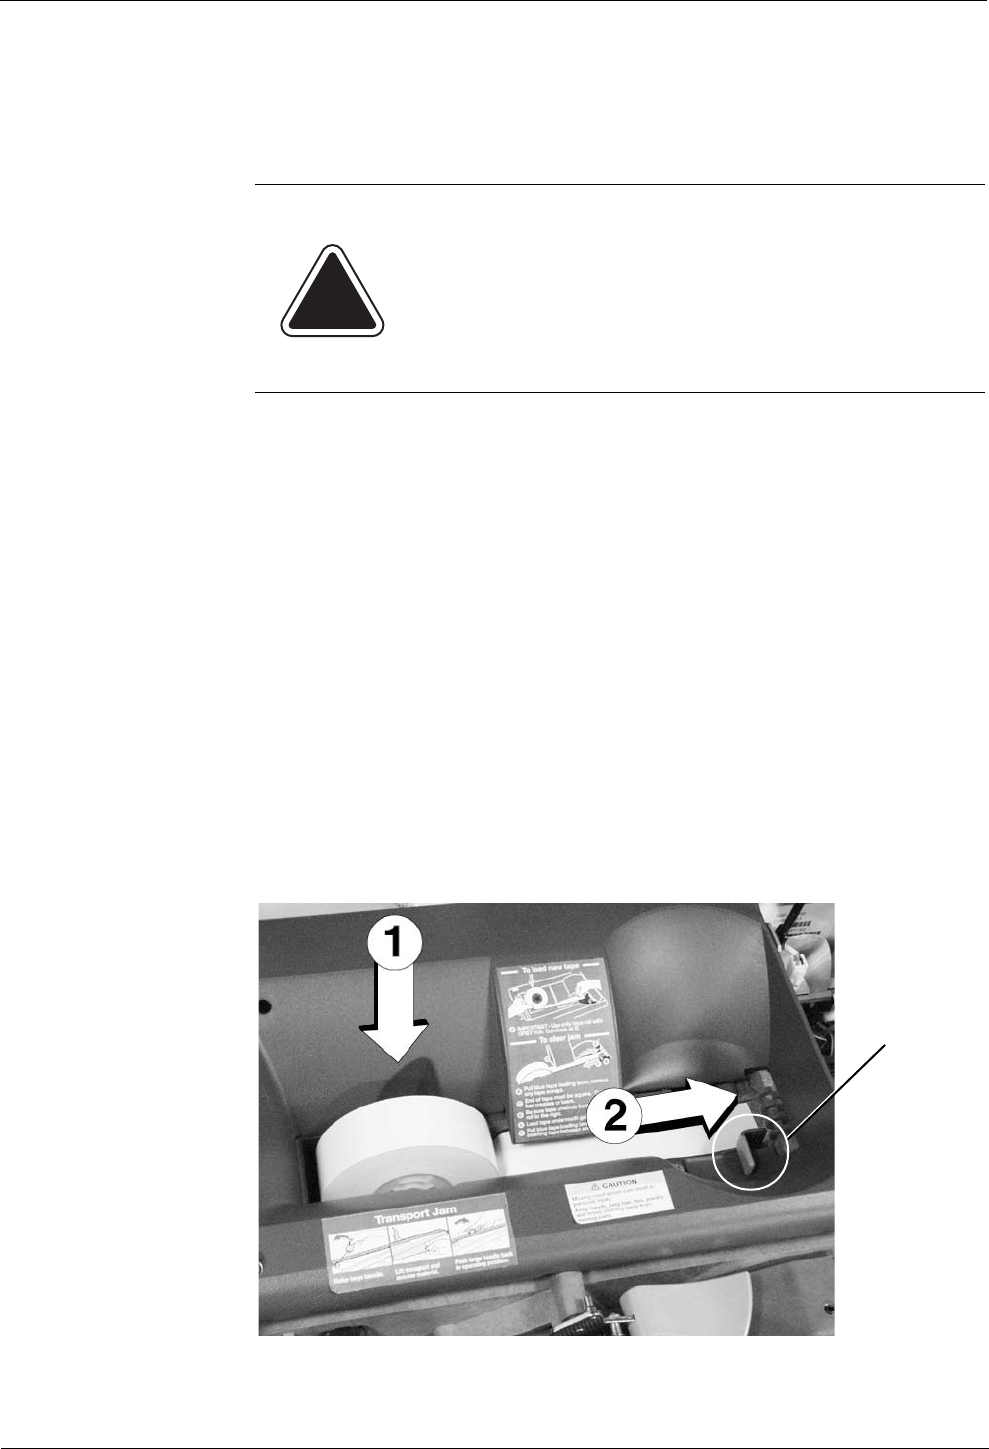
5. Drop the new roll tape into the well with gummed or adhesive surface
facing down. Make sure the leading tape edge comes up from under
the roll and to the right as shown in the picture below.
6. Push the feed lever to the left and hold while inserting the lead edge of
tape into the gap between the roller and the track.
7. Release the feed lever.
8. Close the cover. The tape advances to the proper position.
CAUTION: If you do not use Pitney Bowes supplied tape,
you will not be able to determine when the tape is running
out and this may cause a jam.
The red stripe on the tape notifies you that you are running
low on tape. There is also a black stripe that tells the
machine when it is out of tape. When the system detects the
black stripe on the tape it stops the machine. At this point
there is still a small amount of tape on the roll.
Feed Lever