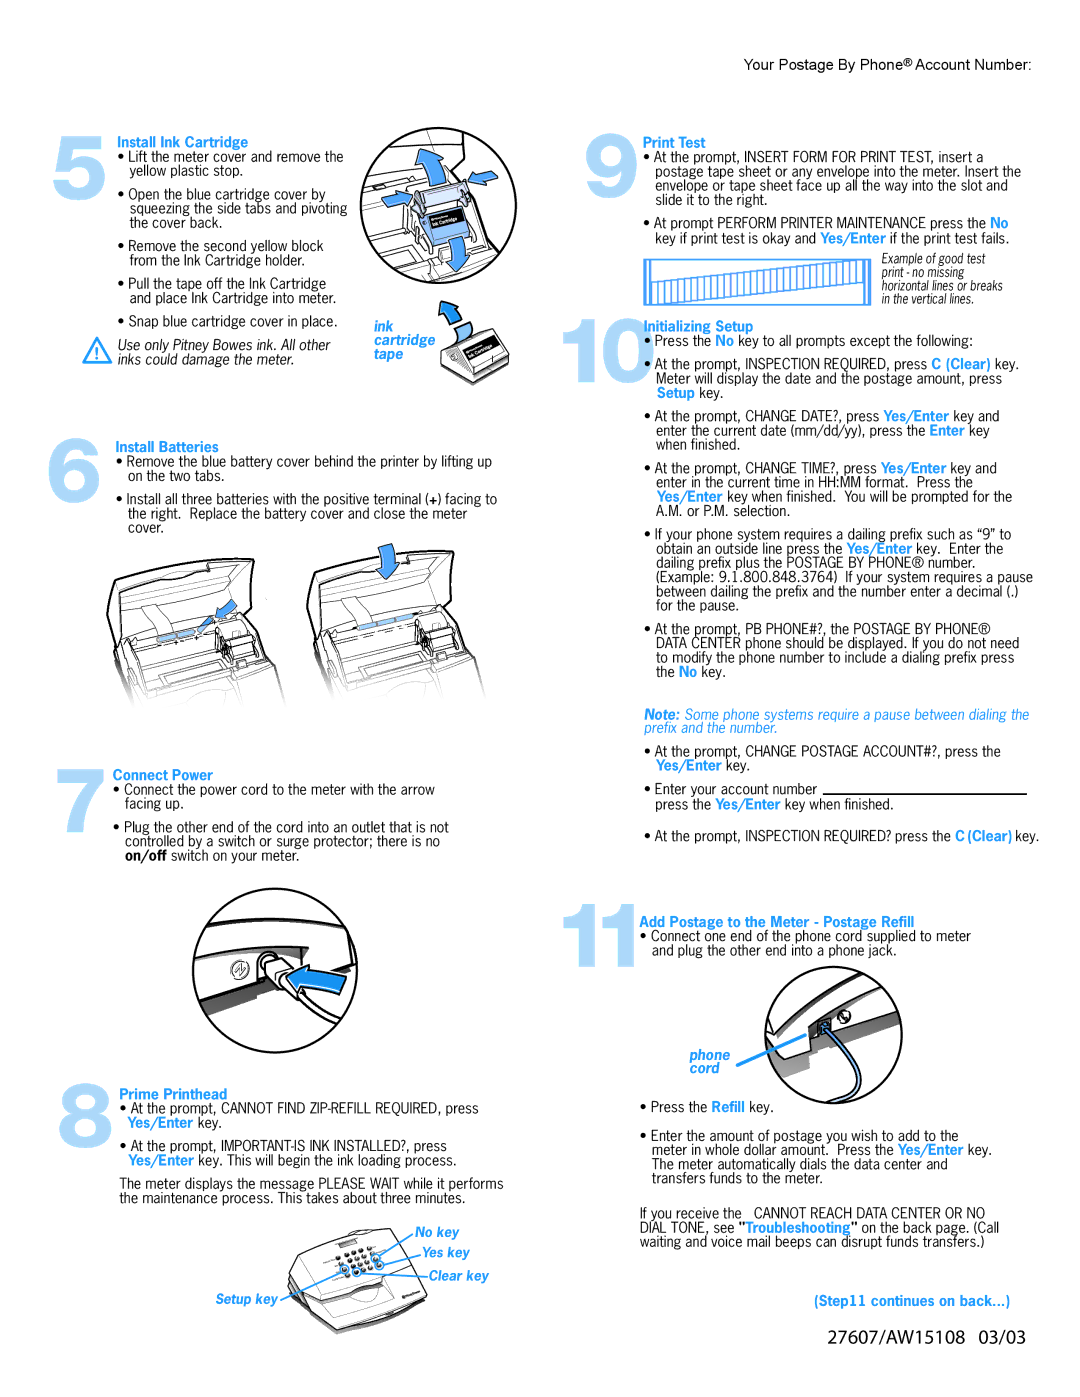
5Install Ink Cartridge
• Lift the meter cover and remove the yellow plastic stop.
• Open the blue cartridge cover by squeezing the side tabs and pivoting the cover back.
• Remove the second yellow block from the Ink Cartridge holder.
• Pull the tape off the Ink Cartridge and place Ink Cartridge into meter.
• Snap blue cartridge cover in place.
! Use only Pitney Bowes ink. All other inks could damage the meter.
ink  cartridge
  tape
tape 


Your Postage By Phone® Account Number:
9Print Test
• At the prompt, INSERT FORM FOR PRINT TEST, insert a postage tape sheet or any envelope into the meter. Insert the envelope or tape sheet face up all the way into the slot and slide it to the right.
• At prompt PERFORM PRINTER MAINTENANCE press the No key if print test is okay and Yes/Enter if the print test fails.
10Initializing Setup
• Press the No key to all prompts except the following:
• At the prompt, INSPECTION REQUIRED, press C (Clear) key. Meter will display the date and the postage amount, press Setup key.
6 Install Batteries
• Remove the blue battery cover behind the printer by lifting up on the two tabs.
• Install all three batteries with the positive terminal (+) facing to the right. Replace the battery cover and close the meter cover.
7Connect Power
• Connect the power cord to the meter with the arrow facing up.
• Plug the other end of the cord into an outlet that is not controlled by a switch or surge protector; there is no on/off switch on your meter.
• At the prompt, CHANGE DATE?, press Yes/Enter key and enter the current date (mm/dd/yy), press the Enter key when finished.
• At the prompt, CHANGE TIME?, press Yes/Enter key and enter in the current time in HH:MM format. Press the Yes/Enter key when finished. You will be prompted for the A.M. or P.M. selection.
• If your phone system requires a dailing prefix such as “9” to obtain an outside line press the Yes/Enter key. Enter the dailing prefix plus the POSTAGE BY PHONE® number. (Example: 9.1.800.848.3764) If your system requires a pause between dailing the prefix and the number enter a decimal (.) for the pause.
• At the prompt, PB PHONE#?, the POSTAGE BY PHONE® DATA CENTER phone should be displayed. If you do not need to modify the phone number to include a dialing prefix press the No key.
Note: Some phone systems require a pause between dialing the prefix and the number.
•At the prompt, CHANGE POSTAGE ACCOUNT#?, press the Yes/Enter key.
•Enter your account number
press the Yes/Enter key when finished.
•At the prompt, INSPECTION REQUIRED? press the C (Clear) key.
11Add Postage to the Meter - Postage Refill
• Connect one end of the phone cord supplied to meter and plug the other end into a phone jack.
8Prime Printhead
• At the prompt, CANNOT FIND
• At the prompt,
The meter displays the message PLEASE WAIT while it performs the maintenance process. This takes about three minutes.
|
| No key |
eDate |
| Yes key |
Advanc |
|
|
Ads | . | Clear key |
Fun |
| |
Setup |
|
|
s |
|
|
ds/Piece |
|
|
Setup key
phone cord
•Press the Refill key.
•Enter the amount of postage you wish to add to the meter in whole dollar amount. Press the Yes/Enter key. The meter automatically dials the data center and transfers funds to the meter.
If you receive the CANNOT REACH DATA CENTER OR NO DIAL TONE, see "Troubleshooting" on the back page. (Call waiting and voice mail beeps can disrupt funds transfers.)
(Step11 continues on back...)
27607/AW15108 03/03