System applications
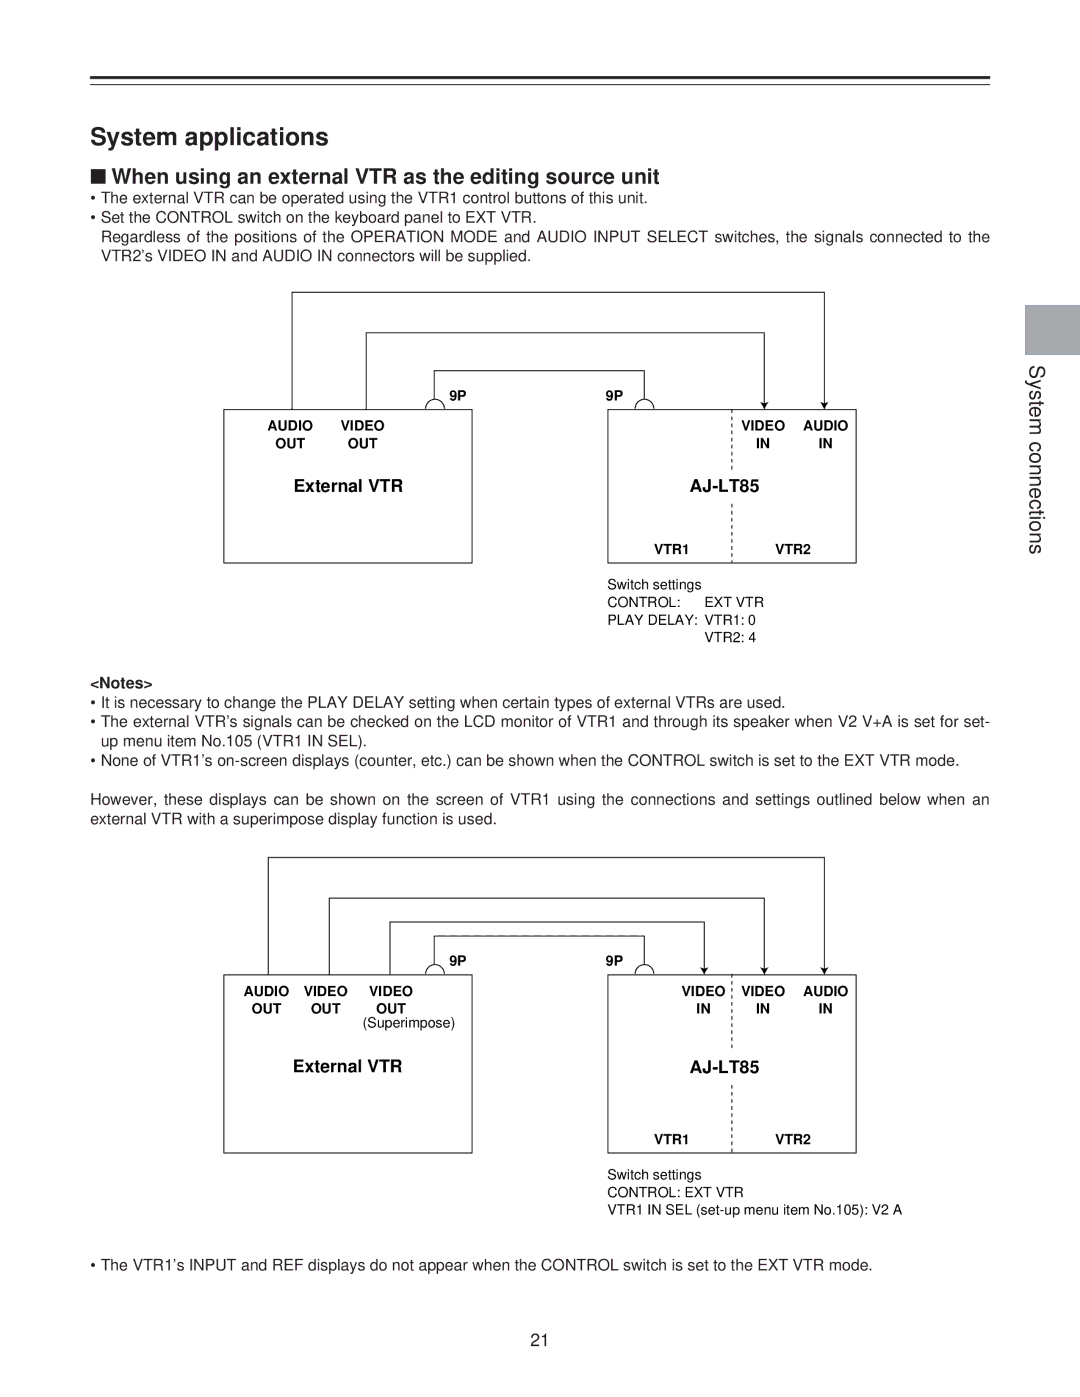
■When using an external VTR as the editing source unit
•The external VTR can be operated using the VTR1 control buttons of this unit.
•Set the CONTROL switch on the keyboard panel to EXT VTR.
Regardless of the positions of the OPERATION MODE and AUDIO INPUT SELECT switches, the signals connected to the VTR2’s VIDEO IN and AUDIO IN connectors will be supplied.
| 9P | 9P |
|
AUDIO | VIDEO | VIDEO | AUDIO |
OUT | OUT | IN | IN |
External VTR |
|
VTR1VTR2
Switch settings
CONTROL: EXT VTR
PLAY DELAY: VTR1: 0
VTR2: 4
<Notes>
•It is necessary to change the PLAY DELAY setting when certain types of external VTRs are used.
•The external VTR’s signals can be checked on the LCD monitor of VTR1 and through its speaker when V2 V+A is set for set- up menu item No.105 (VTR1 IN SEL).
•None of VTR1’s
However, these displays can be shown on the screen of VTR1 using the connections and settings outlined below when an external VTR with a superimpose display function is used.
|
| 9P | 9P |
|
|
AUDIO | VIDEO | VIDEO | VIDEO | VIDEO | AUDIO |
OUT | OUT | OUT | IN | IN | IN |
|
| (Superimpose) |
|
|
|
External VTR |
VTR1VTR2
Switch settings
CONTROL: EXT VTR
VTR1 IN SEL
• The VTR1’s INPUT and REF displays do not appear when the CONTROL switch is set to the EXT VTR mode.
System connections
21
