CUT EDITING PROCEDURE
2. Edit point registration
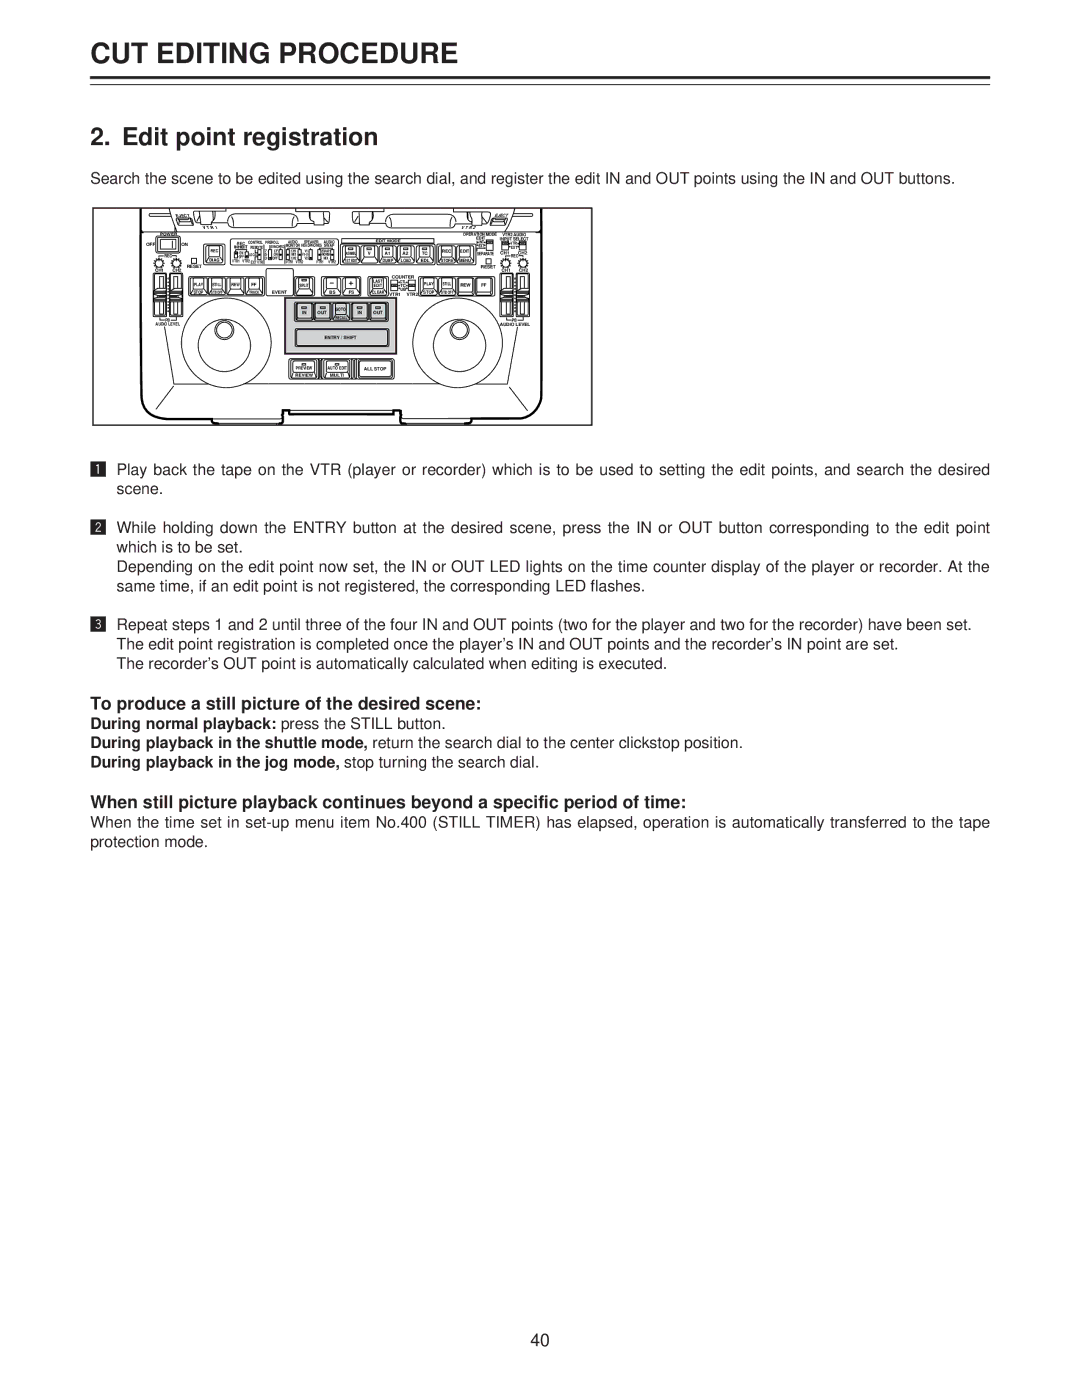
Search the scene to be edited using the search dial, and register the edit IN and OUT points using the IN and OUT buttons.
| EJECT |
|
|
|
|
|
|
|
|
|
|
|
|
|
|
|
|
|
| EJECT |
| |
| VTR1 |
|
|
|
|
|
|
|
|
|
|
|
|
|
|
|
| V T R 2 |
|
|
| |
POWER |
|
|
|
|
|
|
|
|
|
|
|
|
|
|
|
|
| OPERATION MODE | VTR2 AUDIO | |||
OFF | ON |
| REC | CONTROL | PREROLL | AUDIO | SPEAKER/ | AUDIO |
|
| EDIT MODE |
|
|
|
| EDIT | INPUT SELECT | |||||
|
|
|
|
|
|
|
|
|
| INT |
| VTR1 | ||||||||||
|
| REC | INHIBIT | REMOTE |
| SYNCHRO MONITOR HEADPHONES SWAP |
|
|
|
|
|
|
| REC | EDIT | EXT |
| EXT | ||||
|
|
| 7 - | CF- | V1- | ASMBL | V | A1 | A2 | TC | SEPARATE | CH1 RECCH2 | ||||||||||
| REC |
| LOCAL- | 5 - | ON- | - MIX - | V1•2- |
|
| |||||||||||||
|
| DIAG |
| 3 - | OFF- | - | MIX - | 1ST EDIT |
| DUMP | LOAD | EDL | STORE | MENU |
|
|
| |||||
| RESET | VTR1 VTR2 EXT VTR |
|
| VTR1 VTR2 | VTR1 | VTR2 |
| RESET |
|
| |||||||||||
CH1 |
|
|
|
|
|
|
|
|
|
|
|
|
|
|
|
|
|
| CH1 | CH2 | ||
CH2 |
|
|
|
|
|
|
|
|
|
|
|
|
|
|
|
|
|
|
| |||
|
|
|
|
|
|
|
|
|
|
|
|
| LAST | COUNTER |
|
|
|
|
|
| ||
| PLAY | STILL | REW | FF |
|
|
| SPLIT |
|
|
|
|
| CTL |
| PLAY | STILL | REW | FF |
|
| |
|
|
|
|
|
|
|
| EDIT |
| TC |
|
|
| |||||||||
| STOP | STB OFF |
| TRACK |
| EVENT |
|
| BS | FS |
| CLEAR |
| UB |
| STOP | STB OFF |
|
|
|
| |
|
|
|
|
|
| VTR1 | VTR2 |
|
|
|
| |||||||||||
|
|
|
|
|
|
|
| IN |
| GO TO |
| OUT |
|
|
|
|
|
|
|
|
| |
|
|
|
|
|
|
|
| OUT | IN |
|
|
|
|
|
|
|
|
|
| |||
| PB |
|
|
|
|
|
|
|
| RECALL |
|
|
|
|
|
|
|
|
|
| PB | |
AUDIO LEVEL |
|
|
|
|
|
|
|
|
|
|
|
|
|
|
|
|
|
|
| AUDIO LEVEL | ||
|
|
|
|
|
|
|
|
|
| ENTRY / SHIFT |
|
|
|
|
|
|
|
|
|
|
| |
|
|
|
|
|
|
| PREVIEW |
| AUTO EDIT | ALL STOP |
|
|
|
|
|
|
|
|
| |||
|
|
|
|
|
|
| REVIEW |
| MULTI |
|
|
|
|
|
|
|
|
|
|
|
| |
!Play back the tape on the VTR (player or recorder) which is to be used to setting the edit points, and search the desired scene.
@While holding down the ENTRY button at the desired scene, press the IN or OUT button corresponding to the edit point which is to be set.
Depending on the edit point now set, the IN or OUT LED lights on the time counter display of the player or recorder. At the same time, if an edit point is not registered, the corresponding LED flashes.
#Repeat steps 1 and 2 until three of the four IN and OUT points (two for the player and two for the recorder) have been set. The edit point registration is completed once the player’s IN and OUT points and the recorder’s IN point are set.
The recorder’s OUT point is automatically calculated when editing is executed.
To produce a still picture of the desired scene:
During normal playback: press the STILL button.
During playback in the shuttle mode, return the search dial to the center clickstop position.
During playback in the jog mode, stop turning the search dial.
When still picture playback continues beyond a specific period of time:
When the time set in
40
