Installation and Handling
Do not drop, bend, or flex the display. Do not allow objects to strike the surface of the display.
Mounting the Display
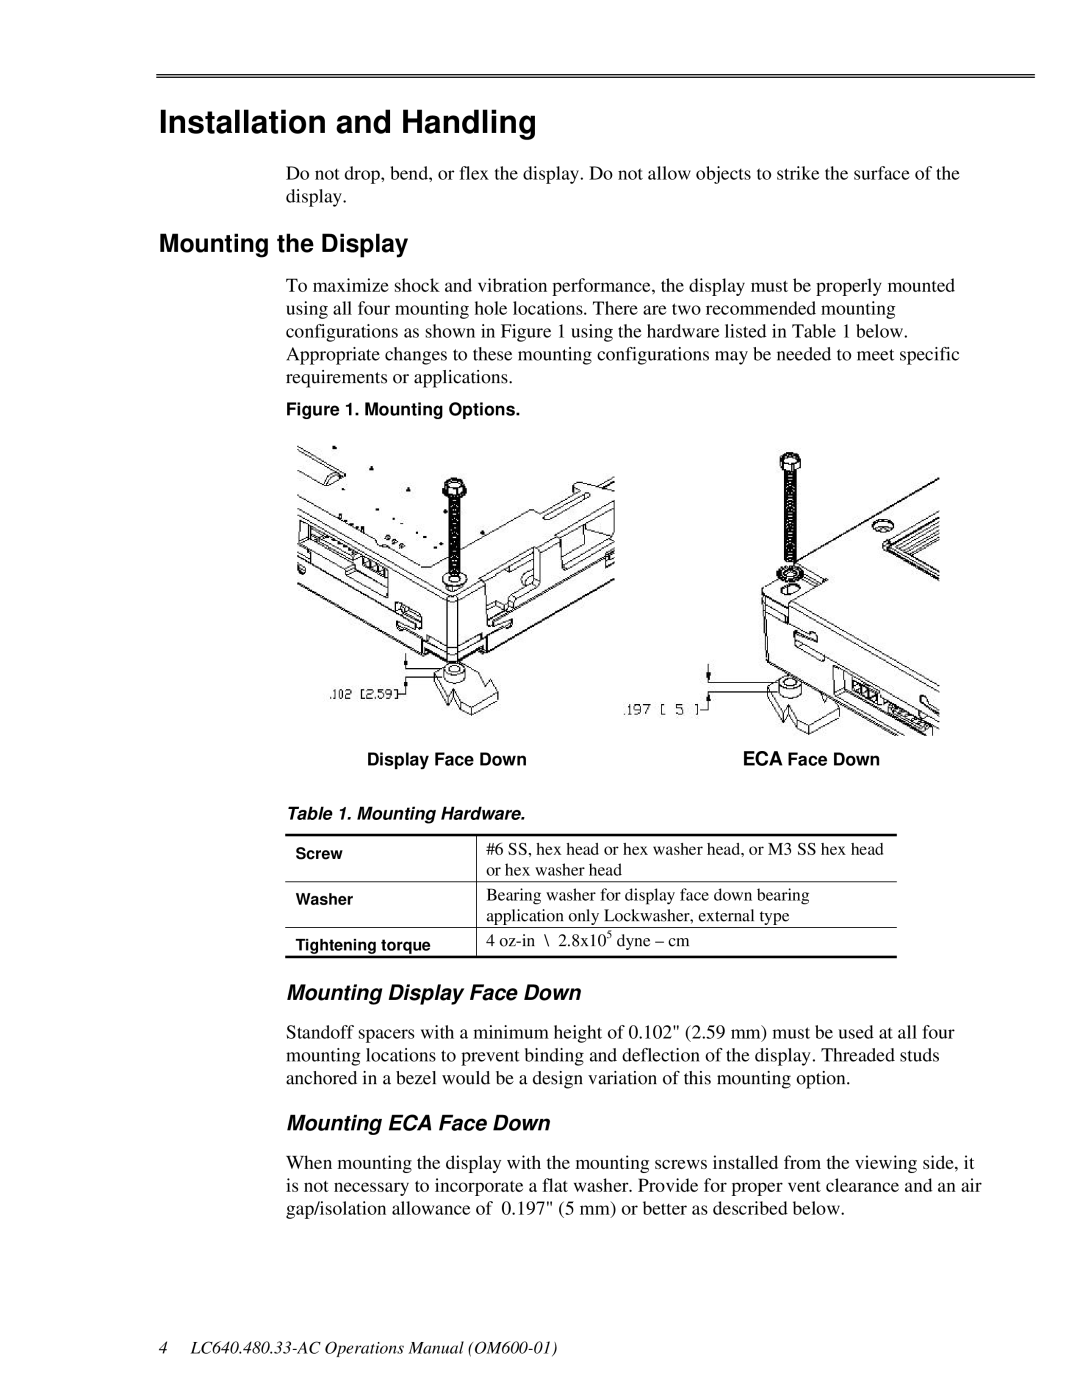
To maximize shock and vibration performance, the display must be properly mounted using all four mounting hole locations. There are two recommended mounting configurations as shown in Figure 1 using the hardware listed in Table 1 below. Appropriate changes to these mounting configurations may be needed to meet specific requirements or applications.
Figure 1. Mounting Options.
Display Face Down | ECA Face Down | |
Table 1. Mounting Hardware. |
| |
|
| |
Screw | #6 SS, hex head or hex washer head, or M3 SS hex head | |
| or hex washer head |
|
Washer | Bearing washer for display face down bearing | |
| application only Lockwasher, external type | |
Tightening torque | 4 |
|
Mounting Display Face Down
Standoff spacers with a minimum height of 0.102" (2.59 mm) must be used at all four mounting locations to prevent binding and deflection of the display. Threaded studs anchored in a bezel would be a design variation of this mounting option.
Mounting ECA Face Down
When mounting the display with the mounting screws installed from the viewing side, it is not necessary to incorporate a flat washer. Provide for proper vent clearance and an air gap/isolation allowance of 0.197" (5 mm) or better as described below.
4