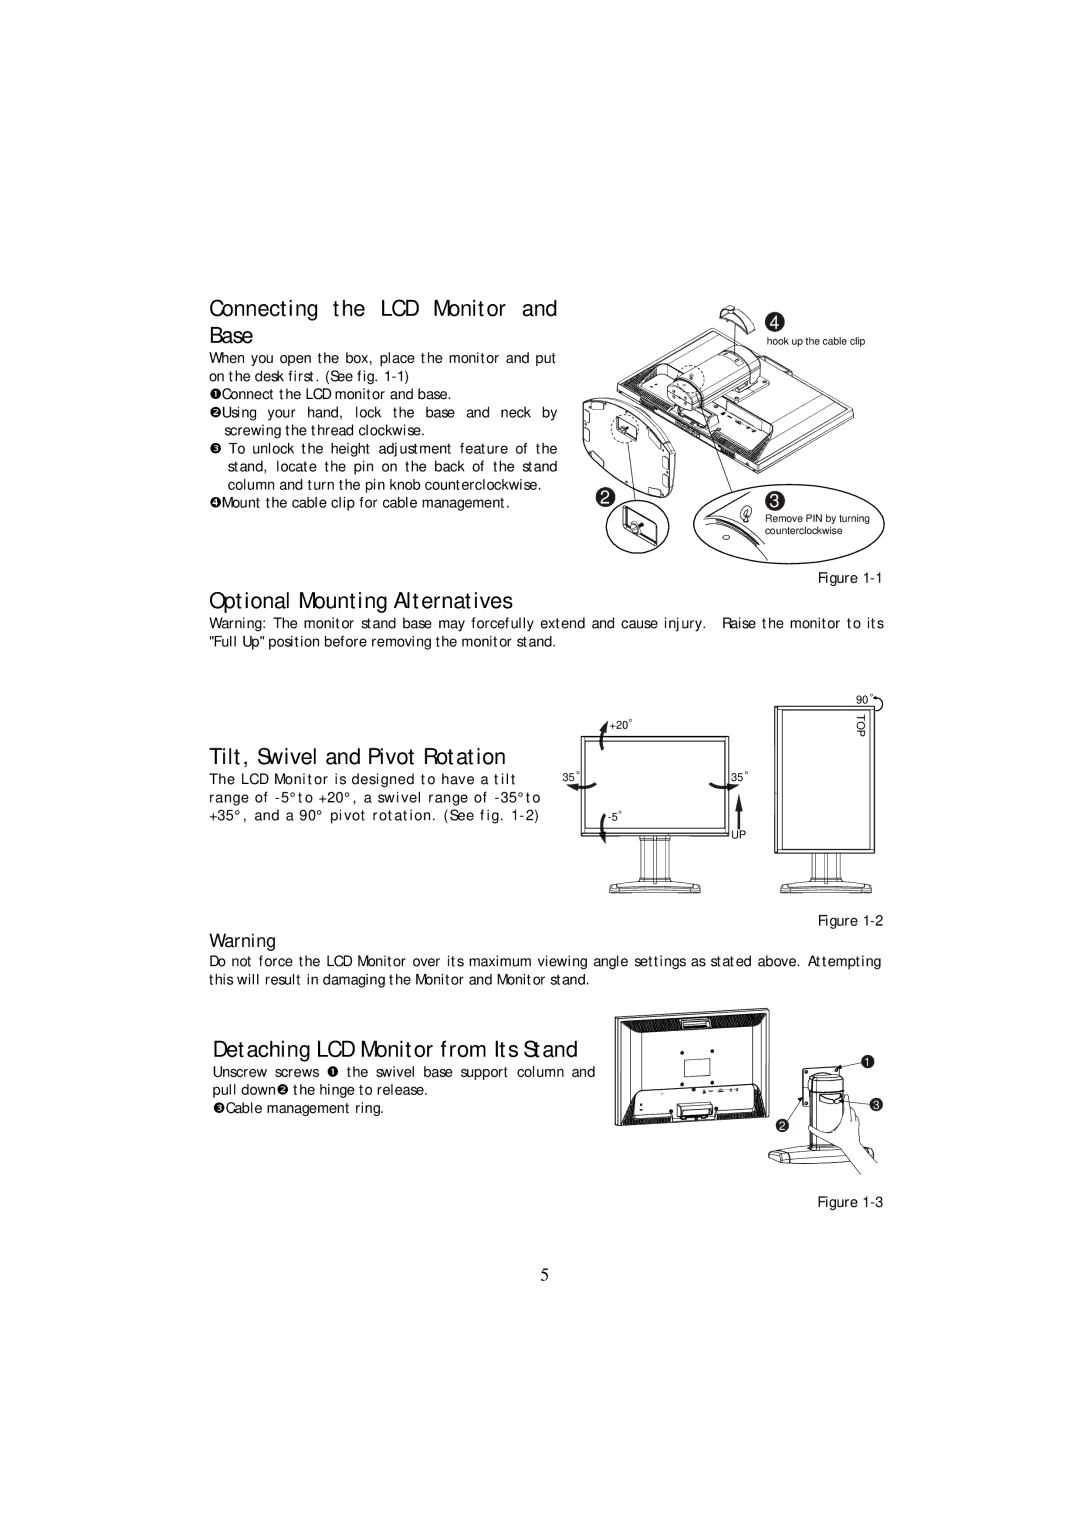
Connecting the LCD Monitor and
Base
When you open the box, place the monitor and put on the desk first. (See fig.
nConnect the LCD monitor and base.
oUsing your hand, lock the base and neck by screwing the thread clockwise.
pTo unlock the height adjustment feature of the stand, locate the pin on the back of the stand
column and turn the pin knob counterclockwise. | 2 |
qMount the cable clip for cable management. |
Optional Mounting Alternatives
Warning: The monitor stand base may forcefully extend and cause injury. "Full Up" position before removing the monitor stand.
+20![]()
Tilt, Swivel and Pivot Rotation
The LCD Monitor is designed to have a tilt | 35 |
range of |
|
+35°, and a 90° pivot rotation. (See fig. |
4
hook up the cable clip
3
Remove PIN by turning counterclockwise
Figure
Raise the monitor to its
90 ![]()
![]()
TOP
35 ![]()
UP
Figure
Warning
Do not force the LCD Monitor over its maximum viewing angle settings as stated above. Attempting this will result in damaging the Monitor and Monitor stand.
Detaching LCD Monitor from Its Stand
Unscrew screws n the swivel base support column and pull downo the hinge to release.
pCable management ring.
1
3
2
Figure
5