Indoor installation on a flat surface
1.To aim your antenna at the satellites:
2.Set the antenna flat against its base on a flat (horizontal) surface.
3.Turn the base of the antenna so that XM Logo is facing to the South/Southwest if you are in the Eastern half of the US, and to the South/Southeast if you are in the Western half of the US.
4.Use the “Antenna Aiming” screen, as described earlier, to optimize antenna tilt angle and position.
5.If necessary, experiment with different locations near
Your
the antenna where there is a strong XM signal, purchase a
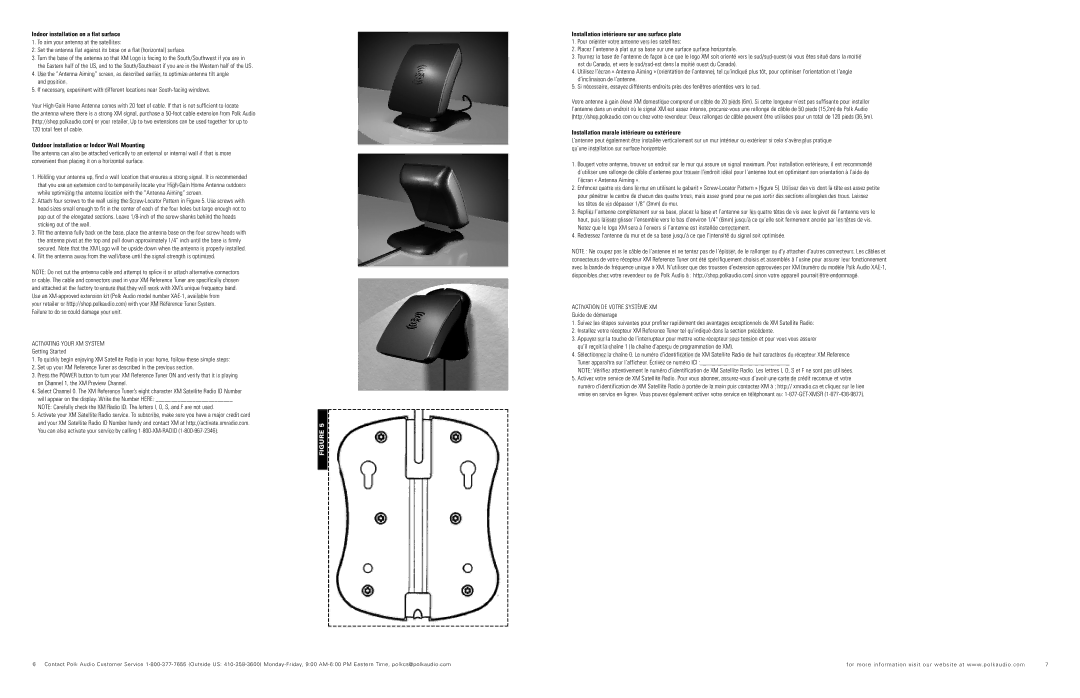
Outdoor installation or Indoor Wall Mounting
The antenna can also be attached vertically to an external or internal wall if that is more convenient than placing it on a horizontal surface.
1.Holding your antenna up, find a wall location that ensures a strong signal. It is recommended that you use an extension cord to temporarily locate your
2.Attach four screws to the wall using the
3.Tilt the antenna fully back on the base, place the antenna base on the four screw heads with the antenna pivot at the top and pull down approximately 1/4” inch until the base is firmly secured. Note that the XM Logo will be upside down when the antenna is properly installed.
4.Tilt the antenna away from the wall/base until the signal strength is optimized.
NOTE: Do not cut the antenna cable and attempt to splice it or attach alternative connectors or cable. The cable and connectors used in your XM Reference Tuner are specifically chosen and attached at the factory to ensure that they will work with XM’s unique frequency band. Use an
your retailer or http://shop.polkaudio.com) with your XM Reference Tuner System. Failure to do so could damage your unit.
ACTIVATING YOUR XM SYSTEM |
| |
Getting Started |
| |
1. | To quickly begin enjoying XM Satellite Radio in your home, follow these simple steps: |
|
2. | Set up your XM Reference Tuner as described in the previous section. |
|
3. | Press the POWER button to turn your XM Reference Tuner ON and verify that it is playing |
|
| on Channel 1, the XM Preview Channel. |
|
4. | Select Channel 0. The XM Reference Tuner’s eight character XM Satellite Radio ID Number |
|
| will appear on the display. Write the Number HERE: _________________________ |
|
| NOTE: Carefully check the XM Radio ID. The letters I, O, S, and F are not used. |
|
5. | Activate your XM Satellite Radio service. To subscribe, make sure you have a major credit card |
|
| and your XM Satellite Radio ID Number handy and contact XM at http://activate.xmradio.com. | 5 |
| You can also activate your service by calling | |
| FIGURE | |
|
| |
|
|
|
Installation intérieure sur une surface plate
1.Pour orienter votre antenne vers les satellites:
2.Placez l’antenne à plat sur sa base sur une surface surface horizontale.
3.Tournez la base de l’antenne de façon à ce que le logo XM soit orienté vers le
4.Utilisez l’écran « Antenna Aiming » (orientation de l’antenne), tel qu’indiqué plus tôt, pour optimiser l’orientation et l’angle d’inclinaison de l’antenne.
5.Si nécessaire, essayez différents endroits près des fenêtres orientées vers le sud.
Votre antenne à gain élevé XM domestique comprend un câble de 20 pieds (6m). Si cette longueur n’est pas suffisante pour installer l’antenne dans un endroit où le signal XM est assez intense,
Installation murale intérieure ou extérieure
L’antenne peut également être installée verticalement sur un mur intérieur ou extérieur si cela s’avère plus pratique qu’une installation sur surface horizontale.
1.Bougert votre antenne, trouvez un endroit sur le mur qui assure un signal maximum. Pour installation extérieure, il est recommandé d’utiliser une rallonge de câble d’antenne pour trouver l’endroit idéal pour l’antenne tout en optimisant son orientation à l’aide de l’écran « Antenna Aiming ».
2.Enfoncez quatre vis dans le mur en utilisant le gabarit «
les têtes de vis dépasser 1/8” (3mm) du mur.
3.Repliez l’antenne complètement sur sa base, placez la base et l’antenne sur les quatre têtes de vis avec le pivot de l’antenne vers le haut, puis laissez glisser l’ensemble vers le bas d’environ 1/4” (6mm) jusqu’à ce qu’elle soit fermement ancrée par les têtes de vis. Notez que le logo XM sera à l’envers si l’antenne est installée correctement.
4.Redressez l’antenne du mur et de sa base jusqu’à ce que l’intensité du signal soit optimisée.
NOTE : Ne coupez pas le câble de l’antenne et ne tentez pas de l’épisser, de le rallonger ou d’y attacher d’autres connecteurs. Les câbles et connecteurs de votre récepteur XM Reference Tuner ont été spécifiquement choisis et assemblés à l’usine pour assurer leur fonctionnement avec la bande de fréquence unique à XM. N’utilisez que des trousses d’extension approuvées par XM (numéro du modèle Polk Audio
ACTIVATION DE VOTRE SYSTÈME XM
Guide de démarrage
1.Suivez les étapes suivantes pour profiter rapidement des avantages exceptionnels de XM Satellite Radio:
2.Installez votre récepteur XM Reference Tuner tel qu’indiqué dans la section précédente.
3.Appuyez sur la touche de l’interrupteur pour mettre votre récepteur sous tension et pour vous vous assurer qu’il reçoit la chaîne 1 (la chaîne d’aperçu de programmation de XM).
4.Sélectionnez la chaîne 0. Le numéro d’identification de XM Satellite Radio de huit caractères du récepteur XM Reference Tuner apparaîtra sur l’afficheur. Écrivez ce numéro ICI :_____________________________
NOTE: Vérifiez attentivement le numéro d’identification de XM Satellite Radio. Les lettres I, O, S et F ne sont pas utilisées.
5.Activez votre service de XM Satellite Radio. Pour vous abonner,
6 Contact Polk Audio Customer Service | for more information visit our website at www. polkaudio . com | 7 |