Chapter 1- Hardware Description
6Slide in the replacement RTM ISDN card.
7Insert the card into the slot until the ejector levers touch the front edge of the card cage.
8Push the ejector levers to their fully closed position.
9Tighten the captive screws on each side of the rear panel of the card, securing the RTM ISDN card to RMX.
10Turn ON the RMX 2000.
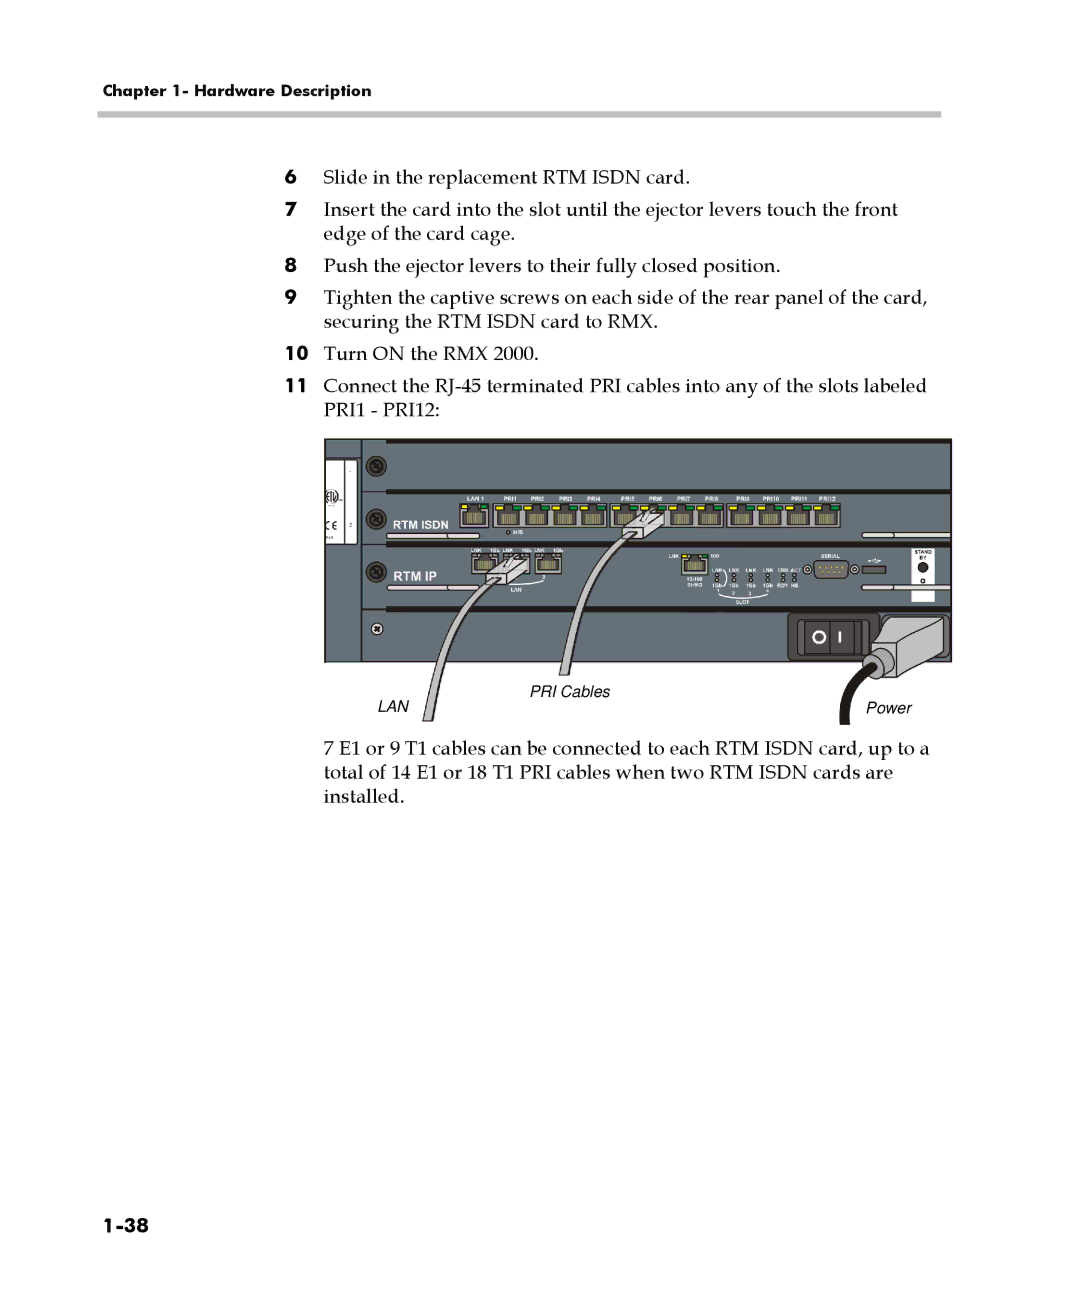
11Connect the
LAN | PRI Cables |
Power |
7 E1 or 9 T1 cables can be connected to each RTM ISDN card, up to a total of 14 E1 or 18 T1 PRI cables when two RTM ISDN cards are installed.
