
DOC2559B specifications
The Polycom DOC2559B is a sophisticated conference phone designed to elevate the audio communication experience in various business environments. Renowned for its cutting-edge technology and user-centric features, the DOC2559B is equipped to handle the demands of modern workplaces.One of the standout features of the DOC2559B is its HD Voice technology, which captures and delivers crystal-clear, high-definition audio. This ensures that conversations are rich and natural, enabling participants to engage more effectively, even in large meeting rooms. The advanced microphone array and full-duplex audio capabilities allow multiple speakers to be heard clearly without cutting off or compromising sound quality.
Another notable characteristic of the DOC2559B is its ability to connect to a wide range of devices. It supports both wired and wireless connections, accommodating local and remote calls through various platforms, including VoIP and traditional phone lines. The integration with cloud-based communication systems is seamless, further enhancing its versatility. Users can easily pair mobile devices through Bluetooth, facilitating conference calls directly from smartphones without needing additional hardware.
The design of the DOC2559B is functional yet elegant, featuring a user-friendly interface that makes operation intuitive. Its large, backlit LCD display provides clear visibility of relevant information such as caller ID, dialed numbers, and call status, making it easy for users to manage calls effectively. The unit is also programmable, allowing organizations to customize speed dial options for frequently contacted numbers, thus streamlining communication processes.
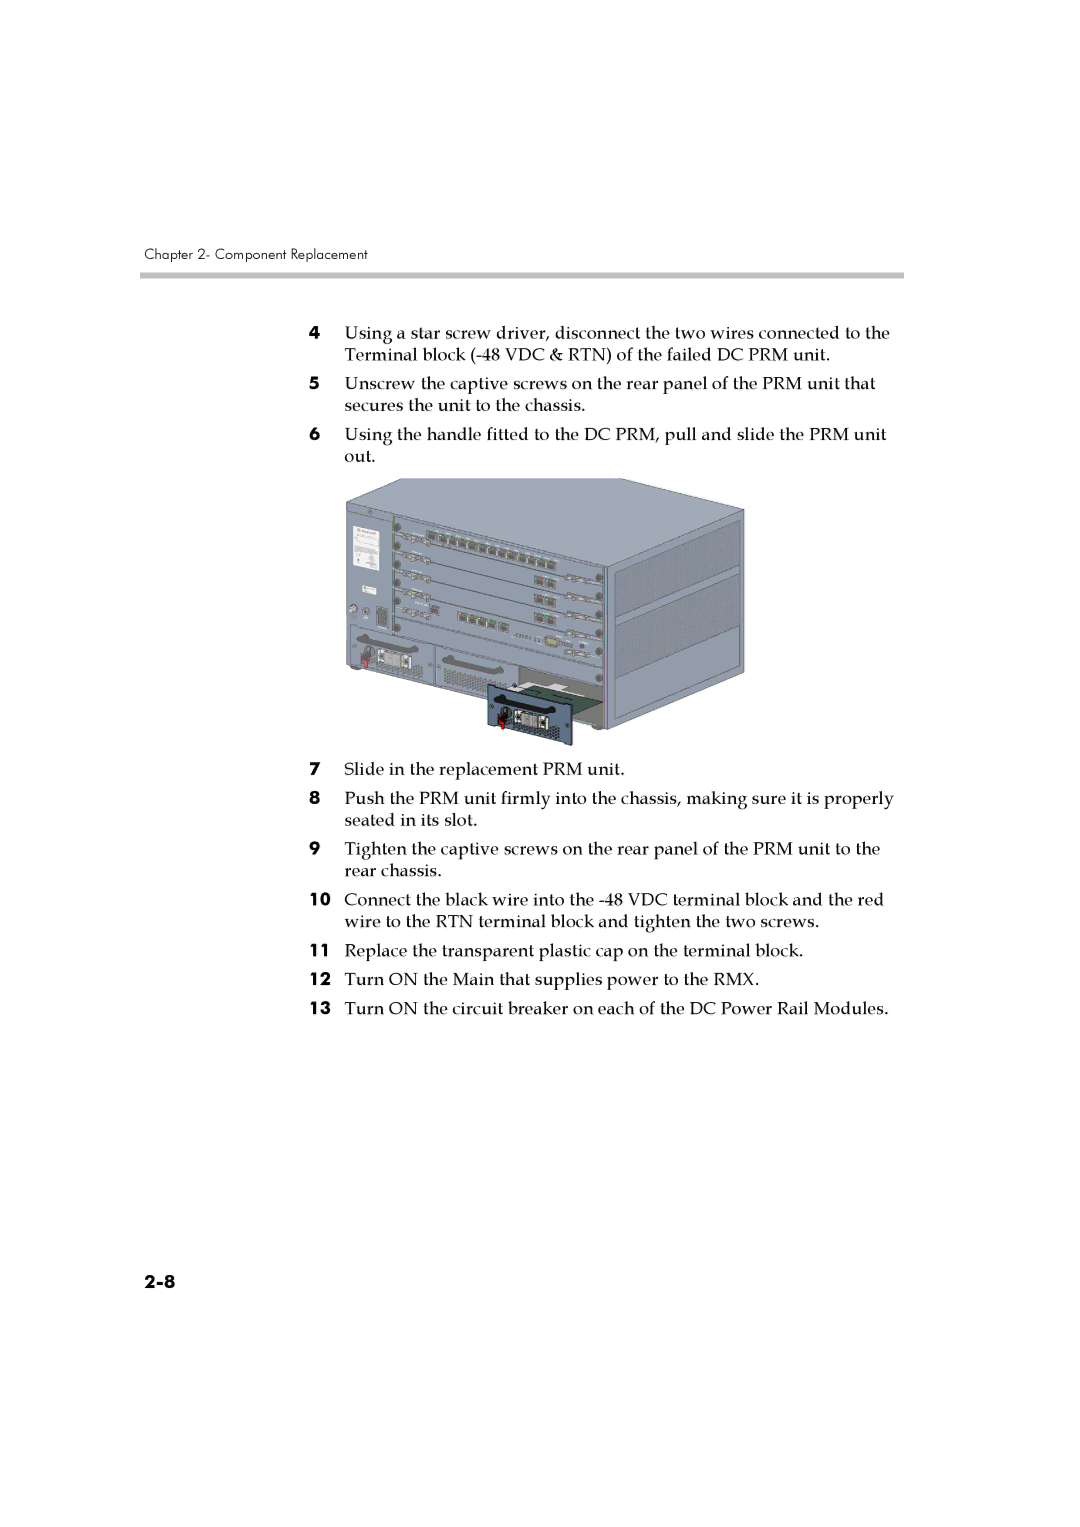
Durability and reliability are key attributes of the Polycom DOC2559B. Built with high-quality materials, it is designed to withstand the rigors of everyday use in a busy office environment. The device is also energy-efficient, helping companies reduce their carbon footprint while maintaining optimal performance.
Moreover, the DOC2559B boasts advanced security features, ensuring that sensitive conversations remain confidential. With encryption options and secure transmission protocols, it protects against unauthorized access and eavesdropping.
In summary, the Polycom DOC2559B is a powerful conference phone that combines high-fidelity audio, robust connectivity options, user-friendly features, and enhanced security. It is an excellent choice for businesses looking to improve their communication capabilities and foster collaboration in an increasingly digital workspace.