3.Plug the other end into the slot under the SoundStation2 Console
as illustrated. Then thread the cable through the channels on the underside of the console as shown at right.
4. Plug the Power Adapter Cable into the Interface Module jack
marked ![]() then plug the Power Adapter into the electrical outlet.
then plug the Power Adapter into the electrical outlet.
►The first time the SoundStation2
Direct Connect is powered up and connected to the network through the Interface Module, it will run a brief
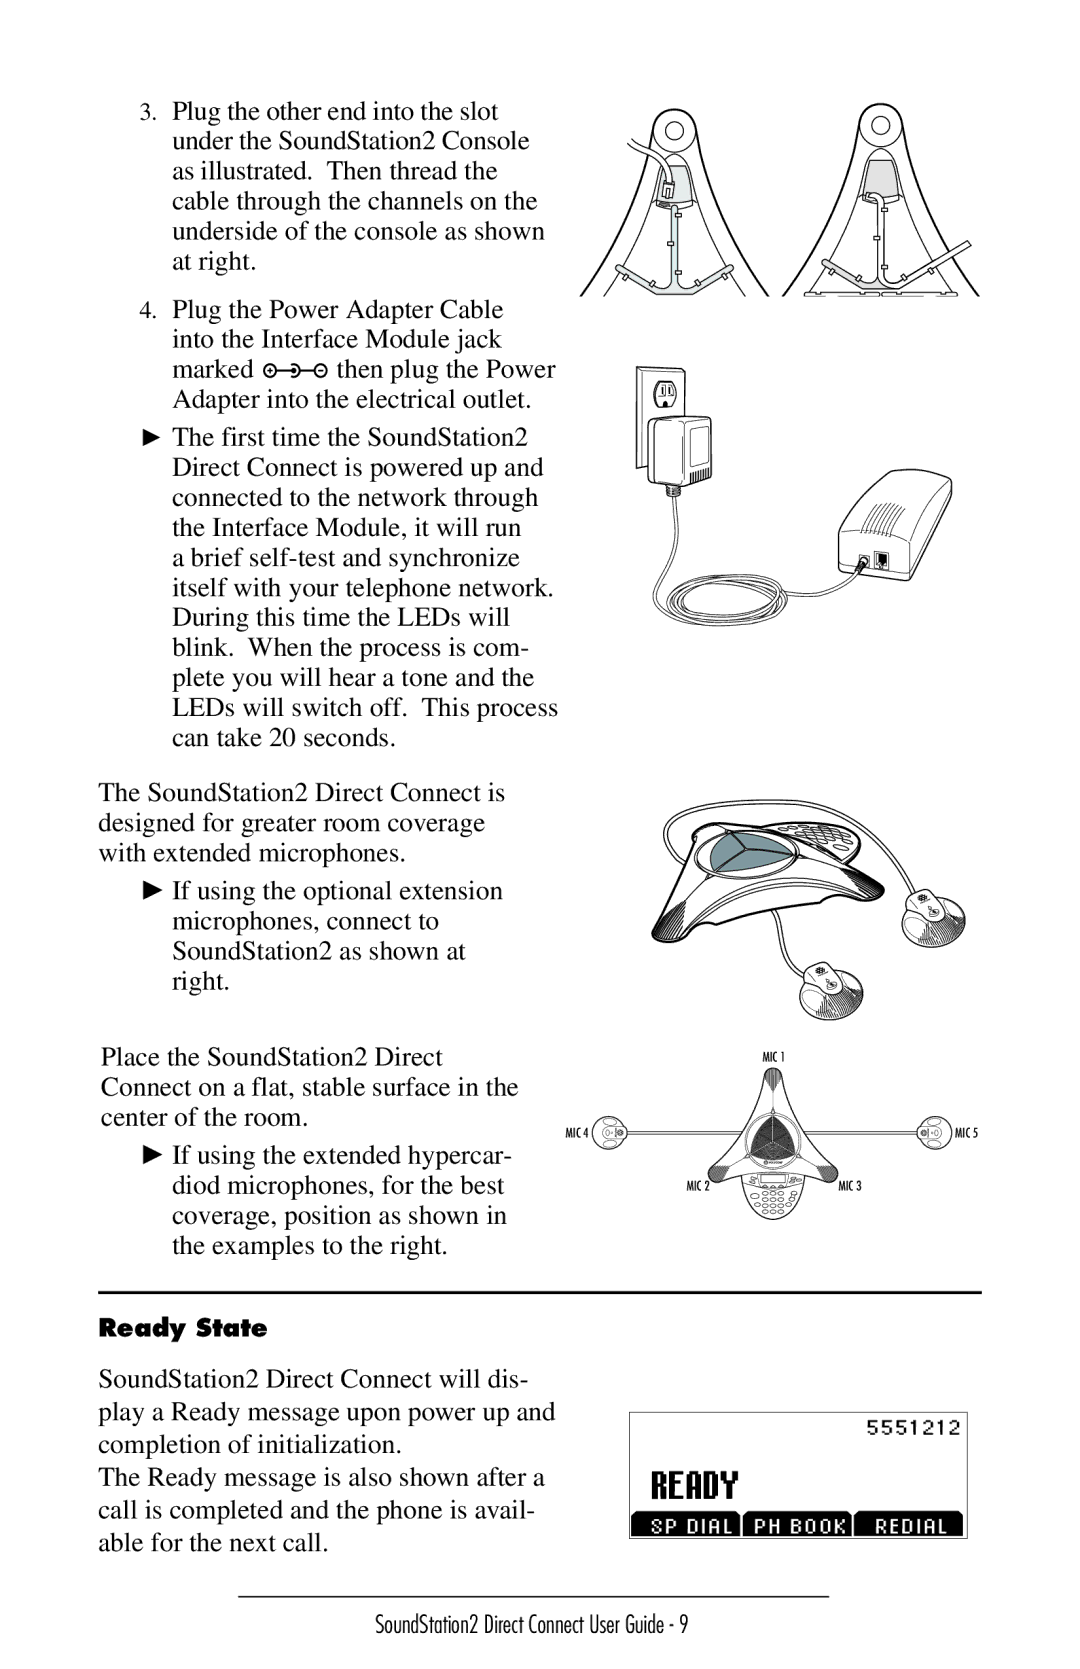
The SoundStation2 Direct Connect is designed for greater room coverage with extended microphones.
► If using the optional extension microphones, connect to SoundStation2 as shown at right.
Place the SoundStation2 Direct |
| MIC 1 |
Connect on a flat, stable surface in the |
|
|
center of the room. |
| MIC 5 |
MIC 4 |
| |
► If using the extended hypercar- |
|
|
diod microphones, for the best | MIC 2 | MIC 3 |
coverage, position as shown in |
|
|
the examples to the right. |
|
|
Ready State |
|
|
SoundStation2 Direct Connect will dis- play a Ready message upon power up and completion of initialization.
The Ready message is also shown after a call is completed and the phone is avail- able for the next call.
5551212
READY
SP DIAL PH BOOK REDIAL
SoundStation2 Direct Connect User Guide - 9