NORMAL CHARGING
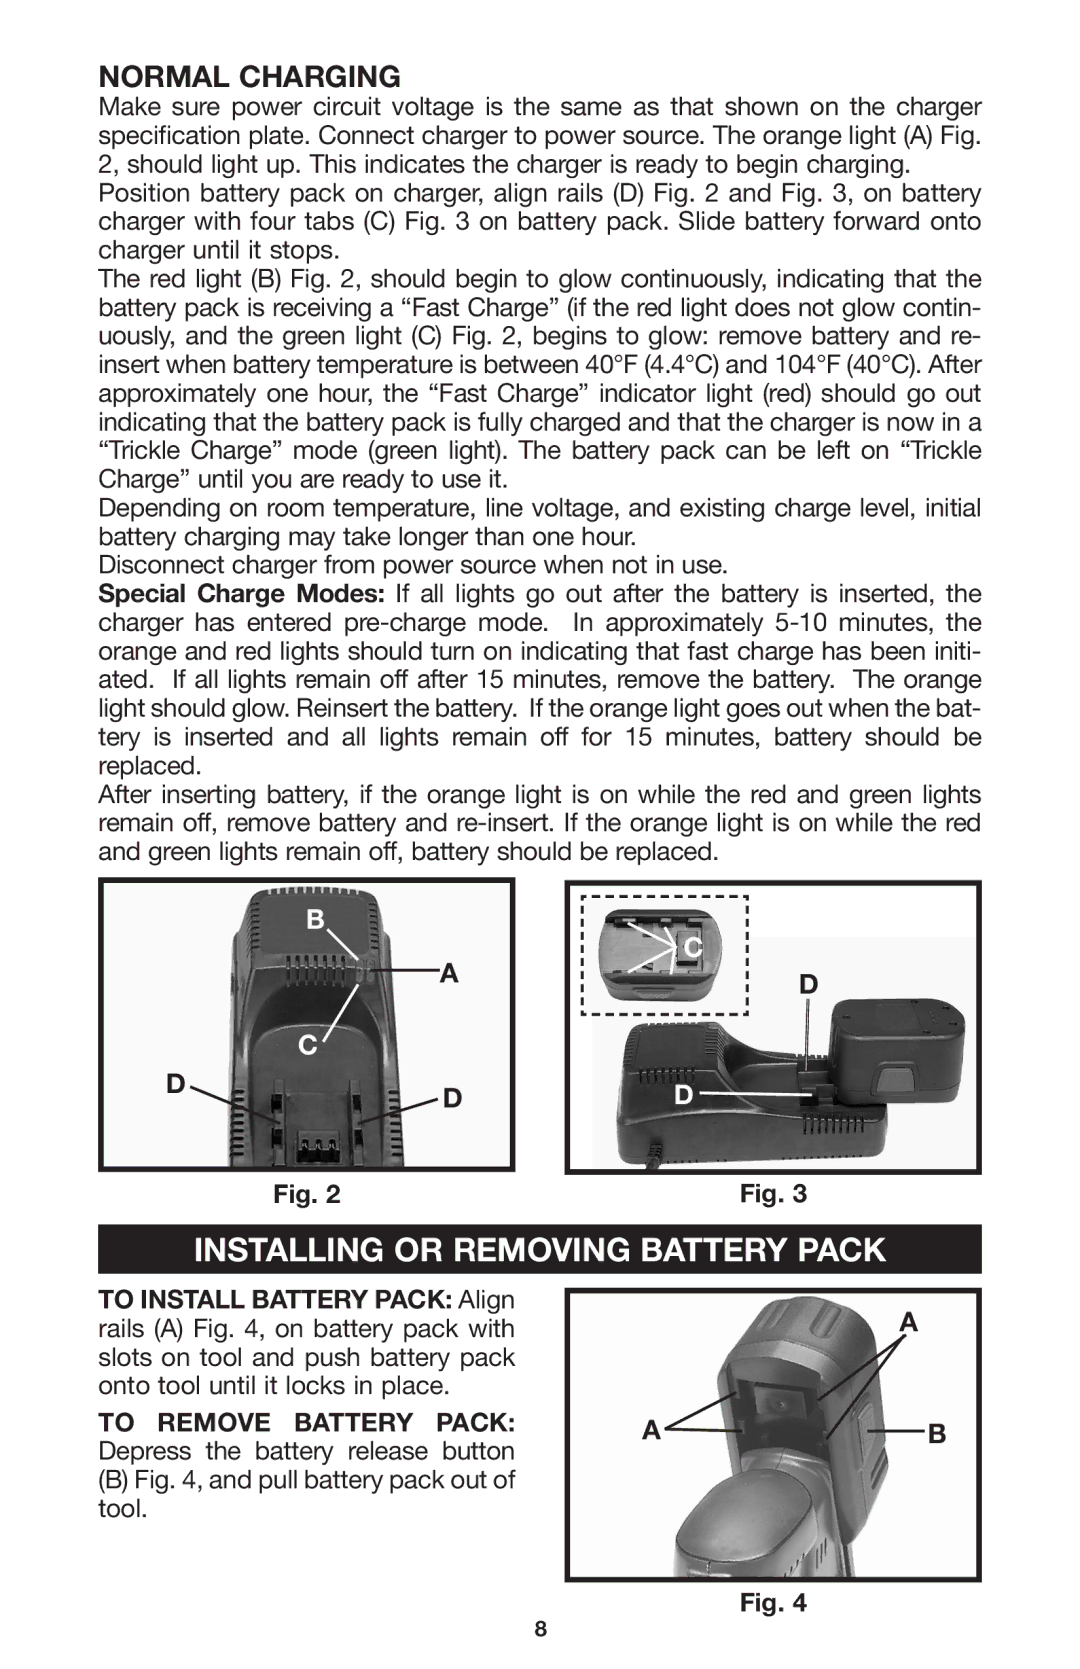
Make sure power circuit voltage is the same as that shown on the charger specification plate. Connect charger to power source. The orange light (A) Fig. 2, should light up. This indicates the charger is ready to begin charging.
Position battery pack on charger, align rails (D) Fig. 2 and Fig. 3, on battery charger with four tabs (C) Fig. 3 on battery pack. Slide battery forward onto charger until it stops.
The red light (B) Fig. 2, should begin to glow continuously, indicating that the battery pack is receiving a “Fast Charge” (if the red light does not glow contin- uously, and the green light (C) Fig. 2, begins to glow: remove battery and re- insert when battery temperature is between 40°F (4.4°C) and 104°F (40°C). After approximately one hour, the “Fast Charge” indicator light (red) should go out indicating that the battery pack is fully charged and that the charger is now in a “Trickle Charge” mode (green light). The battery pack can be left on “Trickle Charge” until you are ready to use it.
Depending on room temperature, line voltage, and existing charge level, initial battery charging may take longer than one hour.
Disconnect charger from power source when not in use.
Special Charge Modes: If all lights go out after the battery is inserted, the charger has entered
After inserting battery, if the orange light is on while the red and green lights remain off, remove battery and
B
A
C
D ![]() D
D
![]() C
C
D
D
Fig. 2
Fig. 3
INSTALLING OR REMOVING BATTERY PACK
TO INSTALL BATTERY PACK: Align rails (A) Fig. 4, on battery pack with slots on tool and push battery pack onto tool until it locks in place.
TO REMOVE BATTERY PACK:
Depress the battery release button
(B)Fig. 4, and pull battery pack out of tool.
A
AB
Fig. 4
8