THE CARRY BAG
| Please | refer | to |
|
| a | |
these pictures | for | lettered |
|
| |||
|
|
| |||||
items noted by parentheses |
|
|
| ||||
in descriptions below. |
|
|
|
| |||
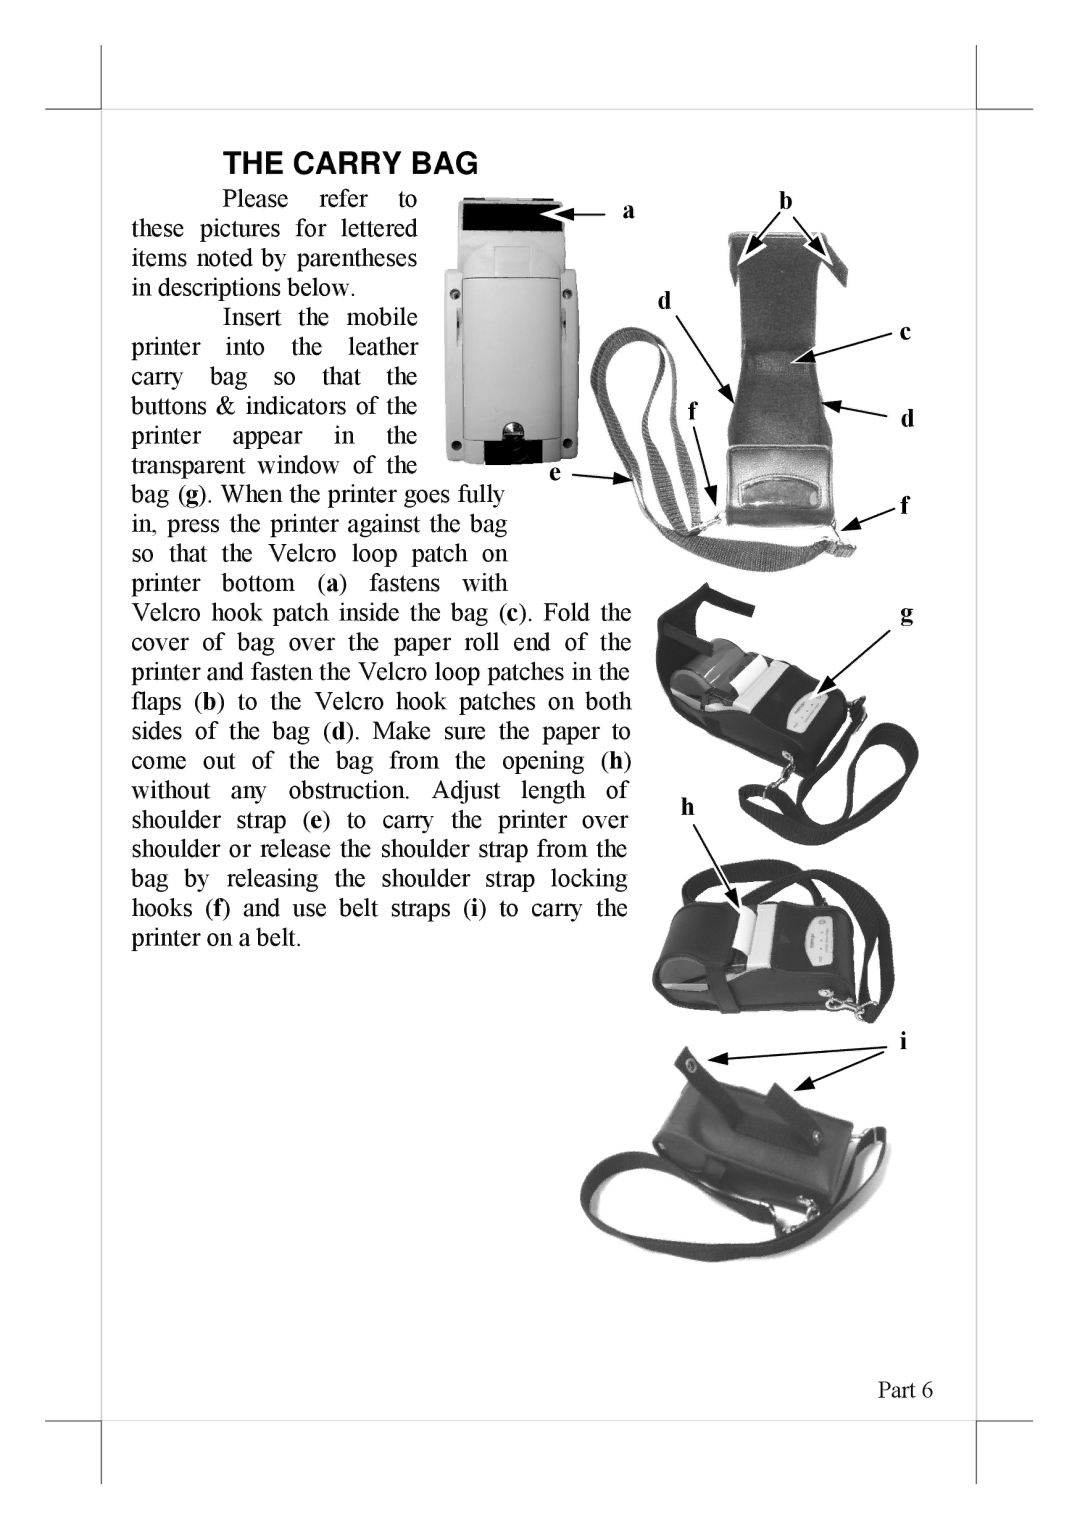
| Insert | the | mobile |
|
|
| |
printer | into | the | leather |
|
|
| |
carry bag so that the |
|
|
| ||||
buttons & indicators of the |
|
|
| ||||
printer | appear | in | the |
|
|
| |
transparent window of the | e | ||||||
bag (g). When the printer goes fully |
|
|
| ||||
in, press the printer against the bag so that the Velcro loop patch on printer bottom (a) fastens with
Velcro hook patch inside the bag (c). Fold the cover of bag over the paper roll end of the printer and fasten the Velcro loop patches in the flaps (b) to the Velcro hook patches on both sides of the bag (d). Make sure the paper to come out of the bag from the opening (h) without any obstruction. Adjust length of shoulder strap (e) to carry the printer over shoulder or release the shoulder strap from the bag by releasing the shoulder strap locking hooks (f) and use belt straps (i) to carry the printer on a belt.
b
d
c
f![]() d
d
f
g
h
i
Part 6
