30inches

(76 cm)

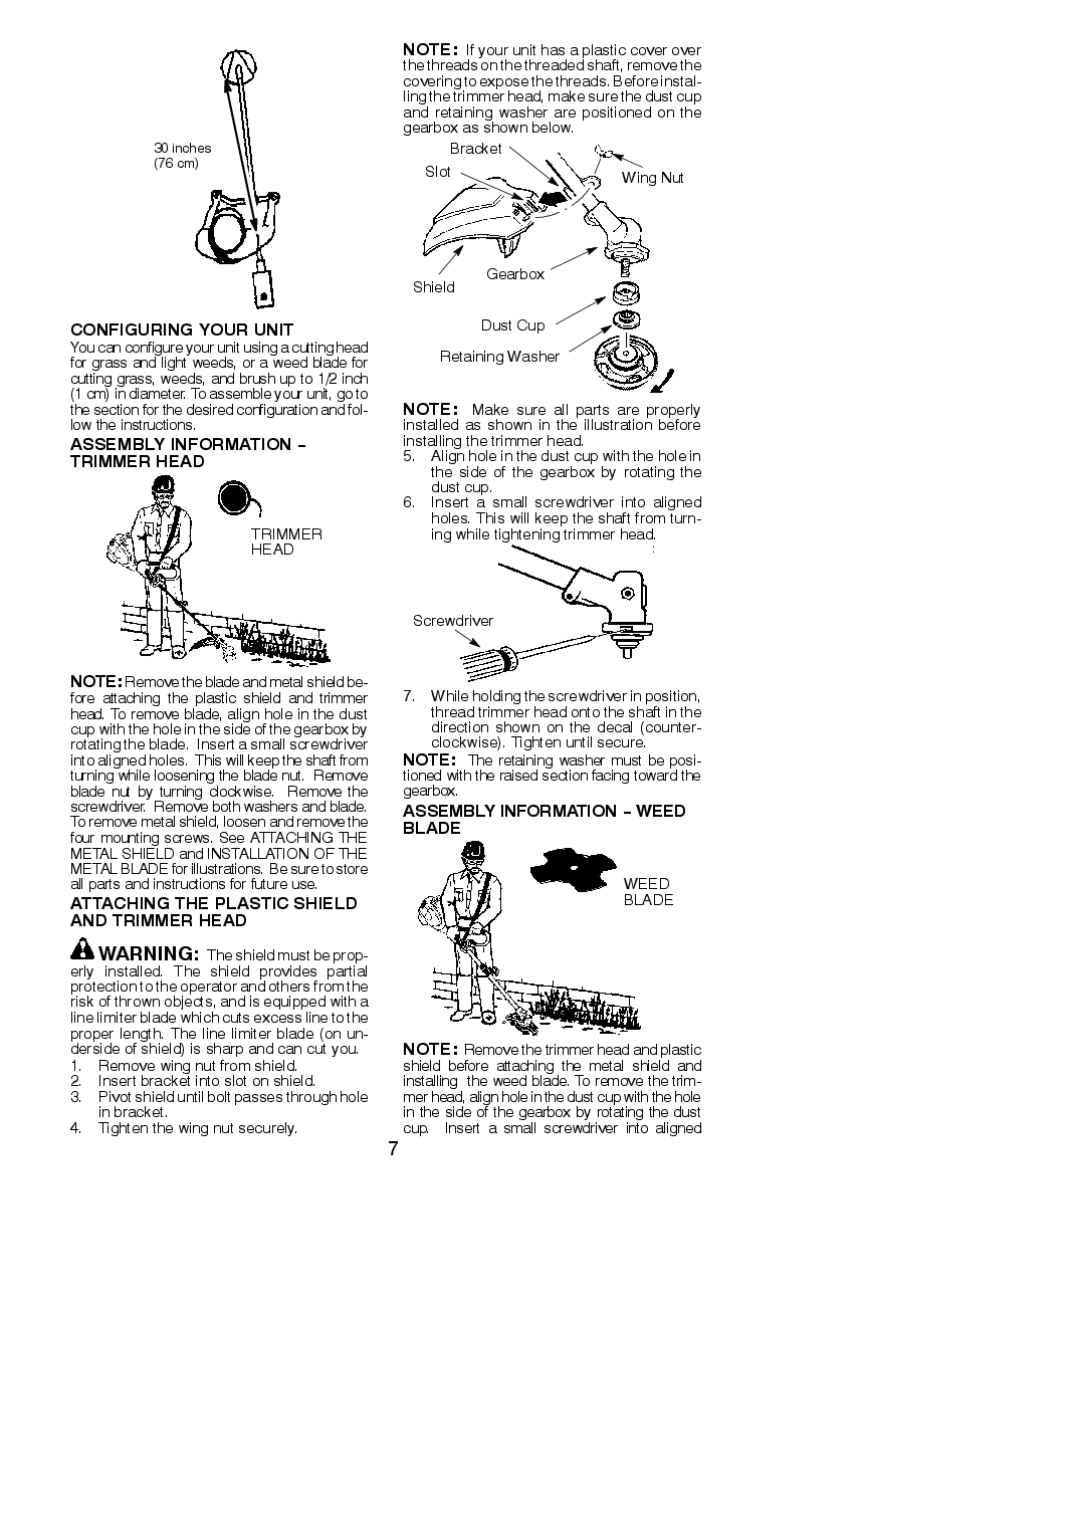
NOTE: If your unit has a plastic cover over the threads on the threaded shaft, remove the covering to expose the threads. Before instal- ling the trimmer head, make sure the dust cup and retaining washer are positioned on the gearbox as shown below.

Bracket


Slot

Wing Nut


Shield

Gearbox

CONFIGURING YOUR UNIT

You can configure your unit using a cutting head for grass and light weeds, or a weed blade for cutting grass, weeds, and brush up to 1/2 inch (1 cm) in diameter. To assemble your unit, go to the section for the desired configuration and fol- low the instructions.

ASSEMBLY INFORMATION - TRIMMER HEAD

TRIMMER

HEAD

Dust Cup

Retaining Washer

NOTE: Make sure all parts are properly installed as shown in the illustration before installing the trimmer head.

5.Align hole in the dust cup with the hole in the side of the gearbox by rotating the dust cup.

6.Insert a small screwdriver into aligned holes. This will keep the shaft from turn- ing while tightening trimmer head.

Screwdriver

NOTE: Remove the blade and metal shield be- fore attaching the plastic shield and trimmer head. To remove blade, align hole in the dust cup with the hole in the side of the gearbox by rotating the blade. Insert a small screwdriver into aligned holes. This will keep the shaft from turning while loosening the blade nut. Remove blade nut by turning clockwise. Remove the screwdriver. Remove both washers and blade. To remove metal shield, loosen and remove the four mounting screws. See ATTACHING THE METAL SHIELD and INSTALLATION OF THE METAL BLADE for illustrations. Be sure to store all parts and instructions for future use.

ATTACHING THE PLASTIC SHIELD AND TRIMMER HEAD

WARNING: The shield must be prop- erly installed. The shield provides partial protection to the operator and others from the risk of thrown objects, and is equipped with a line limiter blade which cuts excess line to the proper length. The line limiter blade (on un- derside of shield) is sharp and can cut you.

1.Remove wing nut from shield.

2.Insert bracket into slot on shield.

3.Pivot shield until bolt passes through hole in bracket.

4.Tighten the wing nut securely.

7.While holding the screwdriver in position, thread trimmer head onto the shaft in the direction shown on the decal (counter- clockwise). Tighten until secure.

NOTE: The retaining washer must be posi- tioned with the raised section facing toward the gearbox.

ASSEMBLY INFORMATION - WEED BLADE

WEED

BLADE

NOTE: Remove the trimmer head and plastic shield before attaching the metal shield and installing the weed blade. To remove the trim- mer head, align hole in the dust cup with the hole in the side of the gearbox by rotating the dust cup. Insert a small screwdriver into aligned

7

Page 7
Image 7
Poulan 952711880 Configuring Your Unit, Assembly Information Trimmer Head, Attaching the Plastic Shield and Trimmer Head

952711880, 115274026 specifications

The Poulan 952711880 and 115274026 are essential components in the world of outdoor power equipment, specifically designed to enhance the performance of various Poulan chainsaws. These two model numbers pertain to vital accessories that contribute to the functionality and efficiency of chainsaws, ensuring that they operate smoothly and effectively in a range of cutting applications.

The Poulan 952711880 is primarily a replacement chain, known for its durable design and reliable performance. This chain features a unique cutting tooth design that allows for efficient wood cutting, making it ideal for both professional and hobbyist lumberjacks. The 952711880 is designed to provide optimal cutting efficiency, reducing the effort needed to fell trees, prune limbs, or cut firewood. Its high carbon steel construction not only enhances durability but also ensures that the chain maintains its sharpness over extended periods, minimizing the need for frequent sharpening.

On the other hand, the Poulan 115274026 is known for its compatibility with various Poulan chainsaw models. This model number represents a replacement part, specifically a guide bar, which plays a crucial role in the overall operation of the chainsaw. The guide bar is designed to provide stability and support during cutting, allowing for precise maneuvers and reducing the risk of kickback. Made from high-quality materials, the 115274026 guide bar is lightweight yet robust, making it easy to handle while ensuring that it can withstand the rigors of heavy-duty use.

Both the 952711880 chain and the 115274026 guide bar incorporate cutting-edge technologies to enhance performance. For instance, the chain features low-vibration technology, which results in less strain on the user and contributes to a more comfortable cutting experience. Additionally, both accessories are engineered for easy installation, allowing users to quickly and conveniently replace worn-out parts without tedious adjustments.

In summary, the Poulan 952711880 and 115274026 are vital components that significantly enhance the performance, efficiency, and safety of Poulan chainsaws. With their durable construction, innovative technologies, and user-friendly design, these accessories are essential for anyone looking to maximize their chainsaw's capabilities, whether for residential property maintenance or professional logging tasks. Investing in these reliable parts ensures that users can tackle any cutting project with confidence and ease.