
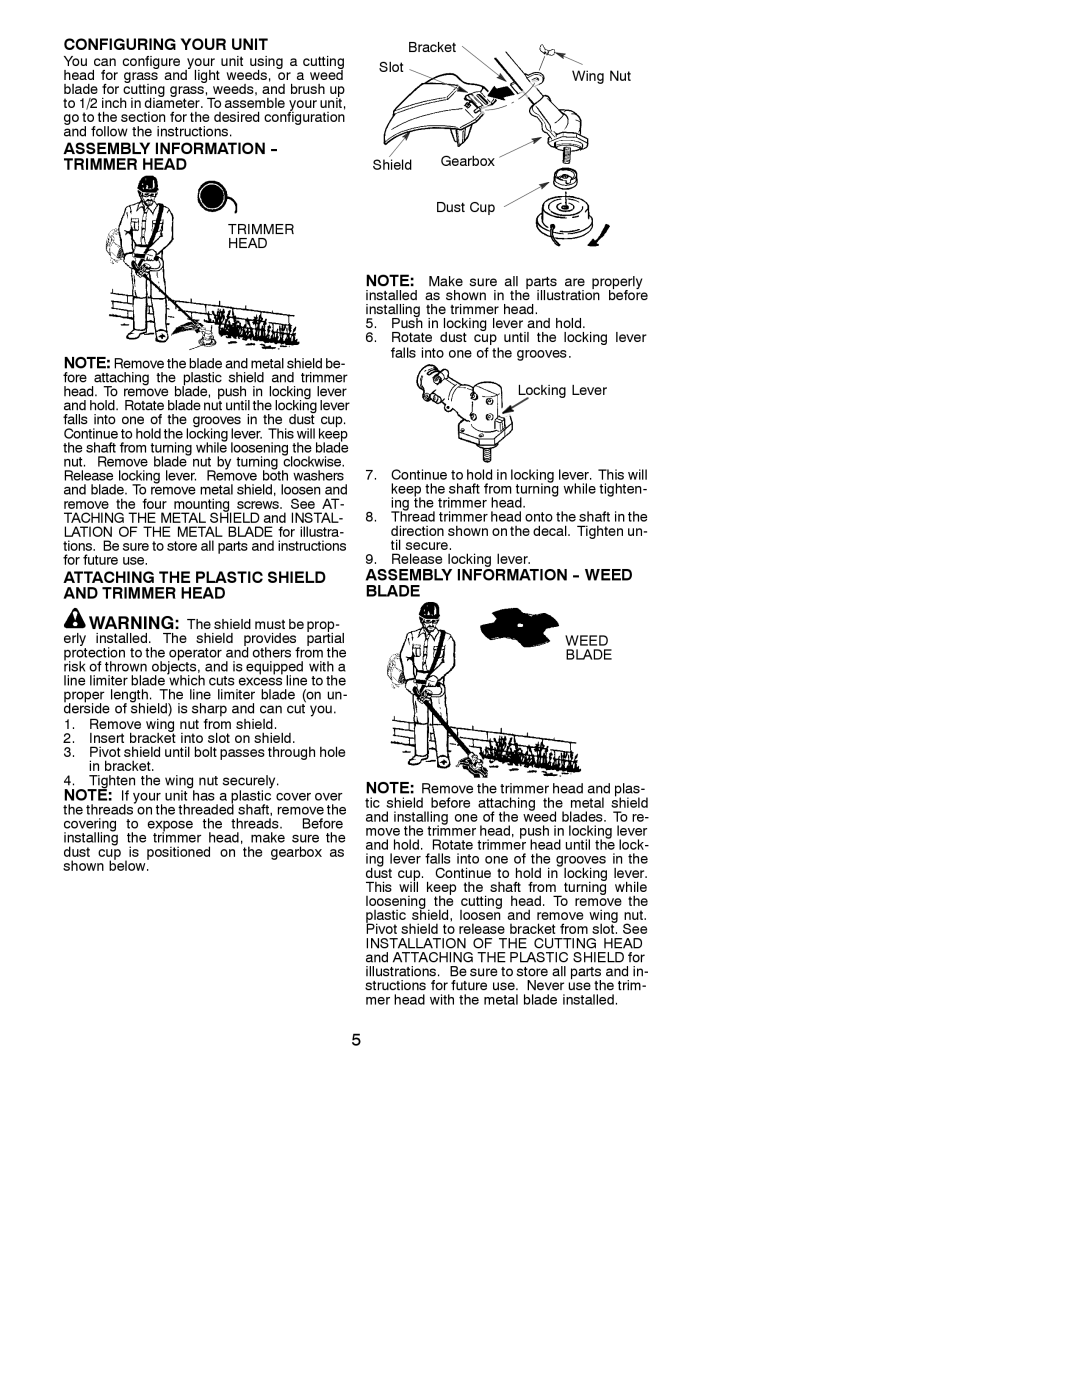
530088129 specifications
The Poulan 530088129 is a high-performance chainsaw designed for both professional and hobbyist use, bringing a blend of efficiency, comfort, and advanced technology to the cutting experience. This model stands out with its powerful engine and features that make it suitable for a variety of tasks, from felling trees to trimming branches and cutting firewood.One of the most notable main features of the Poulan 530088129 is its robust 2-cycle engine, which provides ample power and torque, enabling users to cut through tough wood effortlessly. Its cutting bar typically measures around 16 to 18 inches, striking a balance between reach and maneuverability. This length is ideal for various cutting applications, ensuring users can tackle both small and medium-sized trees or large branches without difficulty.
The saw is equipped with an automatic oiling system that helps maintain the lubrication of the chain and bar while in operation, minimizing wear and extending the lifespan of these components. This feature allows for uninterrupted cutting, as users don't have to frequently stop to apply oil manually. The chain itself is designed for easy replacement and adjustment, making maintenance straightforward.
In terms of comfort, the Poulan 530088129 incorporates ergonomic handles designed to reduce vibration and prevent hand fatigue during prolonged use. The lightweight construction also contributes to a more user-friendly experience, allowing greater control and ease of maneuvering, which is particularly beneficial when working in complex environments or at awkward angles.
Additionally, the chainsaw boasts a safety features package that includes a chain brake, preventing accidental chain movement during kickback incidents. This is crucial for ensuring user safety, as kickback can be a significant hazard when operating chainsaws.
Furthermore, the Poulan 530088129 features a primer bulb for easy starting, making it accessible for users of all experience levels. With its combination of efficiency, safety, and convenience, this model is a reliable option for anyone looking to invest in a durable and effective chainsaw. Overall, the Poulan 530088129 stands out due to its powerful engine, user-friendly features, and an emphasis on safety, making it an excellent choice for a wide range of cutting tasks.