545186845 specifications
The Poulan 545186845 is a robust and versatile chainsaw that caters to both novice and experienced users, making it an excellent choice for homeowners and professionals alike. Known for its reliability and power, this chainsaw is ideal for a variety of cutting tasks, including tree felling, limb pruning, and firewood preparation.One of the standout features of the Poulan 545186845 is its powerful engine. It is equipped with a 50cc, 2-stroke engine that delivers ample power for demanding cutting applications, allowing users to tackle larger logs and tough wood with ease. The engine is designed to provide an excellent power-to-weight ratio, ensuring that the chainsaw remains manageable even during extended use.
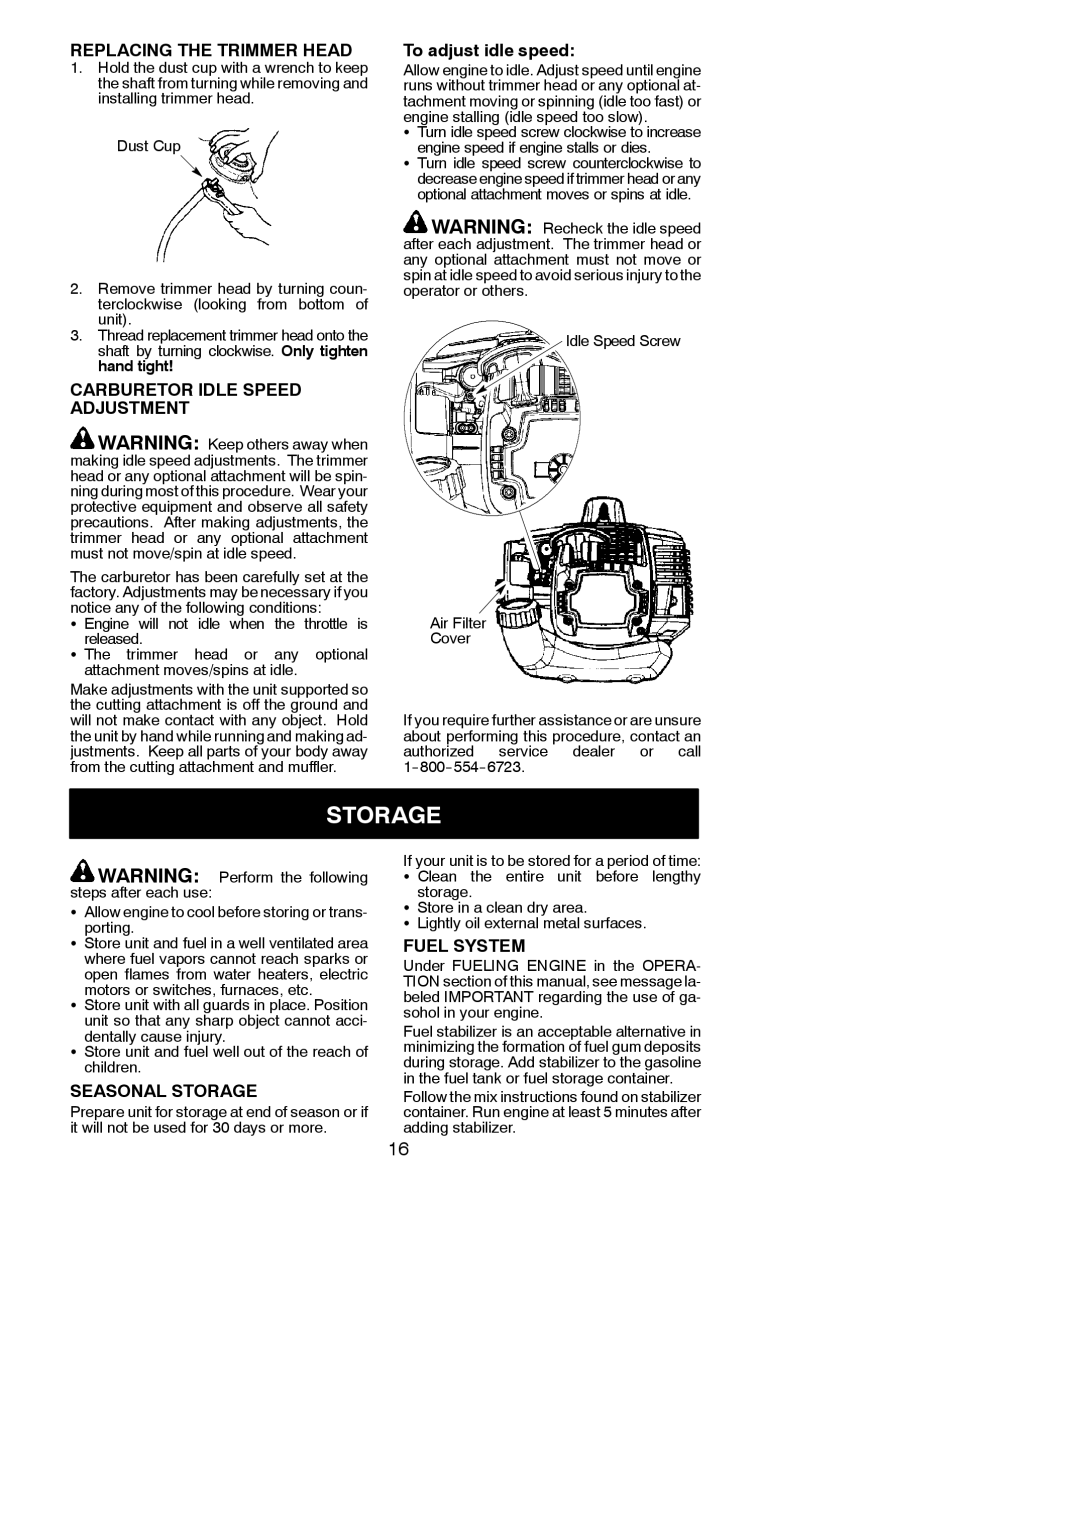
The chainsaw utilizes a specially designed air filtration system that enhances its performance and prolongs engine life. This system minimizes the amount of dust and debris that enters the engine, resulting in less maintenance and longer periods between filter cleaning. This technology not only extends the lifespan of the unit but also ensures consistent performance during operation.
Another key characteristic is its ease of use. The Poulan 545186845 features an automatic oiling system that maintains proper lubrication to the bar and chain, reducing friction and wear during cutting. Additionally, the chainsaw has a tool-less chain tensioning system, allowing users to quickly adjust the chain tension without the need for any additional tools. This combination of features makes it convenient for users to perform maintenance and adjustments in the field.
Safety is paramount in the design of the Poulan 545186845. It comes equipped with a chain brake that automatically engages in the event of kickback, providing an added layer of protection for the operator. The anti-vibration handle also enhances comfort during use, reducing user fatigue and improving control during prolonged tasks.
The Poulan 545186845 is designed for durability and reliability, with a robust construction that withstands the rigors of regular use. Its lightweight design further enhances its usability, allowing users to maneuver the chainsaw easily while ensuring that it does not become overly burdensome during cutting sessions.
In summary, the Poulan 545186845 is a powerful, versatile, and user-friendly chainsaw that incorporates advanced technology and features. With its strong engine, effective air filtration system, automatic oiling, and safety enhancements, it is a reliable tool for anyone looking to tackle outdoor cutting tasks effectively and efficiently. Whether you're a seasoned professional or a weekend warrior, this chainsaw is sure to meet your needs and exceed your expectations.