
115327926, P3816, 966557801 specifications
The Poulan P3816 chainsaw, model number 966557801, is a robust and efficient tool designed to meet the needs of both novice users and seasoned professionals. Known for its cutting performance and user-friendly design, this chainsaw is ideal for various tasks, including pruning, tree felling, and firewood cutting.One of the standout features of the Poulan P3816 is its powerful 38cc engine. This 2-cycle engine provides the necessary torque and speed to tackle tough cutting jobs efficiently. Additionally, it is designed with an easy-start system that minimizes the effort required to start the chainsaw, making it accessible for users of all skill levels. The engine also incorporates advanced technology to reduce emissions, making it environmentally friendly while still delivering impressive power.
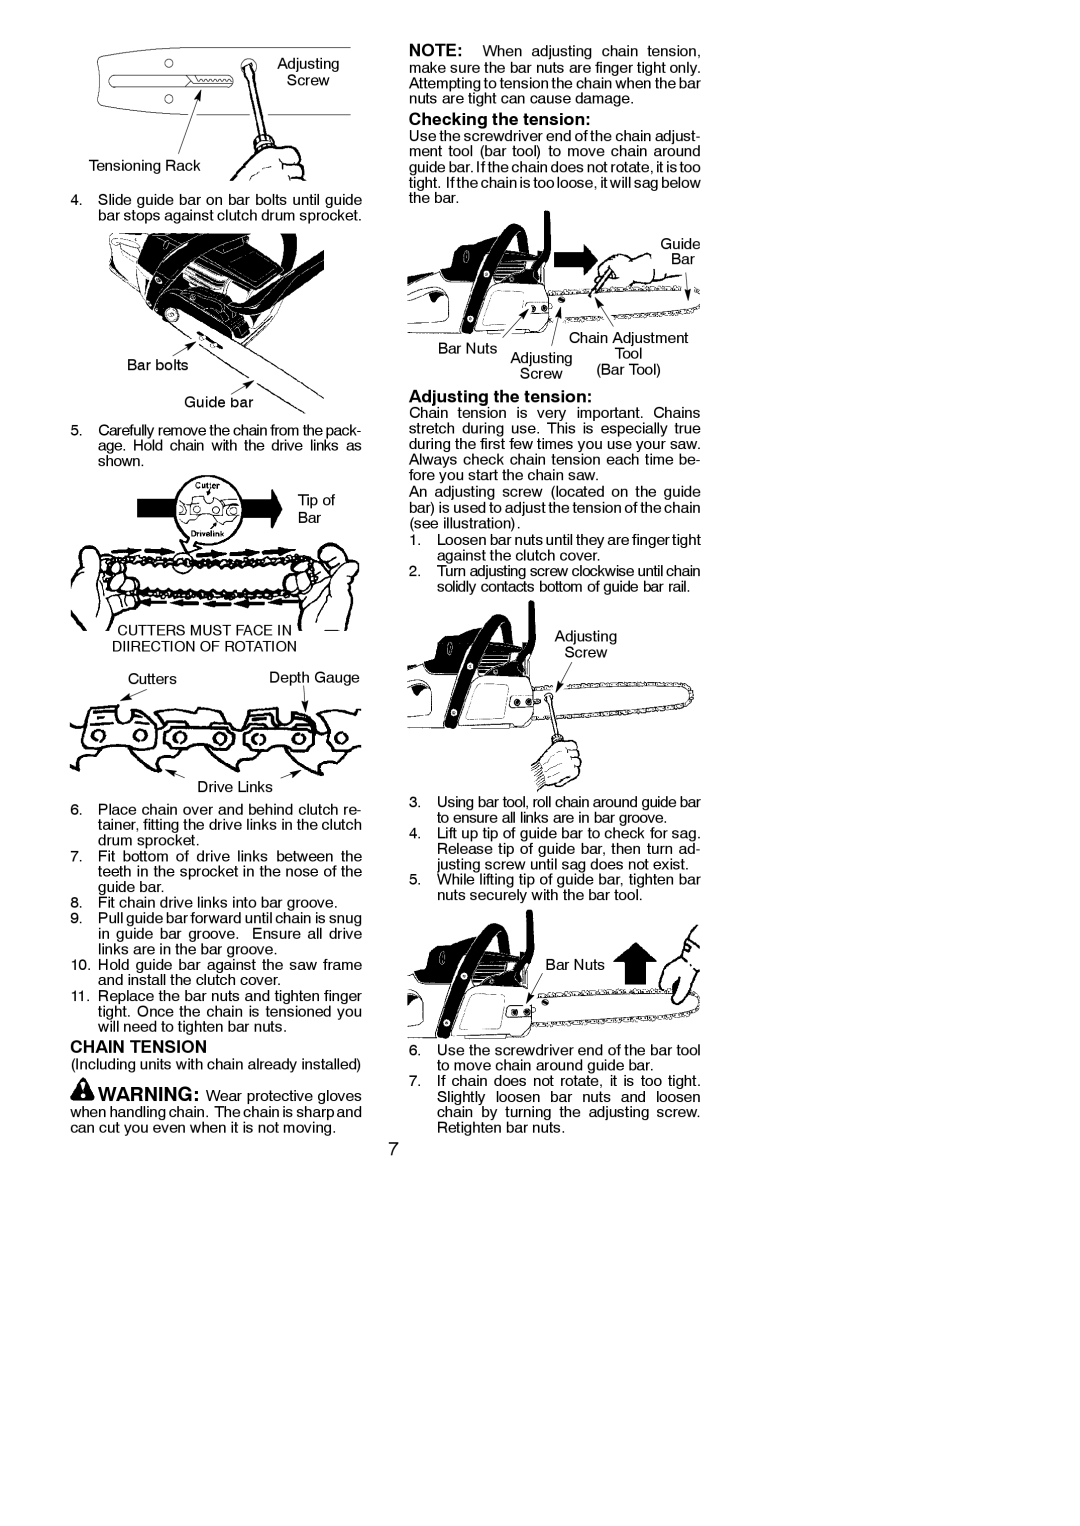
The P3816 features a 16-inch bar with a low-profile chain, allowing for smoother cuts and reduced kickback, which enhances user safety. The chain is specially engineered for durability and longevity, ensuring that users can rely on it for recurring tasks without frequent replacements. Moreover, the chainsaw offers tool-less chain tensioning, allowing users to quickly adjust the chain without the need for additional tools, which contributes to operational efficiency.
Comfort is a critical consideration in the design of the Poulan P3816. It comes with an ergonomic handle that reduces vibrations during operation, providing a more comfortable grip for extended periods. The lightweight design, coupled with the well-balanced construction, allows for easier maneuverability and reduced fatigue.
In terms of maintenance, the chainsaw is equipped with an automatic oiling system that ensures consistent lubrication of the chain and bar. This feature helps prolong the life of the tool and enhances cutting performance. The transparent oil reservoir allows users to easily check the oil level, ensuring they are always prepared for their tasks.
In summary, the Poulan P3816, with model number 966557801, is engineered for versatility and ease of use. Its powerful engine, user-friendly features, and safety-oriented design make it an excellent choice for anyone in need of a reliable chainsaw. Whether you are a homeowner looking to maintain your property or a professional using it for daily jobs, the P3816 stands out as a dependable tool that combines performance with convenience.