
PP258TP specifications
The Poulan PP258TP is a versatile and powerful pole saw that caters to both homeowners and landscaping professionals alike. Designed for efficient tree trimming and maintenance tasks, this tool combines robust performance with user-friendly features, making it an ideal choice for anyone looking to keep their outdoor spaces well-groomed.One of the standout features of the PP258TP is its 25cc, 2-cycle engine. This powerful engine delivers strong performance while also being lightweight, allowing users to maneuver the pole saw with ease. The engine is designed to start quickly, reducing frustration and enabling users to focus on their work rather than struggling with difficult starts.
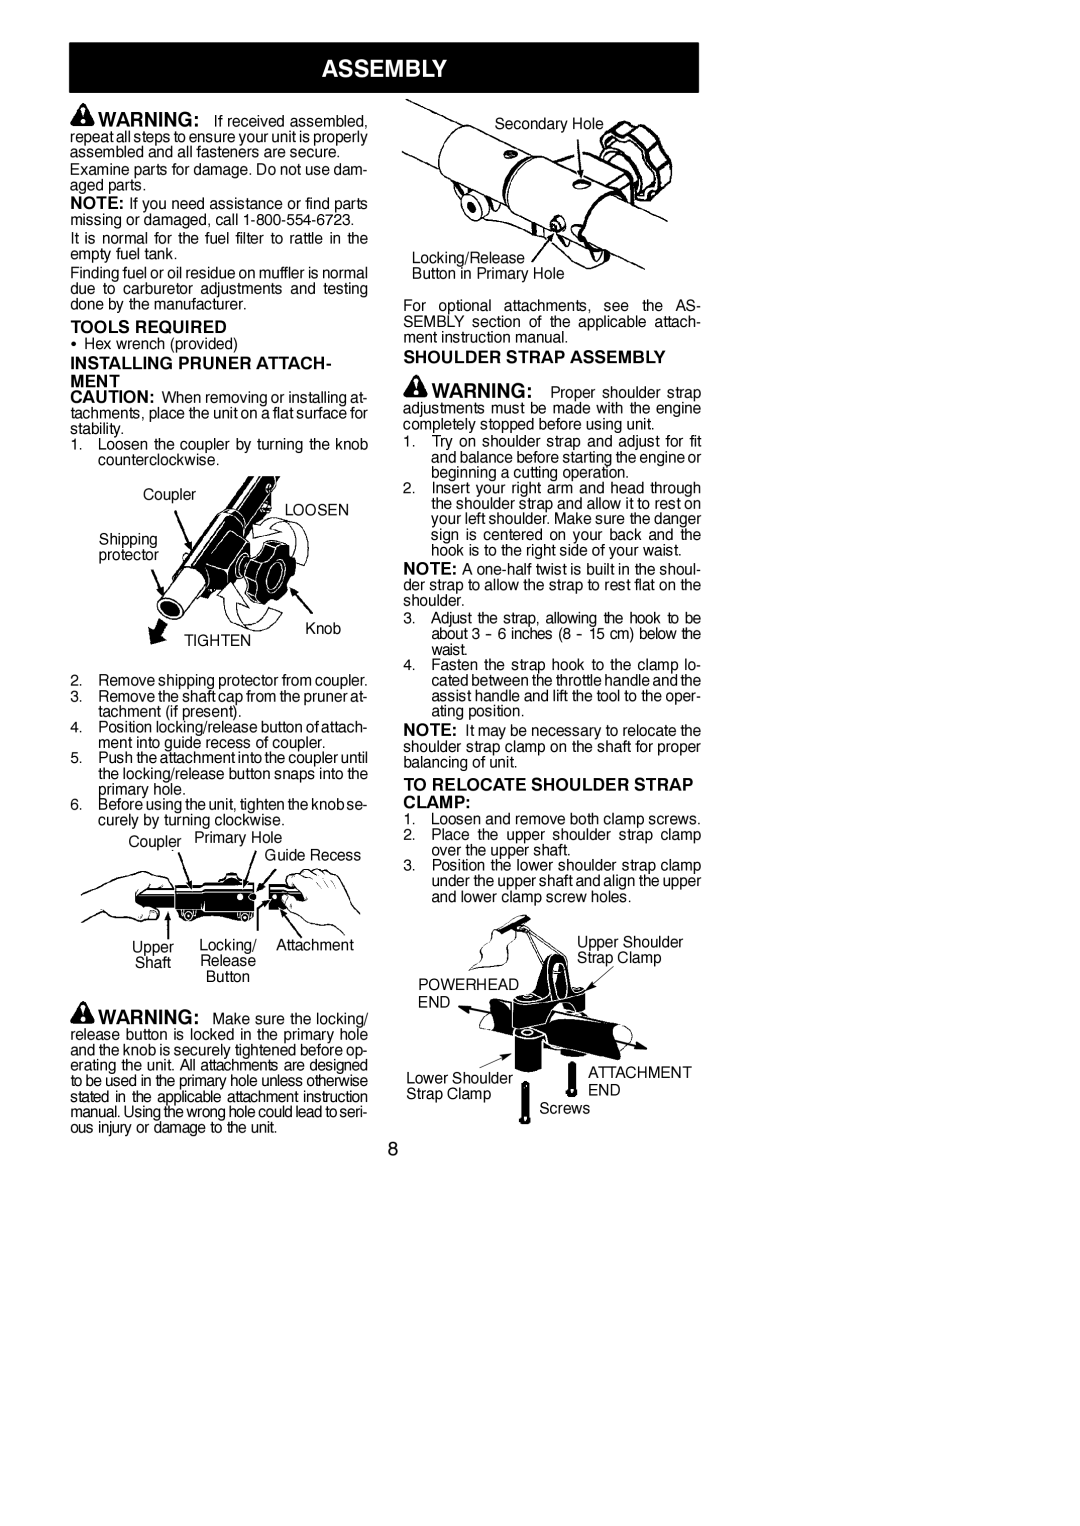
The Poulan PP258TP also comes equipped with a 10-inch Oregon bar and chain, which allows for precise cutting. This saw is suitable for reaching high branches without the need for a ladder, thanks to its adjustable extension pole that can extend up to 8 feet. This added reach is particularly useful for tackling tall trees and hard-to-reach areas, making it a valuable tool for any yard maintenance task.
In terms of technology, the PP258TP showcases Poulan's commitment to user comfort and safety. The tool features an anti-vibration system that helps reduce fatigue during prolonged use, allowing users to work longer while maintaining comfort. Additionally, a safety switch ensures that the tool only operates when intended, providing an extra layer of security, especially when working on elevated branches.
Durability is another key characteristic of the Poulan PP258TP. Built with high-quality materials, this pole saw is designed to withstand the rigors of outdoor use. The bar and chain are engineered for longevity, and regular maintenance protocols ensure continued optimal performance.
Finally, the lightweight design of the PP258TP makes it easy to carry and handle. Weighing just over 10 pounds, it strikes a balance between power and portability, making it a reliable choice for both occasional users and professionals who require efficiency and ease of use.
In conclusion, the Poulan PP258TP pole saw stands out for its combination of power, reach, and user-friendly features. With its robust engine, long extension capability, anti-vibration technology, and durable construction, it is an exceptional tool for effective outdoor maintenance. Whether you're pruning branches or clearing overgrowth, the PP258TP delivers reliable performance, ensuring a well-kept landscape with minimal hassle.