SM4018, 545123649 specifications
The Poulan 545123649 SM4018 chainsaw is a powerful tool designed for both professionals and homeowners who require a reliable and efficient cutting solution for their outdoor tasks. Recognized for its robust design and advanced features, this chainsaw is ideal for felling trees, limbing, and cutting firewood.One of the main features of the SM4018 is its 40cc engine, which provides ample power for cutting through even the toughest wood. With a high-performance engine, users can expect quick acceleration and reduced emissions, making it an environmentally friendly option. The powerful engine ensures that the chainsaw delivers consistent performance over extended periods, ideal for demanding projects.
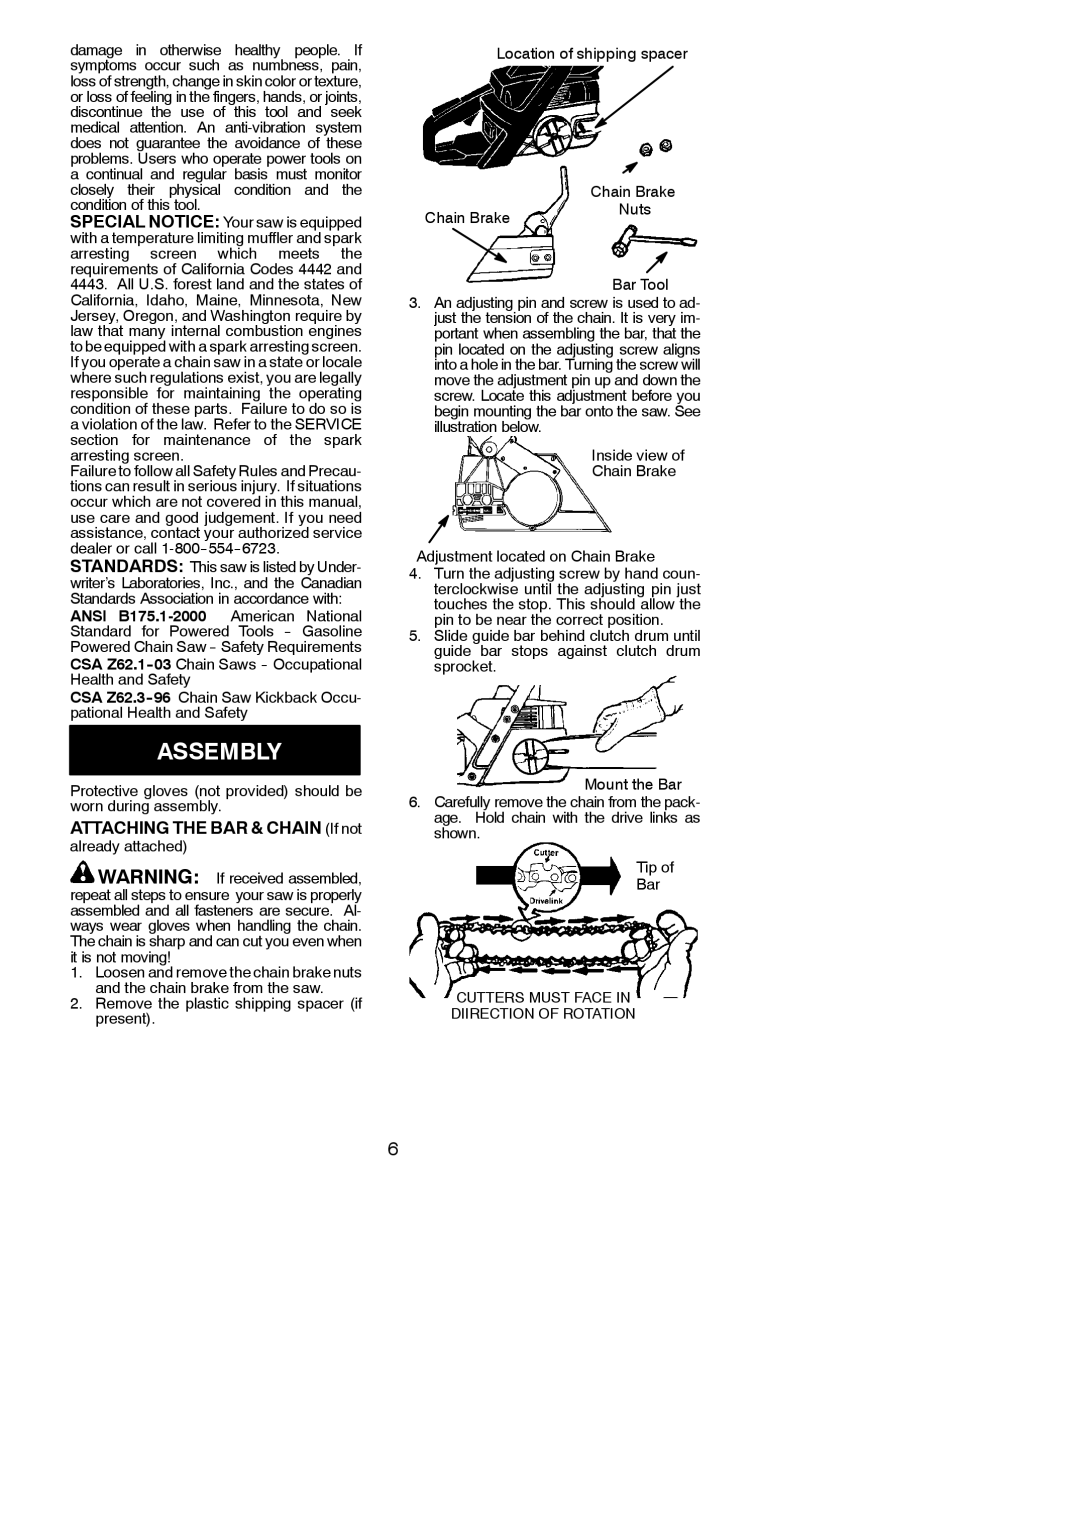
Another standout characteristic of the Poulan 545123649 is its 18-inch bar and chain. This length strikes a perfect balance, allowing users to tackle both small and sizable tasks with ease. The chain is precision-engineered to deliver smooth and efficient cutting, helping users achieve their desired results with minimal effort.
The chainsaw is equipped with an automatic lubrication system, which continually oils the chain during operation. This feature significantly reduces wear and tear, prolonging the life of both the chain and the bar. Furthermore, the convenient oil reservoir is easily accessible, allowing for quick refills when necessary.
Comfort and usability are top priorities in the design of the SM4018. The chainsaw features an ergonomic handle with anti-vibration technology, which reduces user fatigue during prolonged use. This makes it a suitable tool for both novice users and seasoned professionals who need to work for extended periods without discomfort.
Safety is paramount when operating any power tool, and the Poulan SM4018 doesn’t fall short in this regard. It comes equipped with a chain brake system that stops the chain immediately in case of kickback, protecting the user from potential injuries. Additionally, the easy-access air filter ensures that the engine remains clean, maximizing its performance and longevity.
Overall, the Poulan 545123649 SM4018 chainsaw combines power, precision, and safety to deliver an exceptional cutting experience. With its advanced features and user-friendly design, it is a reliable choice for anyone looking to invest in a high-quality chainsaw for their outdoor needs.