FIGURE 6
STEEL PLATEN ADJUSTMENT
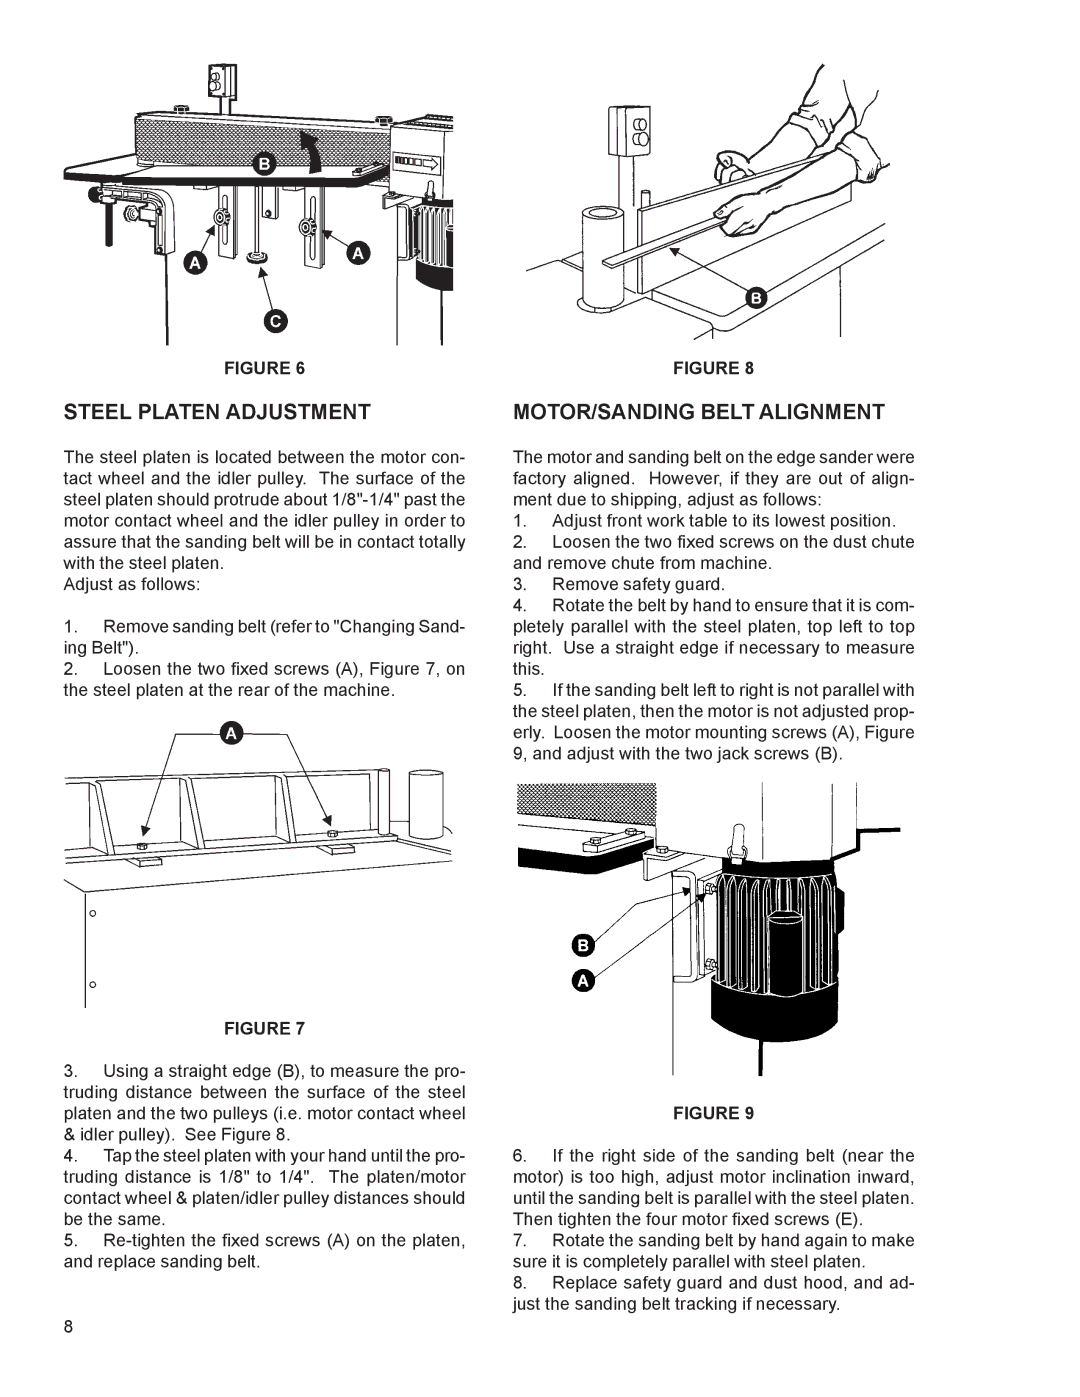
The steel platen is located between the motor con- tact wheel and the idler pulley. The surface of the steel platen should protrude about
Adjust as follows:
1.Remove sanding belt (refer to "Changing Sand- ing Belt").
2.Loosen the two fixed screws (A), Figure 7, on the steel platen at the rear of the machine.
FIGURE 7
3.Using a straight edge (B), to measure the pro- truding distance between the surface of the steel platen and the two pulleys (i.e. motor contact wheel & idler pulley). See Figure 8.
4.Tap the steel platen with your hand until the pro- truding distance is 1/8" to 1/4". The platen/motor contact wheel & platen/idler pulley distances should be the same.
5.
FIGURE 8
MOTOR/SANDING BELT ALIGNMENT
The motor and sanding belt on the edge sander were factory aligned. However, if they are out of align- ment due to shipping, adjust as follows:
1.Adjust front work table to its lowest position.
2.Loosen the two fixed screws on the dust chute and remove chute from machine.
3.Remove safety guard.
4.Rotate the belt by hand to ensure that it is com- pletely parallel with the steel platen, top left to top right. Use a straight edge if necessary to measure this.
5.If the sanding belt left to right is not parallel with the steel platen, then the motor is not adjusted prop- erly. Loosen the motor mounting screws (A), Figure 9, and adjust with the two jack screws (B).
FIGURE 9
6.If the right side of the sanding belt (near the motor) is too high, adjust motor inclination inward, until the sanding belt is parallel with the steel platen. Then tighten the four motor fixed screws (E).
7.Rotate the sanding belt by hand again to make sure it is completely parallel with steel platen.
8.Replace safety guard and dust hood, and ad- just the sanding belt tracking if necessary.
8
