HPS67 specifications
The Powermatic HPS67 is an innovative and powerful hybrid table saw that epitomizes precision woodworking. Designed for serious woodworkers and professionals, the HPS67 integrates advanced technologies and features that elevate its performance and usability in the workshop.At the heart of the HPS67 lies its robust motor, offering a remarkable power output that facilitates seamless cutting through a variety of materials, including hardwoods and composite materials. The saw’s rip capacity is impressive, allowing users to cut wide panels with ease and precision. Its well-engineered design supports both rip cuts and crosscuts, making it versatile for different woodworking projects.
One of the standout features of the Powermatic HPS67 is its advanced dust collection system. The saw is equipped with an efficient dust port that captures debris during cutting, ensuring a clean workspace and promoting a healthier environment for users. This system reduces the overall cleanup time and increases visibility while working.
The HPS67 incorporates an innovative digital display that provides real-time feedback on blade height and angle adjustments. This feature allows for precise settings, ensuring that users can achieve the exact cuts they desire consistently. The easy-to-read display enhances the overall user experience, making it simpler to make quick adjustments on the fly.
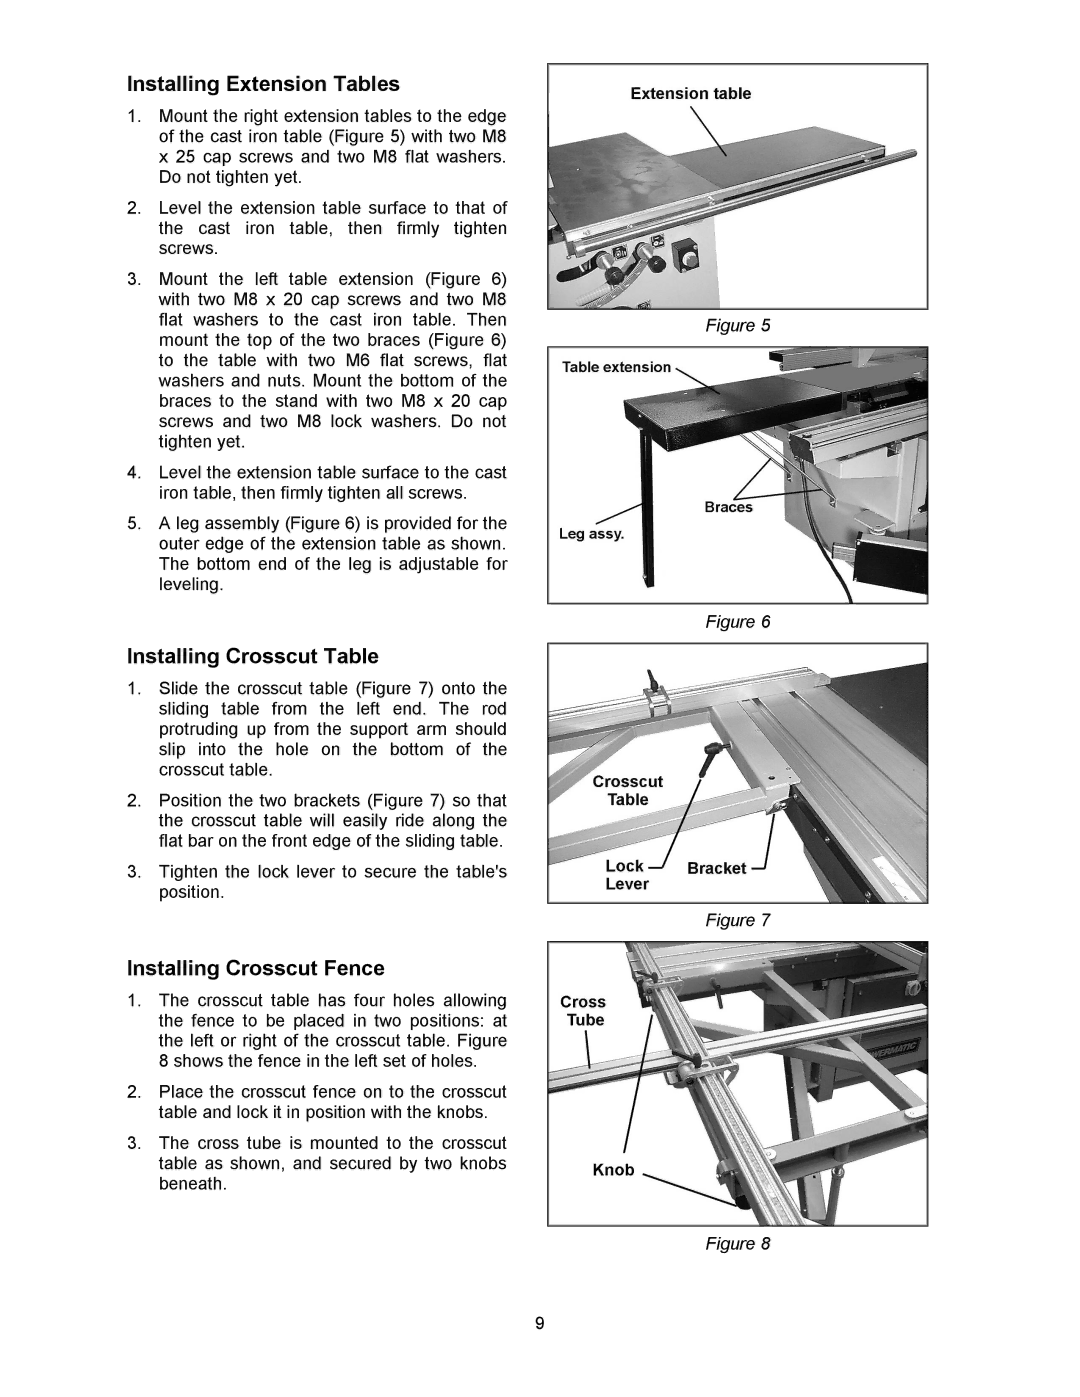
Furthermore, the HPS67 boasts a large, sturdy table surface that offers ample support for large sheets of wood. The tabletop is made from high-quality cast iron, known for its durability and stability. This material minimizes vibrations during operation, thus contributing to the saw's accuracy.
Safety is paramount with the Powermatic HPS67, which features a comprehensive set of safety guards and notifications. The blade guard is designed for easy removal and replacement, ensuring that operators can maintain safety without hindrance to workflow. Additionally, the built-in safety features minimize the risk of accidents, providing peace of mind for woodworkers.
In summary, the Powermatic HPS67 is a sophisticated hybrid table saw that combines power, precision, and safety. Its exceptional features, advanced technologies, and user-focused design make it an invaluable addition to any woodworking shop. Whether for professional use or serious hobbyists, the HPS67 empowers users to take on a variety of woodworking projects with confidence and efficiency.

