Tilt Stop Adjustment
1.Adjust the blade tilt for 90º as described in Blade Tilt Adjustment on page 13.
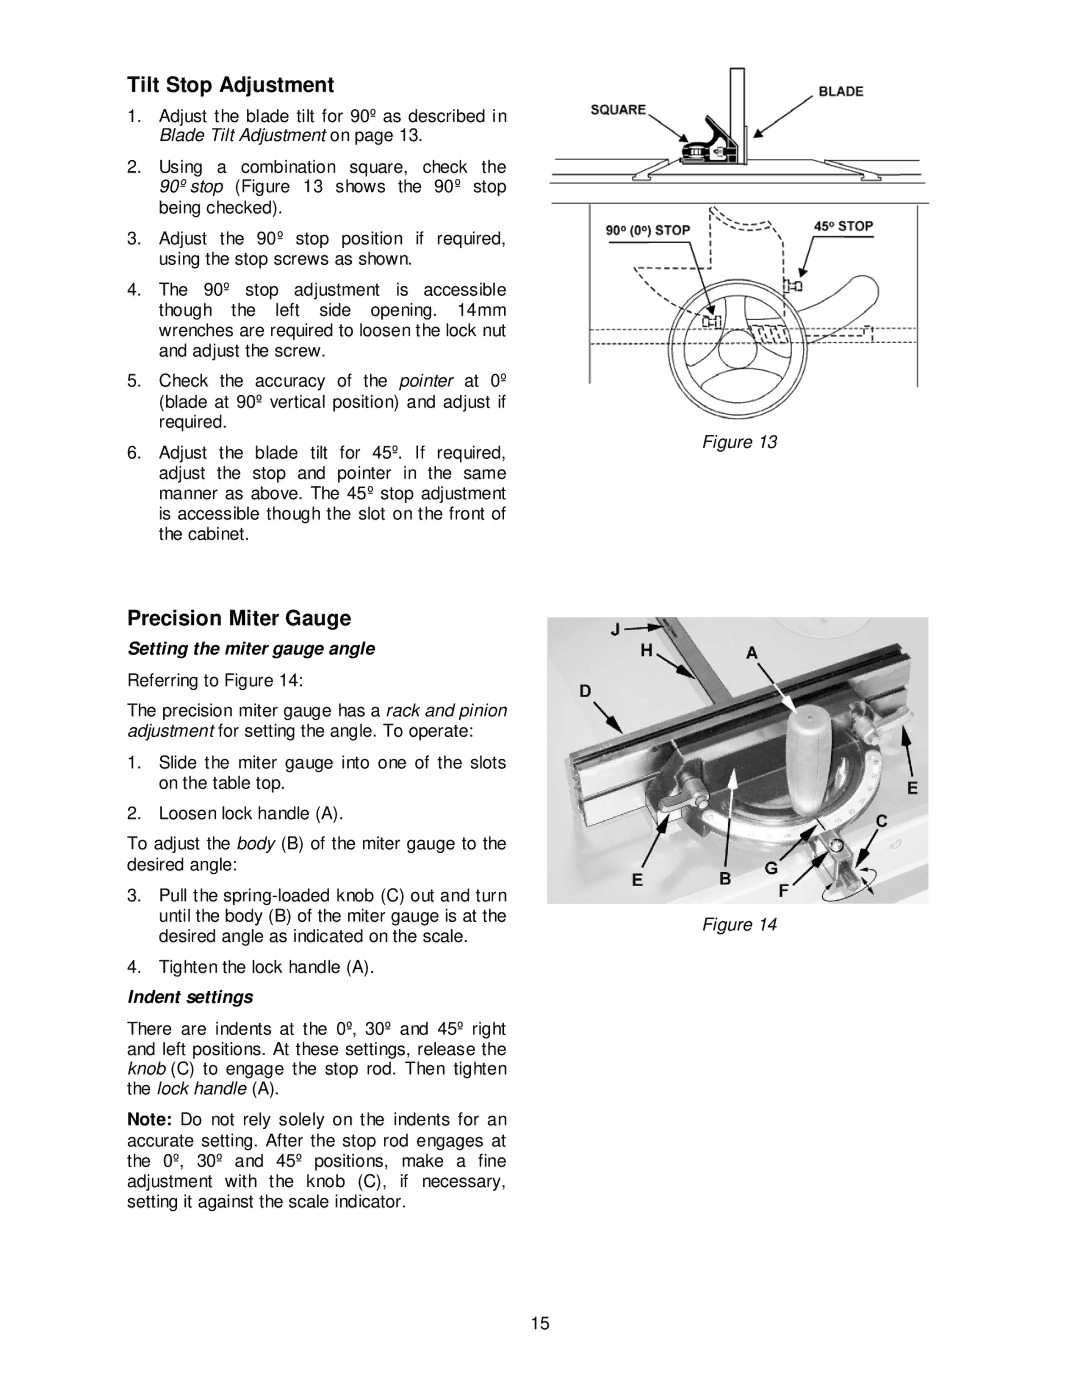
2.Using a combination square, check the 90º stop (Figure 13 shows the 90º stop being checked).
3.Adjust the 90º stop position if required, using the stop screws as shown.
4.The 90º stop adjustment is accessible though the left side opening. 14mm wrenches are required to loosen the lock nut and adjust the screw.
5.Check the accuracy of the pointer at 0º (blade at 90º vertical position) and adjust if required.
6.Adjust the blade tilt for 45º. If required, adjust the stop and pointer in the same manner as above. The 45º stop adjustment is accessible though the slot on the front of the cabinet.
Precision Miter Gauge
Setting the miter gauge angle
Referring to Figure 14:
The precision miter gauge has a rack and pinion adjustment for setting the angle. To operate:
1.Slide the miter gauge into one of the slots on the table top.
2.Loosen lock handle (A).
To adjust the body (B) of the miter gauge to the desired angle:
3.Pull the
4.Tighten the lock handle (A).
Indent settings
There are indents at the 0º, 30º and 45º right and left positions. At these settings, release the knob (C) to engage the stop rod. Then tighten the lock handle (A).
Note: Do not rely solely on the indents for an accurate setting. After the stop rod engages at the 0º, 30º and 45º positions, make a fine adjustment with the knob (C), if necessary, setting it against the scale indicator.
Figure 13
Figure 14
15