5.Pull on the Adjustment Pin and slide the Back Adjustment through the Main Frame. Release the Adjustment Pin while it is aligned with the Back Adjustment middle hole.
Note: Make sure the Springs slide onto the posts on the bottom of the Back Support
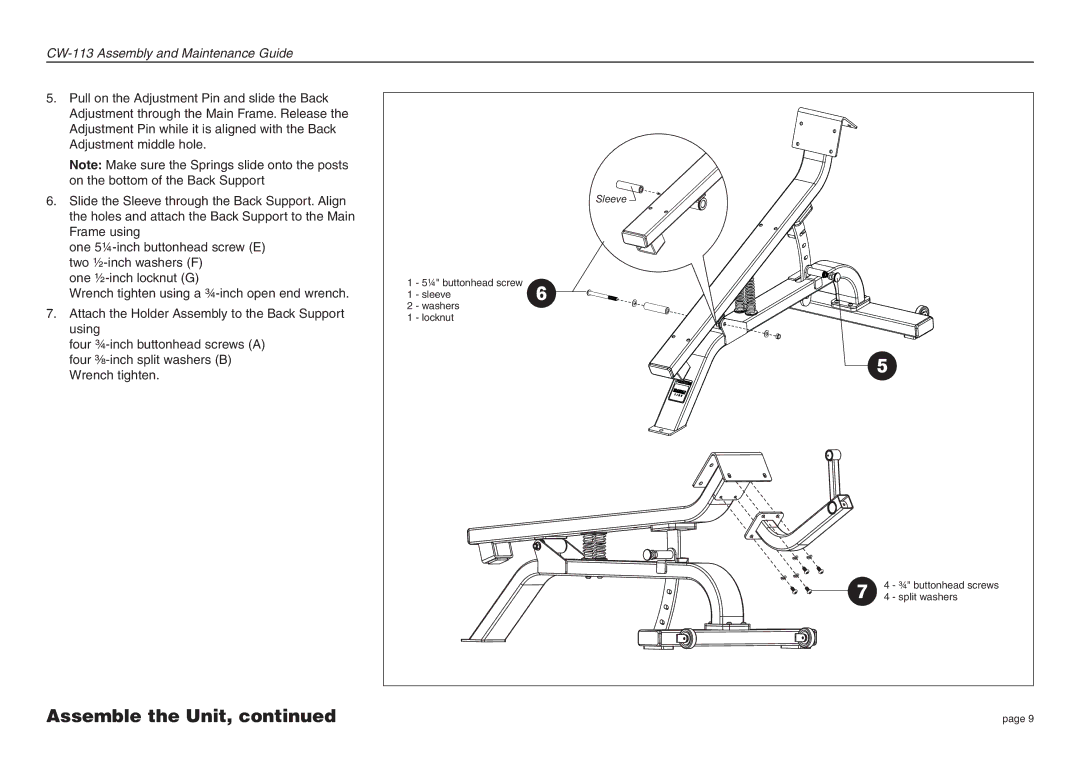
6.Slide the Sleeve through the Back Support. Align the holes and attach the Back Support to the Main Frame using
one
one
Wrench tighten using a
7.Attach the Holder Assembly to the Back Support using
four
| Sleeve |
1 | - 5¼" buttonhead screw |
1 | - sleeve |
2 | - washers |
1 | - locknut |
| 4 - ¾" buttonhead screws |
| 4 - split washers |
Assemble the Unit, continued
page 9