
MAG specifications
The Premier Mounts MAG and MAG-EXT are cutting-edge solutions designed to simplify and enhance the mounting experience for a wide range of audiovisual equipment. As part of Premier Mounts' commitment to delivering high-quality mounting solutions, these products showcase advanced features and innovative technologies tailored to meet the demands of both professional and consumer markets.One of the standout features of the MAG and MAG-EXT mounts is their ability to accommodate various display sizes and types. The versatility of these mounts allows them to support anything from traditional flat-screen TVs to contemporary digital displays. Both models offer a high weight capacity, ensuring that even larger screens can be securely mounted without compromising safety or stability.
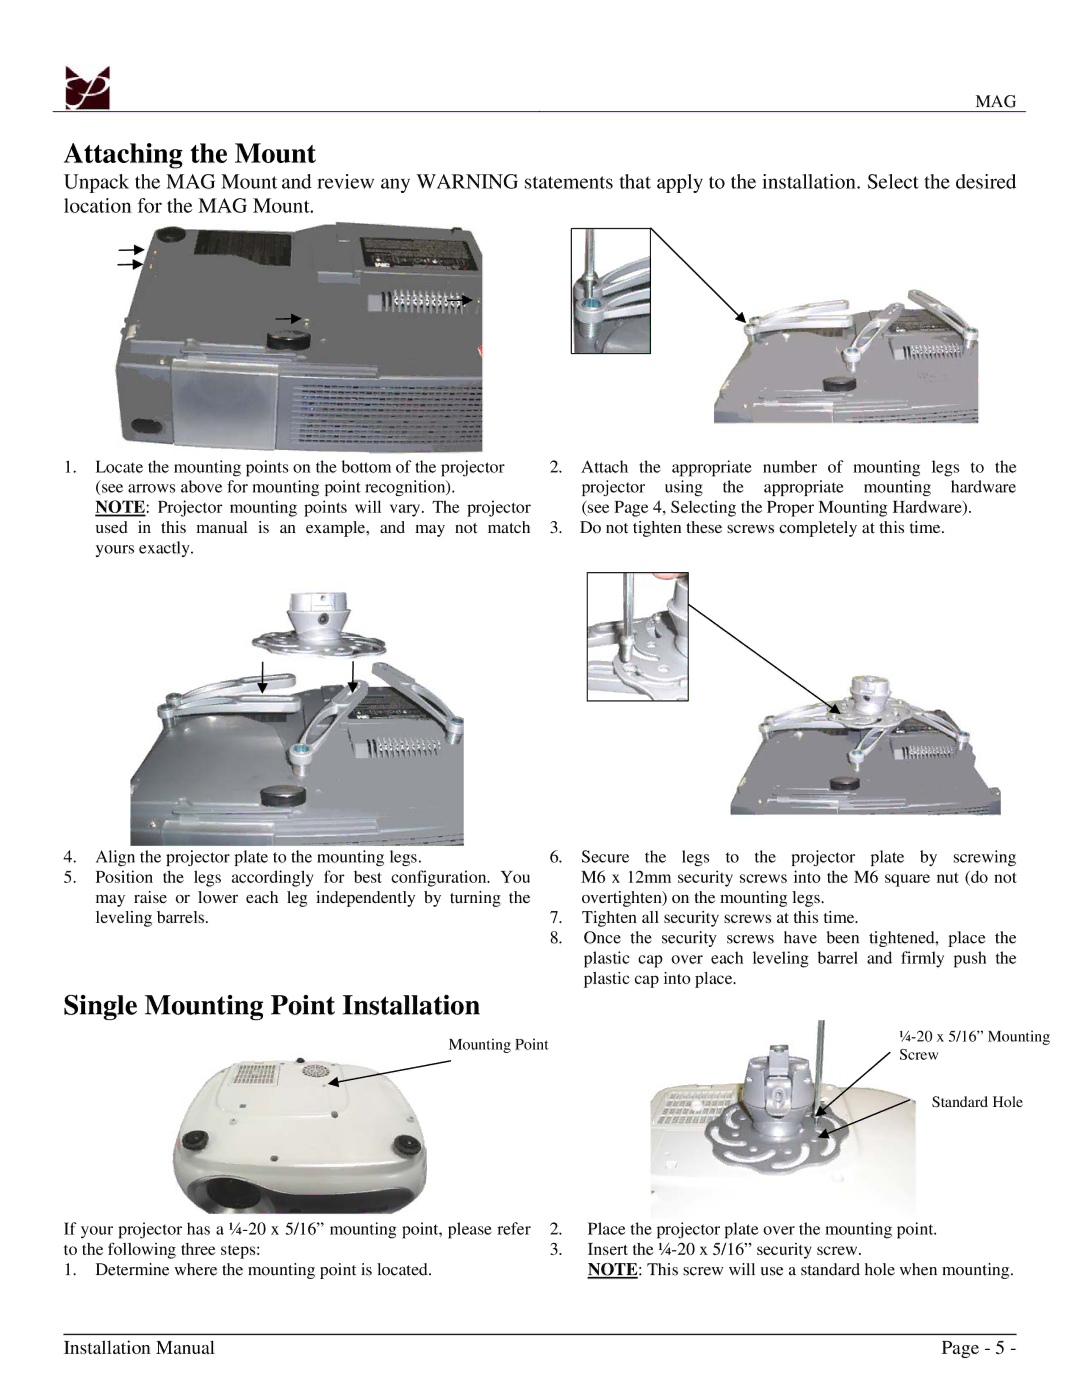
A key characteristic of the MAG and MAG-EXT is their user-friendly design. The quick-release mechanism allows for effortless installation and removal of displays, making it ideal for settings where screens frequently change, such as in corporate environments or educational institutions. This feature is complemented by an innovative cable management system that keeps cords and wires neatly organized and out of sight, contributing to a clean and professional appearance.
Technology plays a vital role in the functionality of the MAG and MAG-EXT mounts. With built-in tilt and swivel capabilities, users can easily adjust the viewing angle of their displays to optimize visibility for diverse audiences. This is particularly useful in conference rooms, classrooms, or public spaces where different viewing perspectives are essential. The tilt feature allows for a maximum range of motion, reducing glare and improving the overall viewing experience.
Durability is another significant characteristic of the MAG and MAG-EXT. Constructed from high-quality materials, these mounts are designed to withstand the test of time, even in high-usage environments. The robust construction not only supports heavy displays but also ensures that the mount maintains its integrity over years of use.
In summary, Premier Mounts MAG and MAG-EXT are advanced mounting solutions that combine versatility, user-friendliness, and durability. With features including a quick-release mechanism, tilt and swivel adjustments, and effective cable management, these mounts cater to a wide range of audiovisual needs while enhancing the overall aesthetic of any installation. Ideal for both professional and personal use, they epitomize the high standards and innovative spirit that Premier Mounts is known for in the mounting solutions industry.