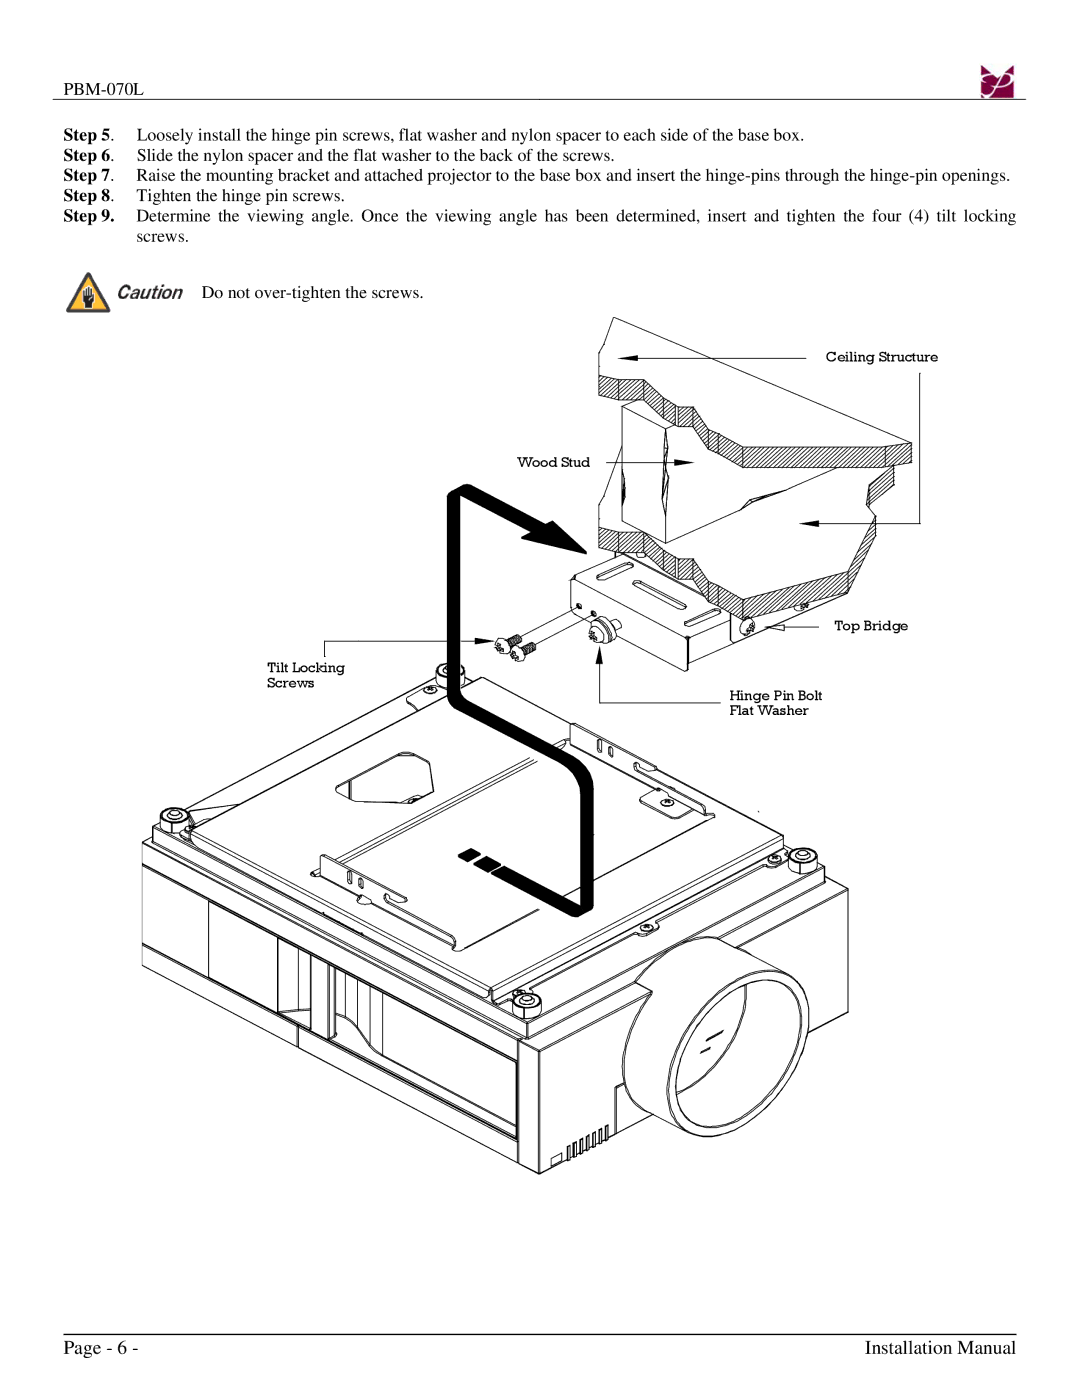
Step 5. Loosely install the hinge pin screws, flat washer and nylon spacer to each side of the base box. Step 6. Slide the nylon spacer and the flat washer to the back of the screws.
Step 7. Raise the mounting bracket and attached projector to the base box and insert the
Step 9. Determine the viewing angle. Once the viewing angle has been determined, insert and tighten the four (4) tilt locking screws.
Do not
Tilt Locking Screws
Ceiling Structure
Wood Stud
Top Bridge
Hinge Pin Bolt
Flat Washer
Page - 6 - | Installation Manual |
