PCM-MS2 specifications
The Premier Mounts PCM-MS2 is a versatile and highly effective mounting solution designed for a wide range of display applications. This model is particularly favored in commercial environments such as conference rooms, classrooms, retail spaces, and control rooms due to its innovative features and robust build quality.One of the standout characteristics of the PCM-MS2 is its adjustable design that accommodates various screen sizes and types. It supports a diversity of flat panel displays, making it a flexible option for users who require adaptability. The mount is engineered to hold screens securely while allowing for effortless adjustments, ensuring that users can optimize visibility and ergonomics.
In terms of technology, the PCM-MS2 is equipped with a patented quick-release mechanism. This technology simplifies the installation and removal process, facilitating quick changes of displays when necessary. This feature is particularly beneficial in environments where display technology needs frequent updates or rotations. The mount also incorporates a tool-free leveling system, allowing for precise alignment of the display without the need for additional equipment.
Durability is another important characteristic of the PCM-MS2. Constructed from high-quality materials, this mount is designed to withstand the rigors of daily use in busy settings. It can support substantial weight, ensuring that even larger displays can be mounted safely and securely. Additionally, the design features a cable management system that helps maintain a clean and organized setup, minimizing clutter and improving the aesthetic of the installation.
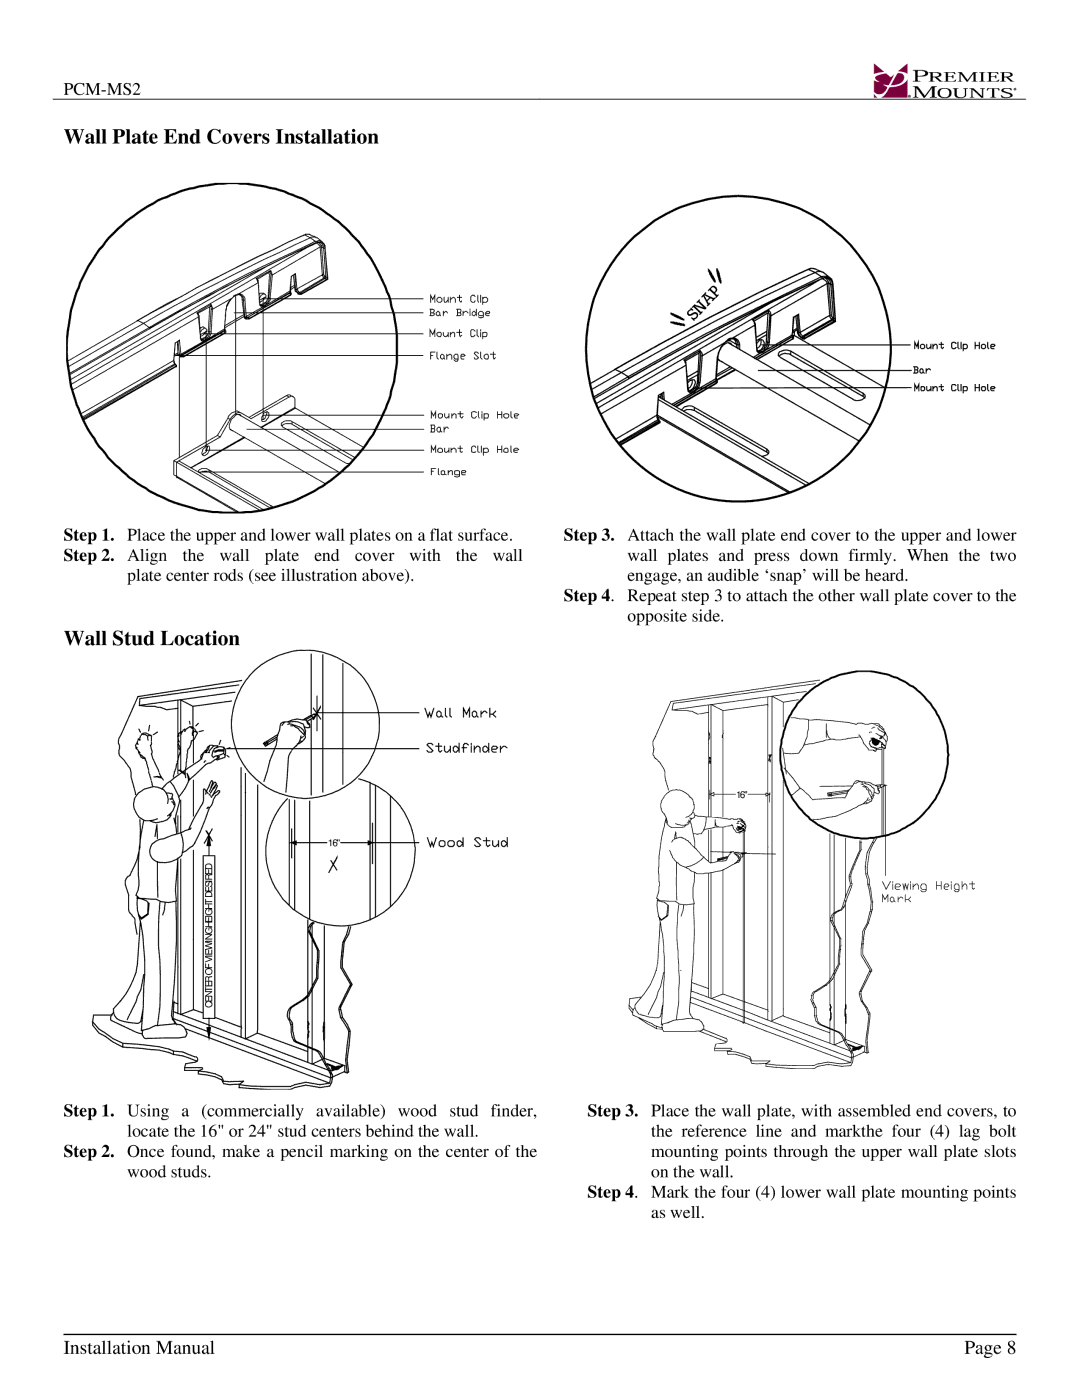
The PCM-MS2 offers multiple mounting options, allowing users to choose between different configurations to best suit their needs. Whether it's ceiling-mounted, wall-mounted, or in a display configuration, the flexibility offered simplifies the installation process.
In conclusion, the Premier Mounts PCM-MS2 stands out as a robust and adaptable mounting solution, ideal for various environments. Its combination of user-friendly features, advanced technology, and durable construction makes it a preferred choice for both professionals and enthusiasts alike. With the ability to accommodate various screen sizes and installation options, the PCM-MS2 is an excellent investment for anyone looking to enhance their display solutions.

