I V . A S S E M B L Y
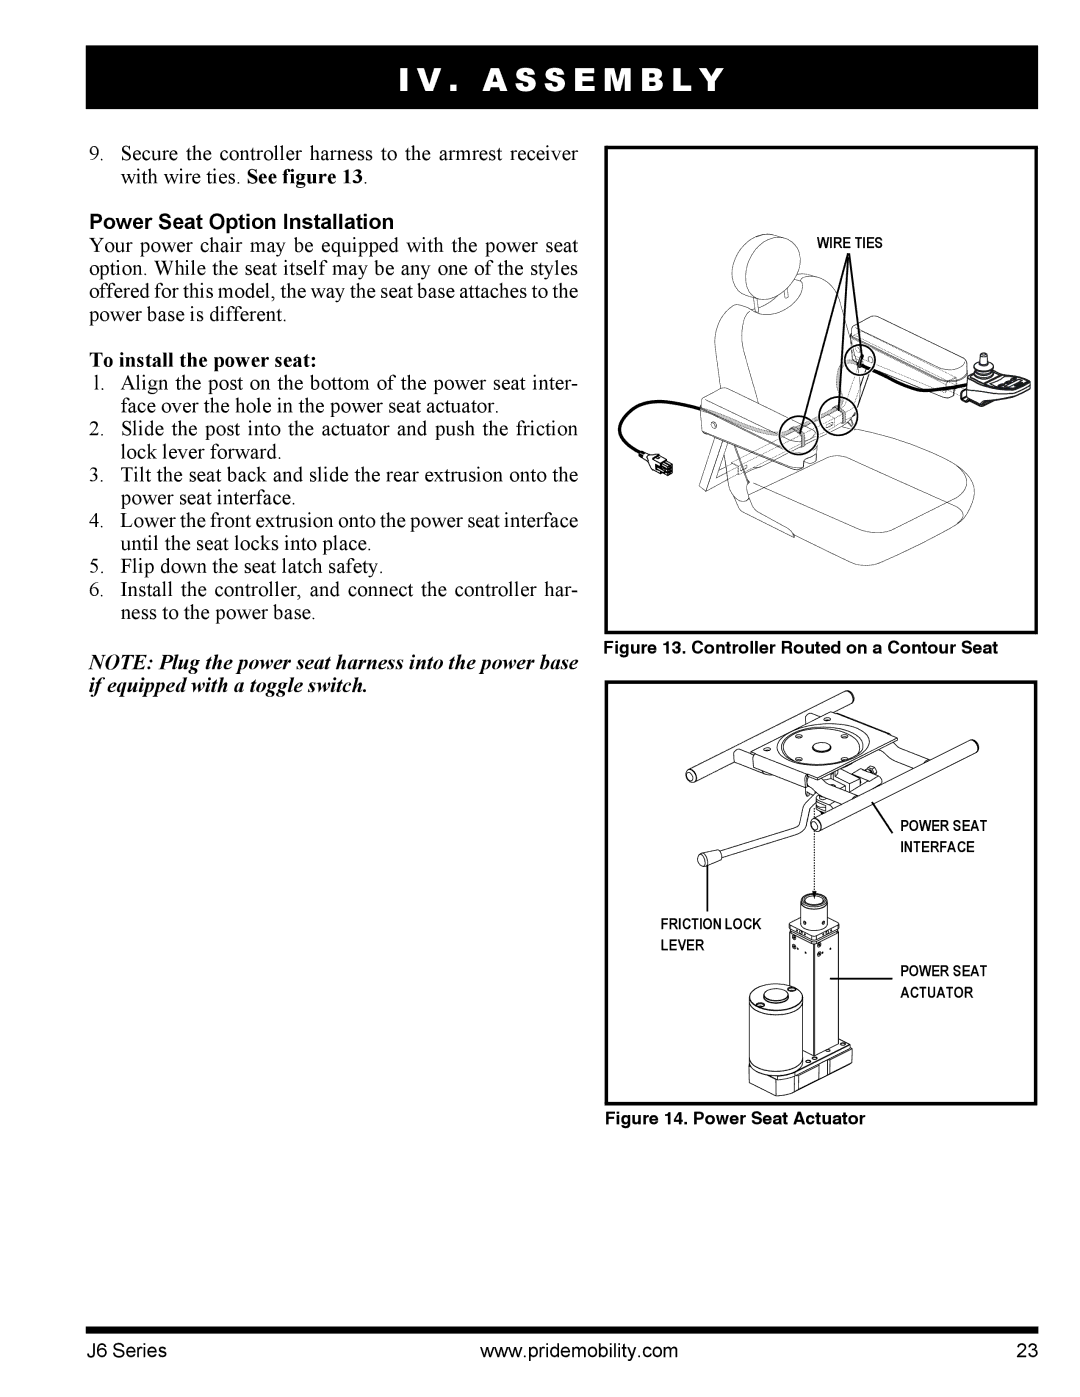
9.Secure the controller harness to the armrest receiver with wire ties. See figure 13.
Power Seat Option Installation
Your power chair may be equipped with the power seat option. While the seat itself may be any one of the styles offered for this model, the way the seat base attaches to the power base is different.
To install the power seat:
l.Align the post on the bottom of the power seat inter- face over the hole in the power seat actuator.
2.Slide the post into the actuator and push the friction lock lever forward.
3.Tilt the seat back and slide the rear extrusion onto the power seat interface.
4.Lower the front extrusion onto the power seat interface until the seat locks into place.
5.Flip down the seat latch safety.
6.Install the controller, and connect the controller har- ness to the power base.
NOTE: Plug the power seat harness into the power base if equipped with a toggle switch.
WIRE TIES |
Figure 13. Controller Routed on a Contour Seat
FRICTION LOCK LEVER
![]() POWER SEAT INTERFACE
POWER SEAT INTERFACE
POWER SEAT
ACTUATOR
Figure 14. Power Seat Actuator
J6 Series | www.pridemobility.com | 23 |
