I V . Y O U R P M V
TILLER CONSOLE
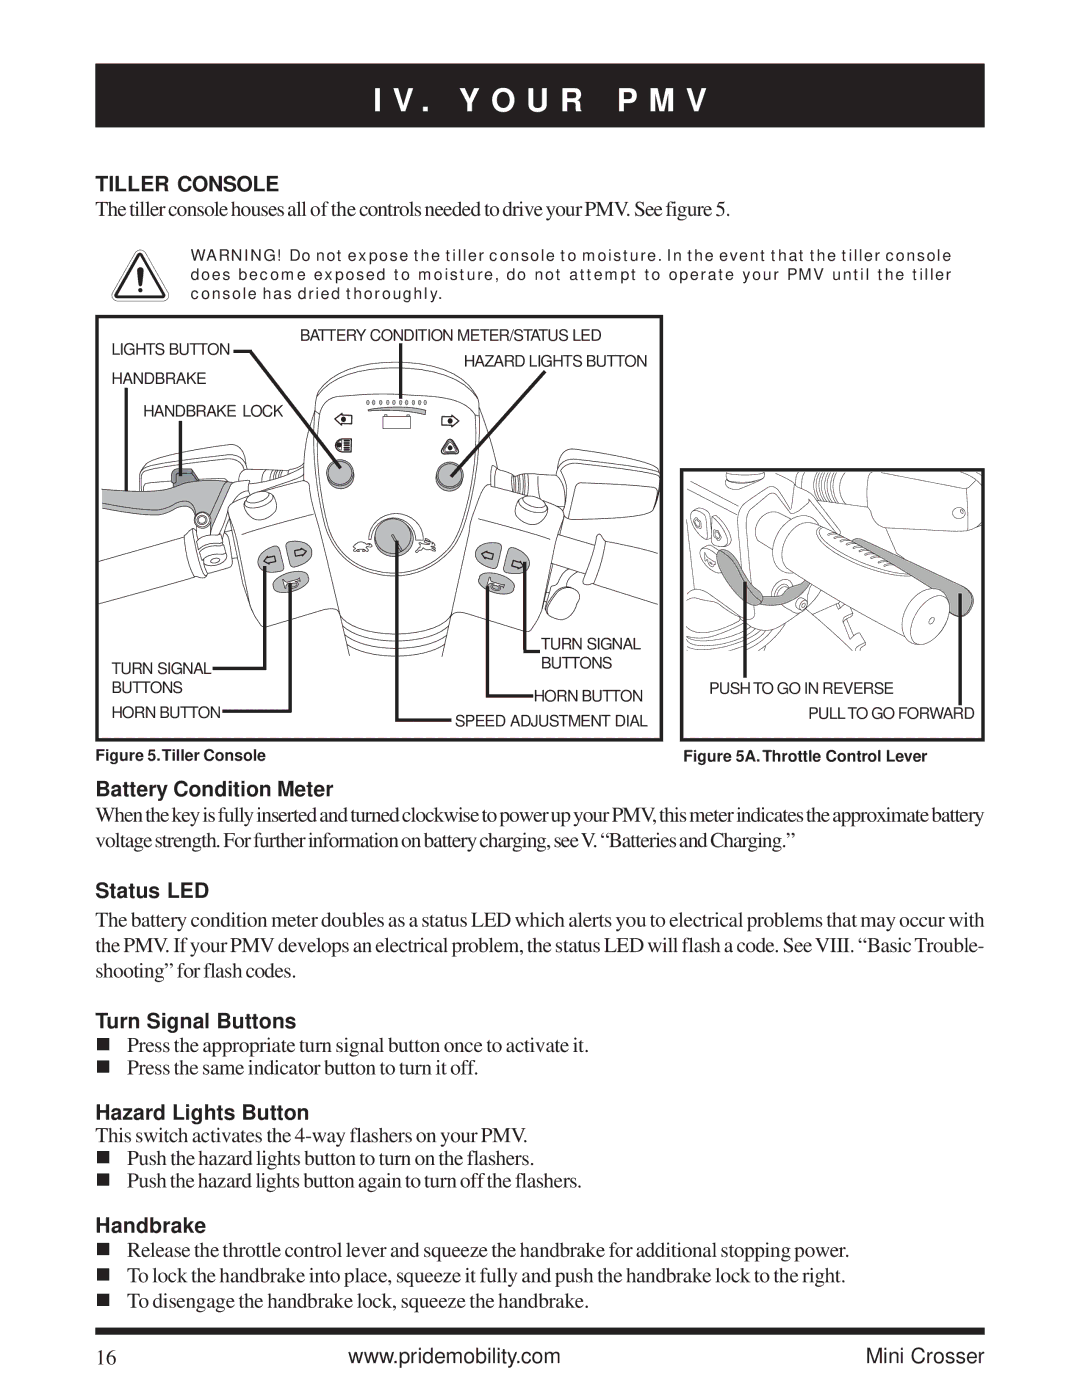
The tiller console houses all of the controls needed to drive your PMV. See figure 5.
WARNING! Do not expose the tiller console to moisture. In the event that the tiller console does become exposed to moisture, do not attempt to operate your PMV until the tiller console has dried thoroughly.
LIGHTS BUTTON | BATTERY CONDITION METER/STATUS LED | |
HAZARD LIGHTS BUTTON | ||
HANDBRAKE | ||
| ||
HANDBRAKE LOCK |
| |
| TURN SIGNAL | |
TURN SIGNAL | BUTTONS | |
| ||
BUTTONS | HORN BUTTON | |
HORN BUTTON | ||
SPEED ADJUSTMENT DIAL | ||
|
Figure 5.Tiller Console
PUSH TO GO IN REVERSE |
PULL TO GO FORWARD |
Figure 5A. Throttle Control Lever
Battery Condition Meter
When the key is fully inserted and turned clockwise to power up your PMV, this meter indicates the approximate battery voltage strength. For further information on battery charging, see V. “Batteries and Charging.”
Status LED
The battery condition meter doubles as a status LED which alerts you to electrical problems that may occur with the PMV. If your PMV develops an electrical problem, the status LED will flash a code. See VIII. “Basic Trouble- shooting” for flash codes.
Turn Signal Buttons
!Press the appropriate turn signal button once to activate it.
!Press the same indicator button to turn it off.
Hazard Lights Button
This switch activates the
!Push the hazard lights button to turn on the flashers.
!Push the hazard lights button again to turn off the flashers.
Handbrake
!Release the throttle control lever and squeeze the handbrake for additional stopping power.
!To lock the handbrake into place, squeeze it fully and push the handbrake lock to the right.
!To disengage the handbrake lock, squeeze the handbrake.
16 | www.pridemobility.com | Mini Crosser |