I X . C A R E A N D M A I N T E N A N C E
TIRE/WHEEL REPLACEMENT
If you have pneumatic tires and have a flat, you can replace the tube. Replacement tires, tubes, and wheel assem- blies are readily available through your authorized Pride Provider.
WARNING! To avoid possible injury, be sure the PMV’s power is off and the PMV is not in freewheel mode before removing a wheel.
WARNING! Completely deflate the tire before attempting repair.
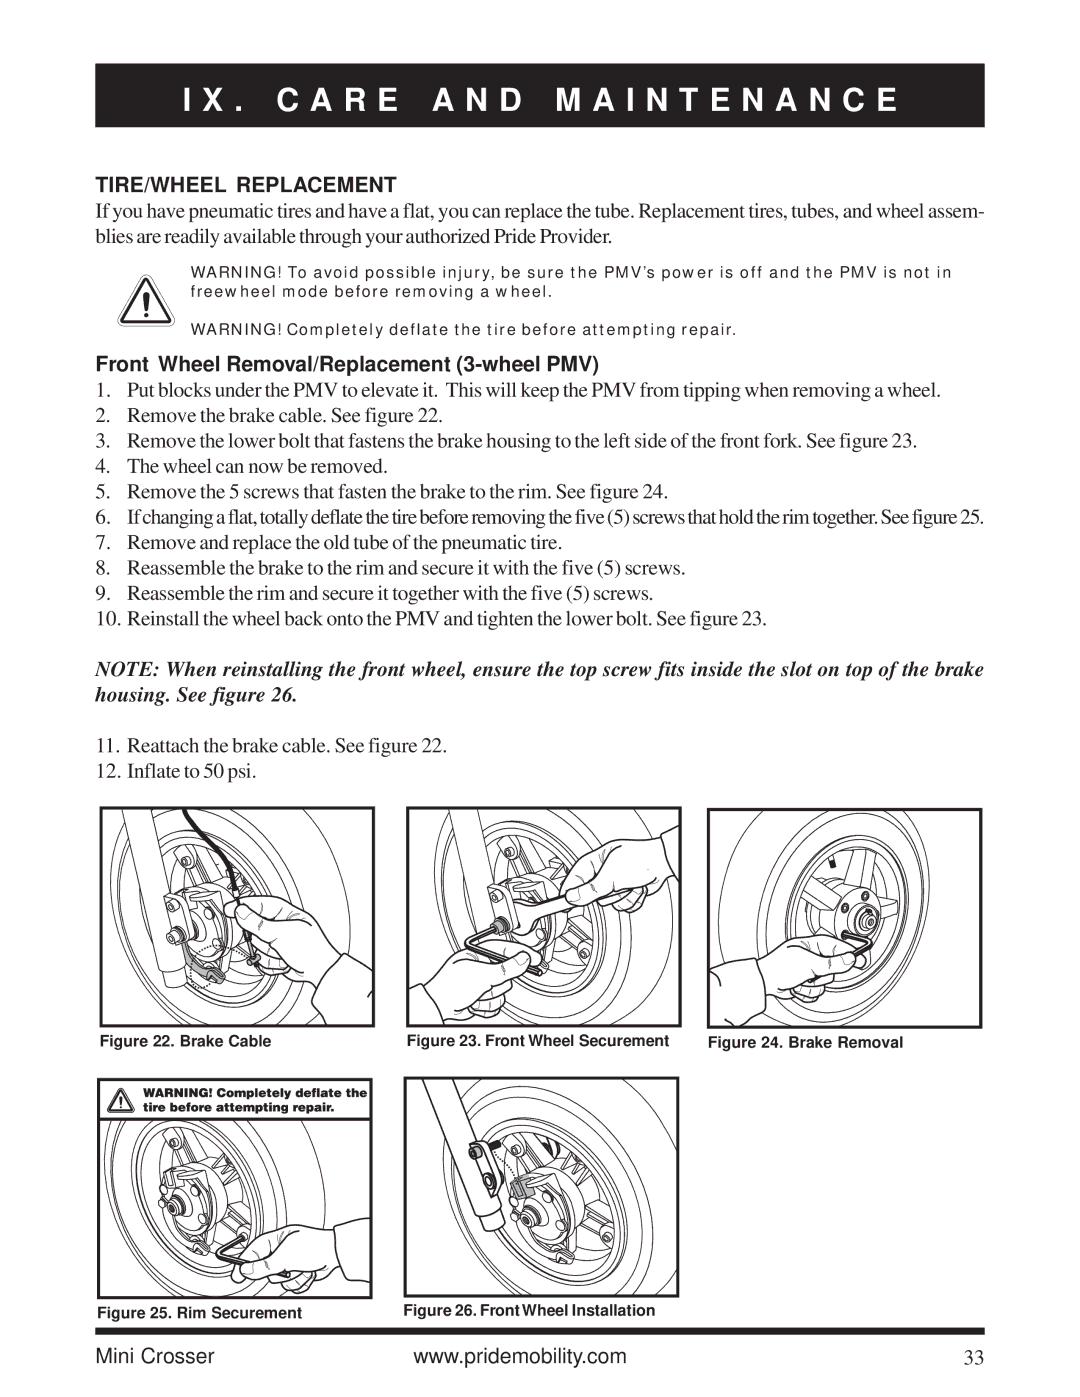
Front Wheel Removal/Replacement (3-wheel PMV)
1.Put blocks under the PMV to elevate it. This will keep the PMV from tipping when removing a wheel.
2.Remove the brake cable. See figure 22.
3.Remove the lower bolt that fastens the brake housing to the left side of the front fork. See figure 23.
4.The wheel can now be removed.
5.Remove the 5 screws that fasten the brake to the rim. See figure 24.
6.If changing a flat, totally deflate the tire before removing the five (5) screws that hold the rim together. See figure 25.
7.Remove and replace the old tube of the pneumatic tire.
8.Reassemble the brake to the rim and secure it with the five (5) screws.
9.Reassemble the rim and secure it together with the five (5) screws.
10.Reinstall the wheel back onto the PMV and tighten the lower bolt. See figure 23.
NOTE: When reinstalling the front wheel, ensure the top screw fits inside the slot on top of the brake housing. See figure 26.
11.Reattach the brake cable. See figure 22.
12.Inflate to 50 psi.
Figure 22. Brake Cable | Figure 23. Front Wheel Securement | Figure 24. Brake Removal | |||||
|
|
|
|
|
|
|
|
|
|
|
|
|
|
|
|
|
|
|
|
|
|
|
|
|
|
|
|
|
|
|
|
|
|
|
|
|
|
|
|
Figure 25. Rim Securement | Figure 26. Front Wheel Installation |
|
|
|
|
Mini Crosser | www.pridemobility.com | 33 |