8 | Basic Operation Instructions |
Battery Pack Installation to Backpacker Series Lifts
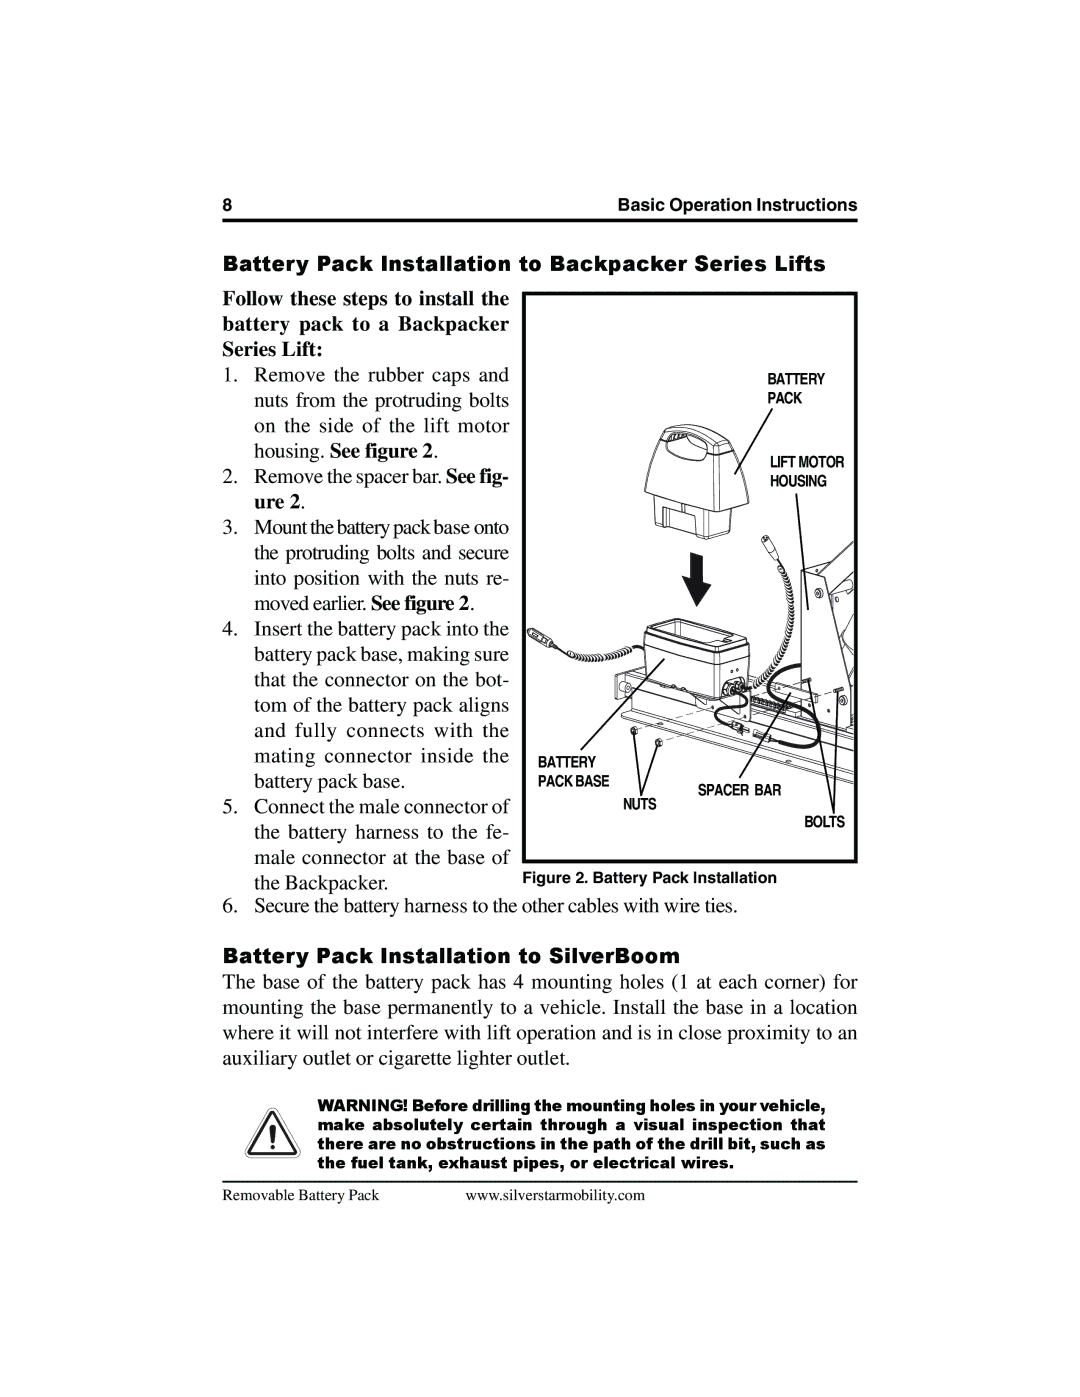
Follow these steps to install the battery pack to a Backpacker Series Lift:
1. | Remove the rubber caps and |
| BATTERY |
| nuts from the protruding bolts |
| PACK |
| on the side of the lift motor |
|
|
| housing. See figure 2. |
| LIFT MOTOR |
2. | Remove the spacer bar. See fig- |
| |
| HOUSING | ||
| ure 2. |
|
|
3. | Mount the battery pack base onto |
|
|
| the protruding bolts and secure |
|
|
| into position with the nuts re- |
|
|
| moved earlier. See figure 2. |
|
|
4. | Insert the battery pack into the |
|
|
| battery pack base, making sure |
|
|
| that the connector on the bot- |
|
|
| tom of the battery pack aligns |
|
|
| and fully connects with the |
|
|
| mating connector inside the | BATTERY |
|
| battery pack base. | PACK BASE | SPACER BAR |
5. | Connect the male connector of |
| NUTS |
| the battery harness to the fe- |
| BOLTS |
|
|
| |
| male connector at the base of | Figure 2. Battery Pack Installation | |
| the Backpacker. | ||
6. | Secure the battery harness to the other cables with wire ties. | ||
Battery Pack Installation to SilverBoom
The base of the battery pack has 4 mounting holes (1 at each corner) for mounting the base permanently to a vehicle. Install the base in a location where it will not interfere with lift operation and is in close proximity to an auxiliary outlet or cigarette lighter outlet.
WARNING! Before drilling the mounting holes in your vehicle, make absolutely certain through a visual inspection that there are no obstructions in the path of the drill bit, such as the fuel tank, exhaust pipes, or electrical wires.
Removable Battery Pack | www.silverstarmobility.com |