ISO/DIN MOUNTING
If you own a Japanese vehicle, you can use the standard ISO/DIN mounting screw holes on the side of the CD player to attach to the existing factory mounting bracket, without using the provided DIN sleeve.
!Remove the factory ISO/DIN mounting bracket from the car along with the factory radio.
!Remove the factory radio from the bracket by unscrewing the two Phillips screws on each side of the radio paying close attention to their screw positions and saving the screws to mount the CD player.
!Remove the two spring clips from each side of the CD player by removing the screws. These clips are not used in ISO/DIN mounting method and must be removed to expose the ISO/DIN mounting holes.
!Also remove the detachable face and rectangular trim ring from the CD player and mount the CD player to the factory ISO/DIN bracket using the screws that you removed from the factory radio.
!Connect the wire harness and antenna plug to the back of the CD player. Then mount the factory
Note: It is not necessary to attach the outer rectangular trim ring for ISO/DIN mounting method.
REMOVING THE CD PLAYER
!To remove the CD player from an ISO/DIN mount, follow the above mounting procedure in reverse order.
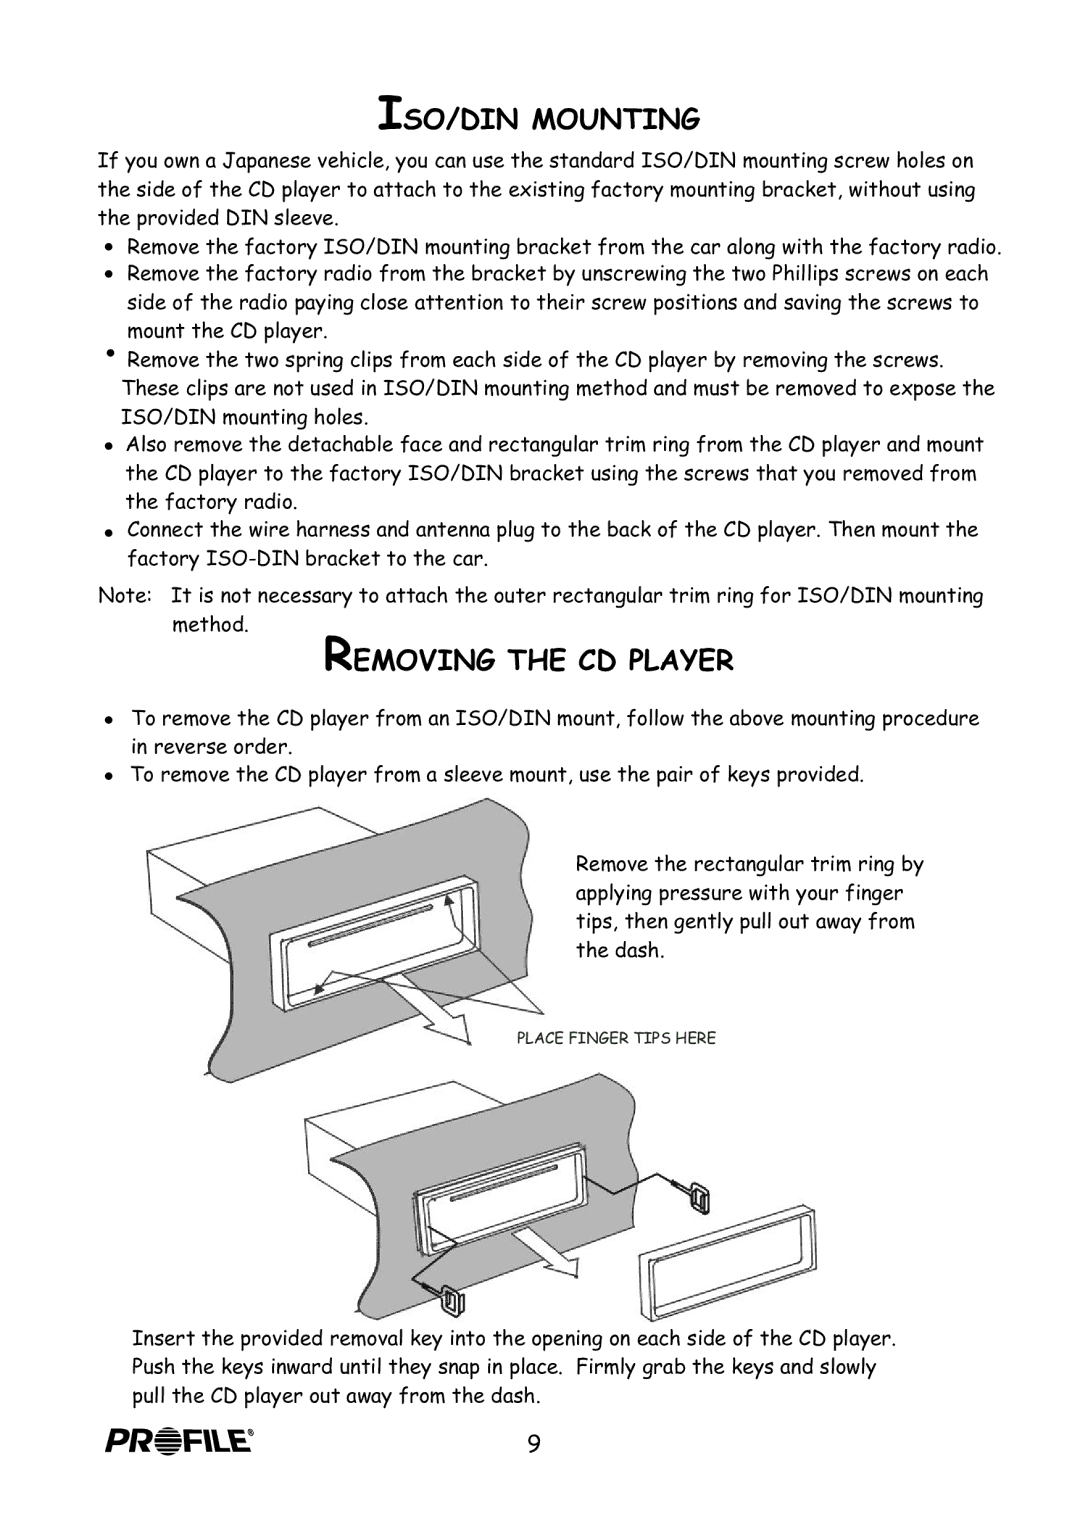
!To remove the CD player from a sleeve mount, use the pair of keys provided.
Remove the rectangular trim ring by applying pressure with your finger tips, then gently pull out away from the dash.
PLACE FINGER TIPS HERE
Insert the provided removal key into the opening on each side of the CD player. Push the keys inward until they snap in place. Firmly grab the keys and slowly pull the CD player out away from the dash.
9