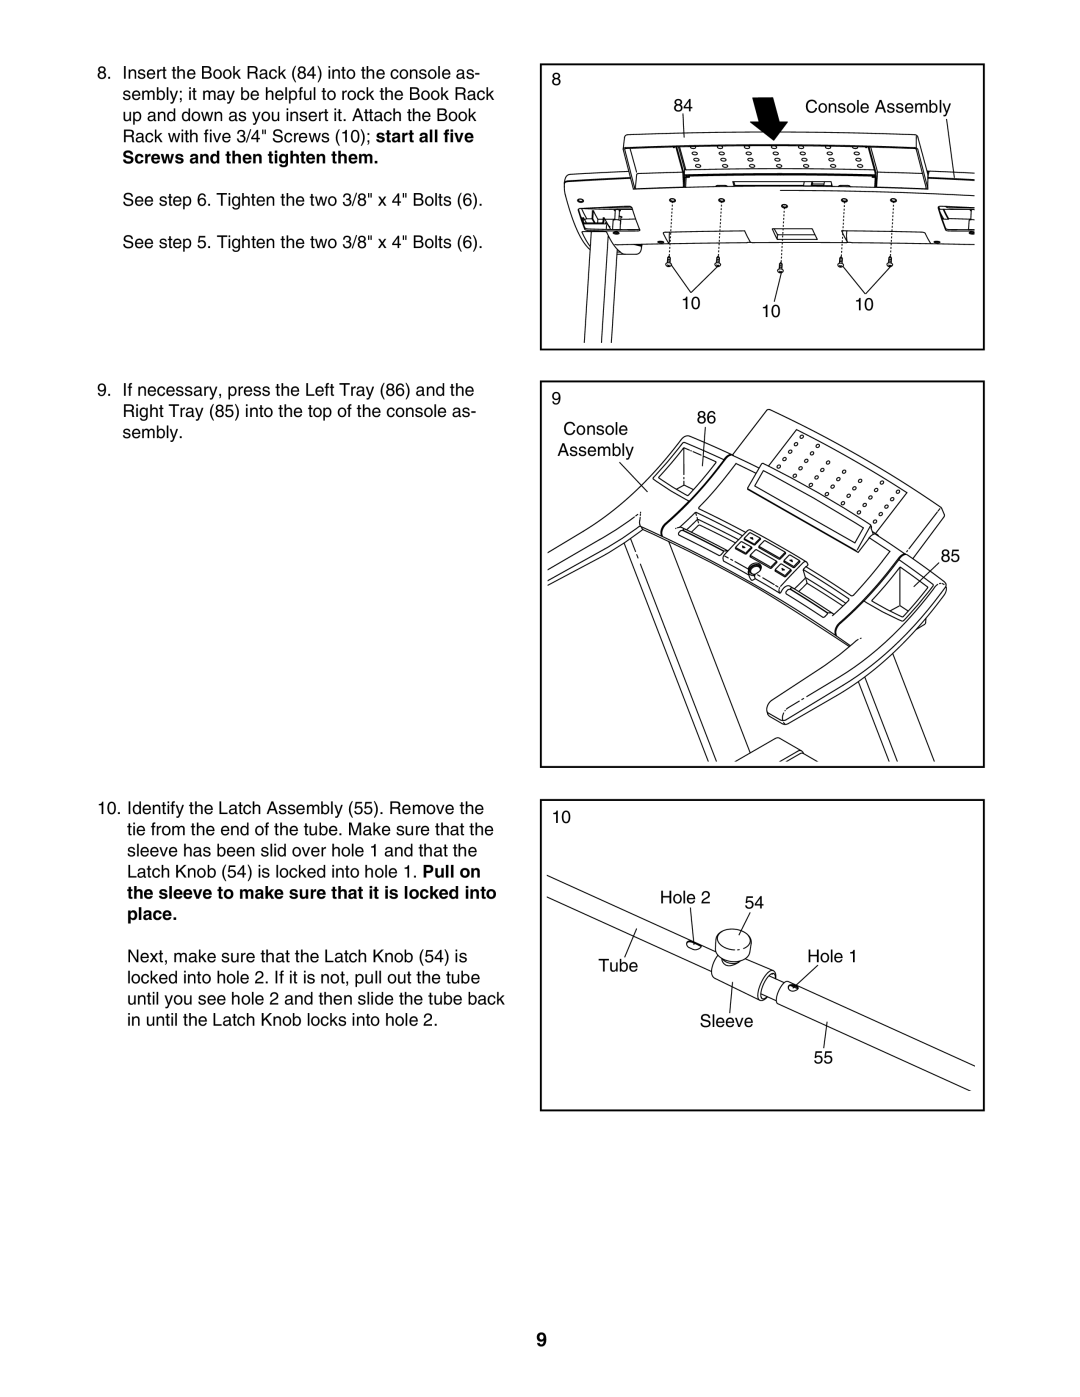
8.Insert the Book Rack (84) into the console as- sembly; it may be helpful to rock the Book Rack up and down as you insert it. Attach the Book Rack with five 3/4" Screws (10); start all five
Screws and then tighten them.
See step 6. Tighten the two 3/8" x 4" Bolts (6). See step 5. Tighten the two 3/8" x 4" Bolts (6).
9.If necessary, press the Left Tray (86) and the Right Tray (85) into the top of the console as- sembly.
8 |
|
|
|
| 84 |
| Console Assembly |
| 10 | 10 | 10 |
|
|
| |
9 | 86 |
|
|
Console |
|
| |
|
|
| |
Assembly |
|
|
|
|
|
| 85 |
10.Identify the Latch Assembly (55). Remove the tie from the end of the tube. Make sure that the sleeve has been slid over hole 1 and that the Latch Knob (54) is locked into hole 1. Pull on the sleeve to make sure that it is locked into place.
Next, make sure that the Latch Knob (54) is locked into hole 2. If it is not, pull out the tube until you see hole 2 and then slide the tube back in until the Latch Knob locks into hole 2.
10
| Hole 2 | 54 |
|
| |
Tube |
| Hole 1 |
|
|
Sleeve
55
9
