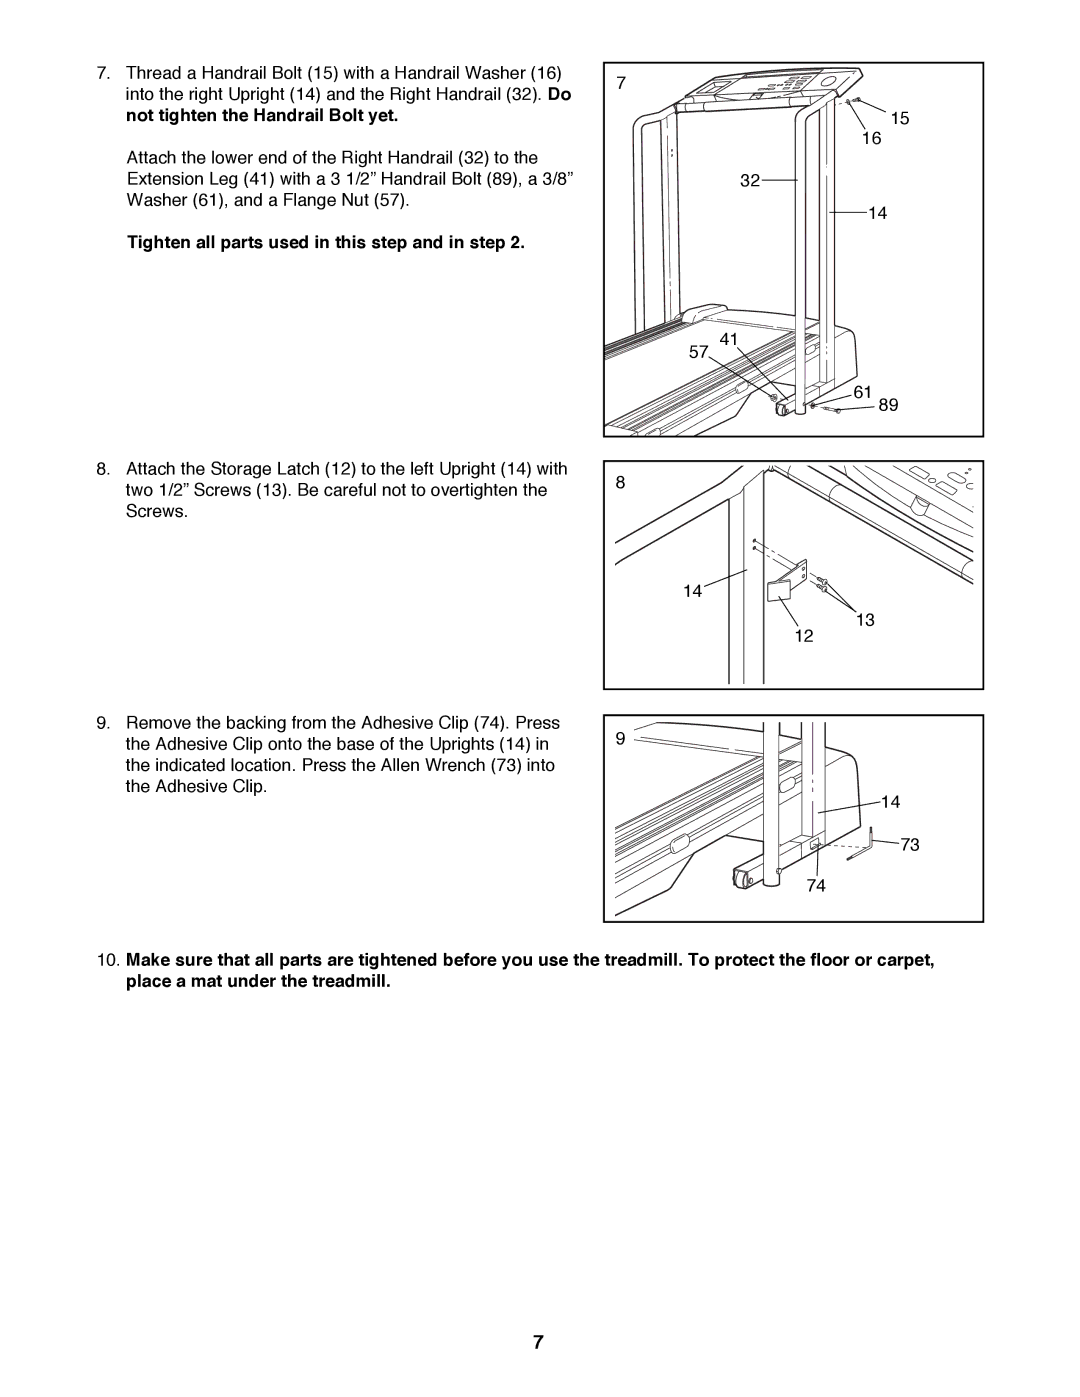
7. Thread a Handrail Bolt (15) with a Handrail Washer (16) | 7 | |
into the right Upright (14) and the Right Handrail (32). Do | ||
| ||
not tighten the Handrail Bolt yet. | 15 | |
Attach the lower end of the Right Handrail (32) to the | 16 | |
| ||
Extension Leg (41) with a 3 1/2Ó Handrail Bolt (89), a 3/8Ó | 32 | |
Washer (61), and a Flange Nut (57). | 14 | |
| ||
Tighten all parts used in this step and in step 2. |
| |
| 41 | |
| 57 | |
| 61 | |
| 89 | |
8. Attach the Storage Latch (12) to the left Upright (14) with | 8 | |
two 1/2Ó Screws (13). Be careful not to overtighten the | ||
| ||
Screws. |
| |
| 14 | |
| 13 | |
| 12 | |
9. Remove the backing from the Adhesive Clip (74). Press | 9 | |
the Adhesive Clip onto the base of the Uprights (14) in | ||
| ||
the indicated location. Press the Allen Wrench (73) into |
| |
the Adhesive Clip. | 14 | |
| ||
| 73 | |
| 74 |
10.Make sure that all parts are tightened before you use the treadmill. To protect the floor or carpet, place a mat under the treadmill.
7
