ASSEMBLY
Assembly requires two people. Set the treadmill in a cleared area and remove all packing materials. Do not dispose of the packing materials until assembly is completed. Refer to the drawings below to identify the small
parts used in assembly. Assembly requires the included allen wrench | and your own phillips screw- | ||
driver | , adjustable wrench | , and scissors | . |
Pulse Handrail Bolt (98)Ð2
Handrail Washer (16)Ð4
Flange Nut (57)Ð2
3/8" Washer (61)Ð2
![]() 1/2" Screw (13)Ð2 Extension Leg Screw (34)Ð2
1/2" Screw (13)Ð2 Extension Leg Screw (34)Ð2
Handrail Bolt (15)Ð2
3/4" Screw (91)Ð4
3 1/2" Handrail Bolt (89)Ð2
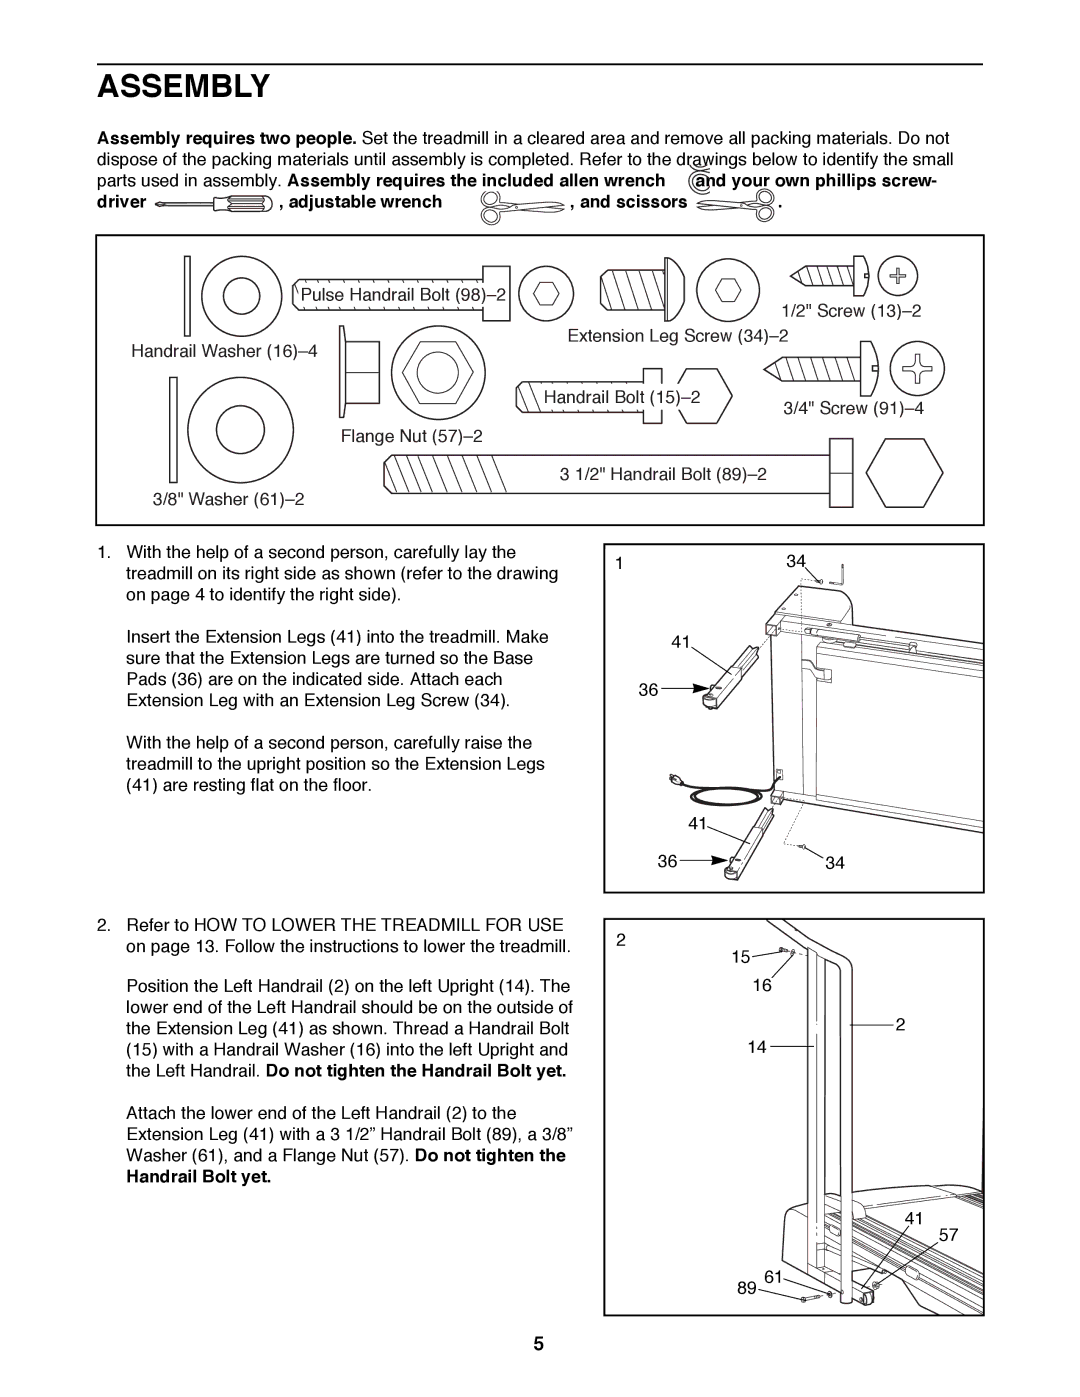
1.With the help of a second person, carefully lay the treadmill on its right side as shown (refer to the drawing on page 4 to identify the right side).
Insert the Extension Legs (41) into the treadmill. Make sure that the Extension Legs are turned so the Base Pads (36) are on the indicated side. Attach each Extension Leg with an Extension Leg Screw (34).
With the help of a second person, carefully raise the treadmill to the upright position so the Extension Legs (41) are resting flat on the floor.
2.Refer to HOW TO LOWER THE TREADMILL FOR USE on page 13. Follow the instructions to lower the treadmill.
Position the Left Handrail (2) on the left Upright (14). The lower end of the Left Handrail should be on the outside of the Extension Leg (41) as shown. Thread a Handrail Bolt (15) with a Handrail Washer (16) into the left Upright and the Left Handrail. Do not tighten the Handrail Bolt yet.
Attach the lower end of the Left Handrail (2) to the Extension Leg (41) with a 3 1/2Ó Handrail Bolt (89), a 3/8Ó Washer (61), and a Flange Nut (57). Do not tighten the
Handrail Bolt yet.
134
41
36
41
36 | 34 |
2
15![]()
16
2
14
41
57
89 61
5