500Er Owner’s Manual
500Er ASSEMBLY INSTRUCTIONS
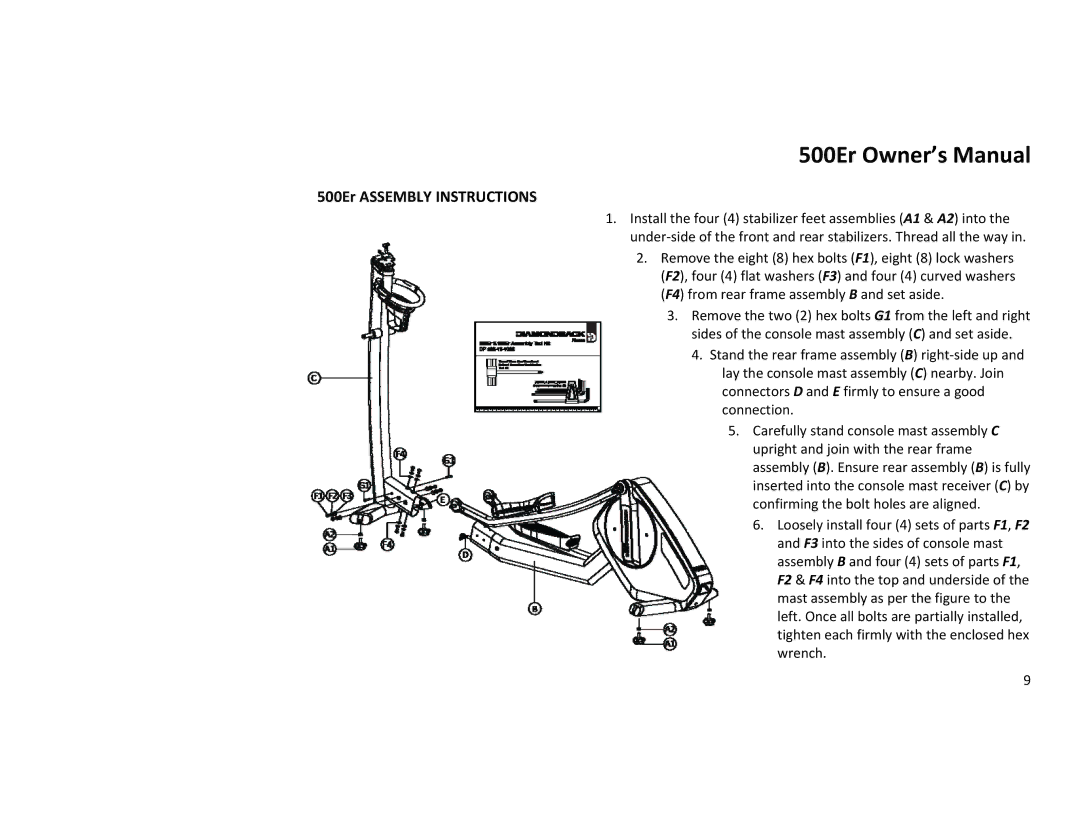
1.Install the four (4) stabilizer feet assemblies (A1 & A2) into the under‐side of the front and rear stabilizers. Thread all the way in.
2.Remove the eight (8) hex bolts (F1), eight (8) lock washers (F2), four (4) flat washers (F3) and four (4) curved washers (F4) from rear frame assembly B and set aside.
3.Remove the two (2) hex bolts G1 from the left and right sides of the console mast assembly (C) and set aside.
4.Stand the rear frame assembly (B) right‐side up and lay the console mast assembly (C) nearby. Join connectors D and E firmly to ensure a good connection.
5.Carefully stand console mast assembly C upright and join with the rear frame assembly (B). Ensure rear assembly (B) is fully inserted into the console mast receiver (C) by confirming the bolt holes are aligned.
6.Loosely install four (4) sets of parts F1, F2 and F3 into the sides of console mast assembly B and four (4) sets of parts F1, F2 & F4 into the top and underside of the mast assembly as per the figure to the left. Once all bolts are partially installed, tighten each firmly with the enclosed hex wrench.
9