|
| ADJUSTMENTS | |
|
|
| WOODS |
|
|
| |
|
|
| |
|
|
| |
|
|
| |
|
|
| |
|
|
| |
CONTROL LEVERS |
|
| |
There are two mounting positions for the control |
|
| |
levers, upper and lower. The lower position works |
|
| |
well for most people. Taller operators may need the |
|
| |
upper position. |
|
| |
To adjust the height of the control levers: |
|
| |
– Remove bolts A and nuts B. |
|
| |
– Align holes in control lever D with appropriate |
|
| |
| holes in traction lever bracket C. |
|
|
– Install bolts A and nuts B. |
|
| |
The upper mounting hole for the control levers is |
|
| |
slotted to allow |
|
| |
alignment of the levers. |
|
| |
To adjust or align the control levers: |
|
| |
– | Loosen nuts B. |
|
|
– Adjust control lever position. |
|
| |
– | Tighten nuts B. |
|
|
|
| ||
|
| ||
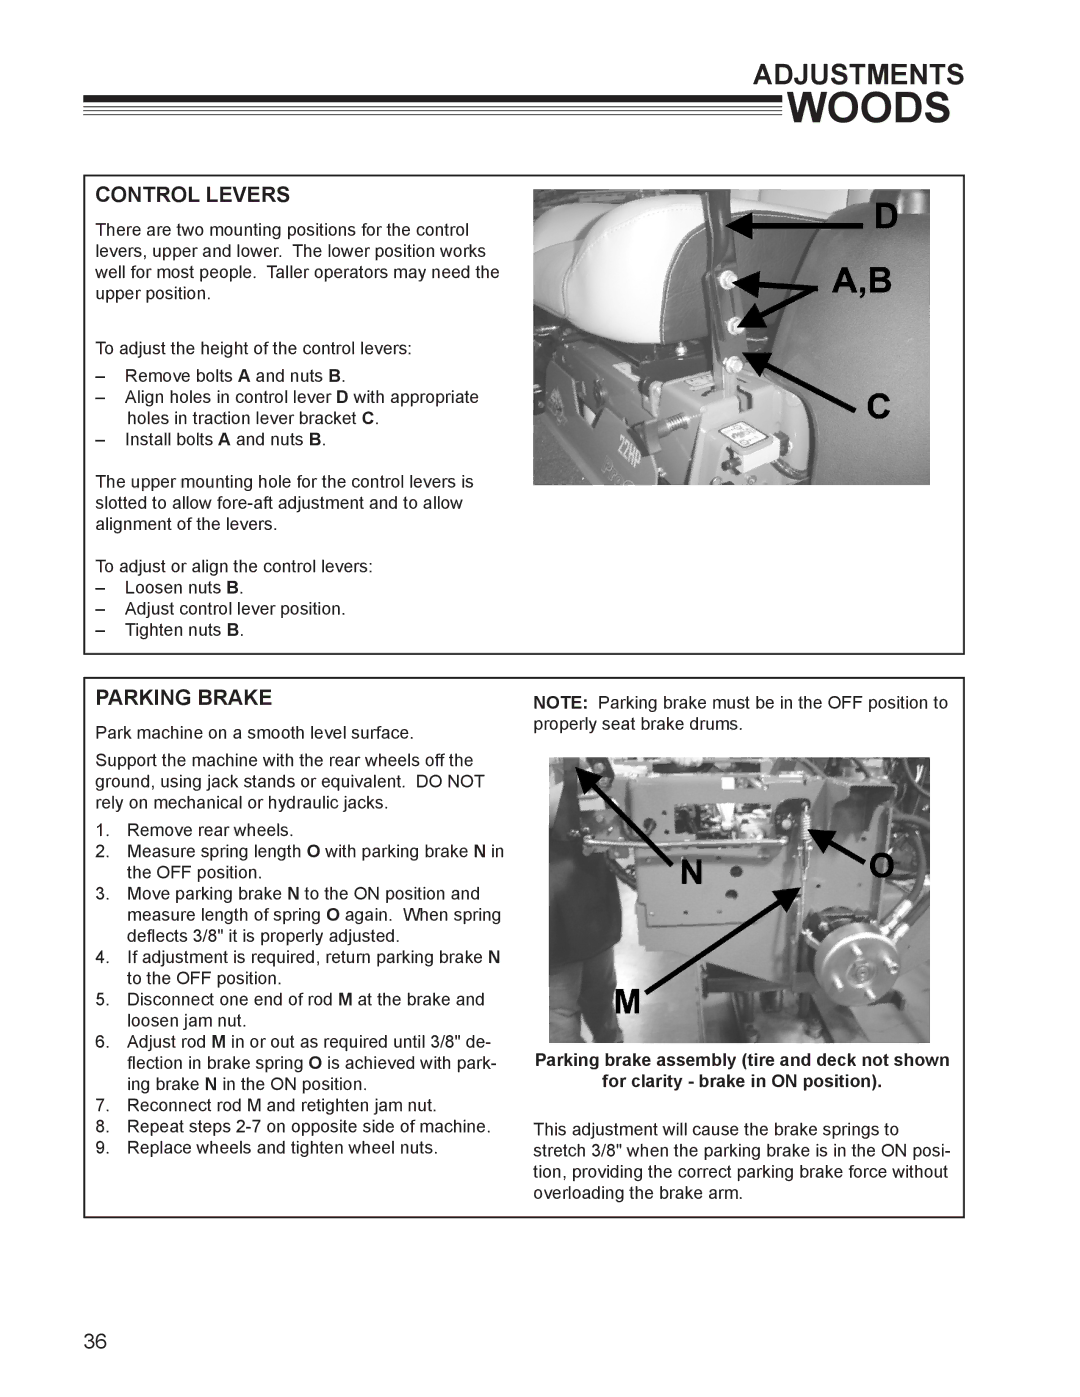
PARKING BRAKE | NOTE: Parking brake must be in the OFF position to | ||
Park machine on a smooth level surface. | properly seat brake drums. | ||
|
| ||
Support the machine with the rear wheels off the |
|
| |
ground, using jack stands or equivalent. DO NOT |
|
| |
rely on mechanical or hydraulic jacks. |
|
| |
1. | Remove rear wheels. |
|
|
2. | Measure spring length O with parking brake N in |
|
|
| the OFF position. |
|
|
3. | Move parking brake N to the ON position and |
|
|
| measure length of spring O again. When spring |
|
|
| deflects 3/8" it is properly adjusted. |
|
|
4. | If adjustment is required, return parking brake N |
|
|
| to the OFF position. |
|
|
5. | Disconnect one end of rod M at the brake and |
|
|
| loosen jam nut. |
|
|
6. | Adjust rod M in or out as required until 3/8" de- | Parking brake assembly (tire and deck not shown | |
| flection in brake spring O is achieved with park- | ||
| ing brake N in the ON position. | for clarity - brake in ON position). | |
7. | Reconnect rod M and retighten jam nut. |
|
|
8. | Repeat steps | This adjustment will cause the brake springs to | |
9. | Replace wheels and tighten wheel nuts. | stretch 3/8" when the parking brake is in the ON posi- | |
|
| tion, providing the correct parking brake force without | |
|
| overloading the brake arm. | |
|
|
|
|
36