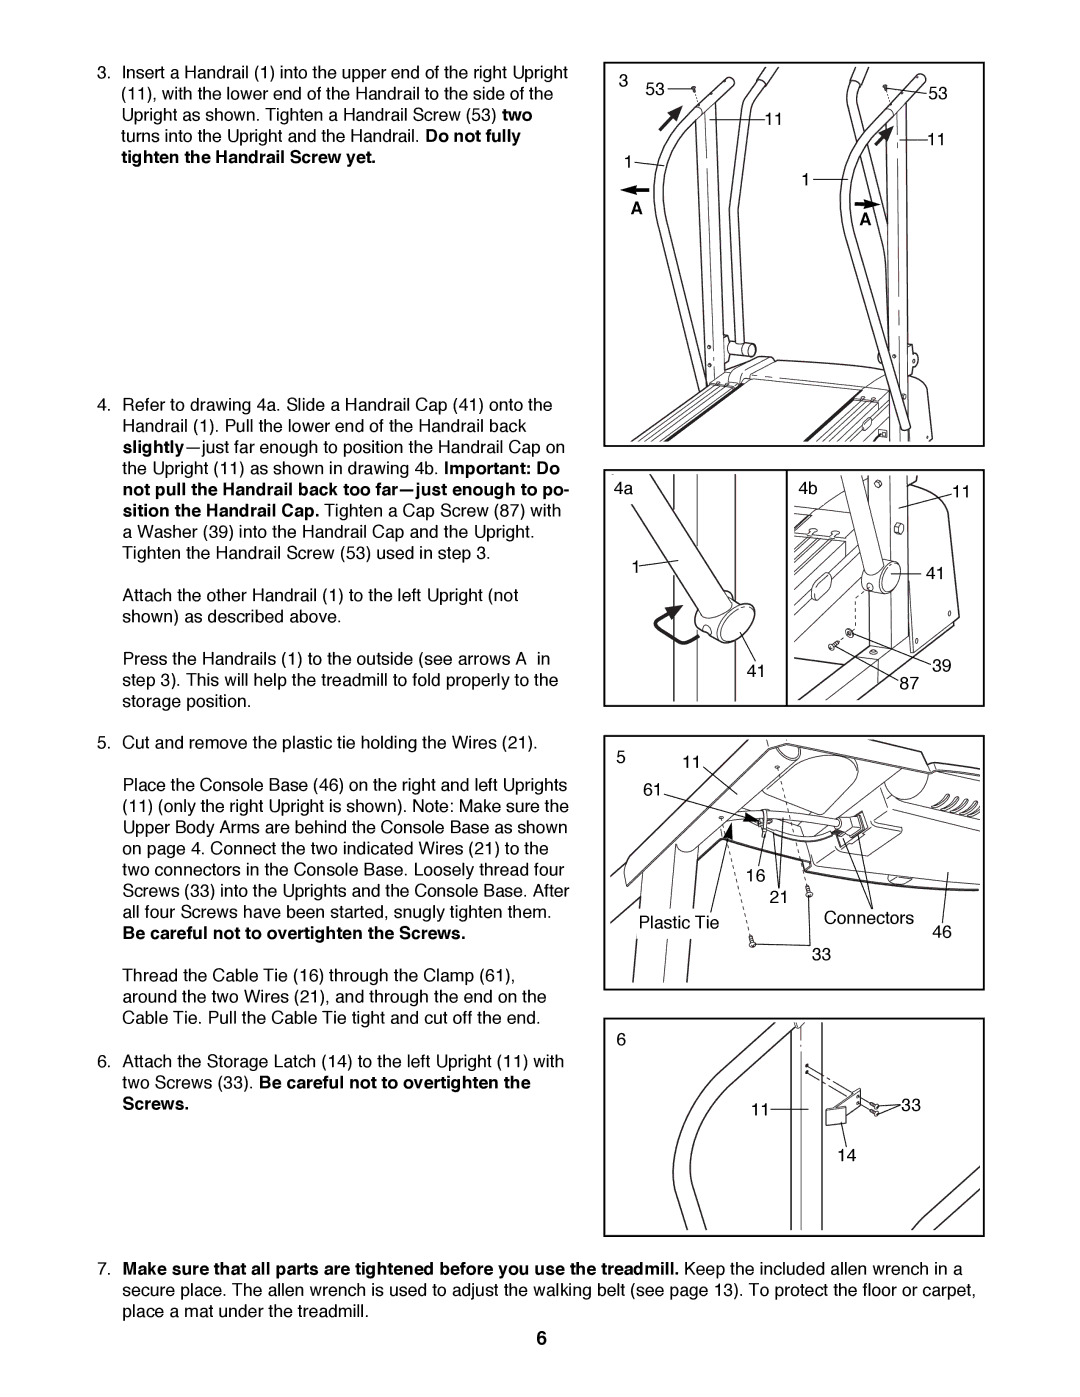
3.Insert a Handrail (1) into the upper end of the right Upright (11), with the lower end of the Handrail to the side of the Upright as shown. Tighten a Handrail Screw (53) two turns into the Upright and the Handrail. Do not fully tighten the Handrail Screw yet.
4.Refer to drawing 4a. Slide a Handrail Cap (41) onto the Handrail (1). Pull the lower end of the Handrail back slightlyÑjust far enough to position the Handrail Cap on the Upright (11) as shown in drawing 4b. Important: Do not pull the Handrail back too farÑjust enough to po- sition the Handrail Cap. Tighten a Cap Screw (87) with a Washer (39) into the Handrail Cap and the Upright. Tighten the Handrail Screw (53) used in step 3.
Attach the other Handrail (1) to the left Upright (not shown) as described above.
Press the Handrails (1) to the outside (see arrows A in step 3). This will help the treadmill to fold properly to the storage position.
5.Cut and remove the plastic tie holding the Wires (21).
Place the Console Base (46) on the right and left Uprights
(11)(only the right Upright is shown). Note: Make sure the Upper Body Arms are behind the Console Base as shown on page 4. Connect the two indicated Wires (21) to the two connectors in the Console Base. Loosely thread four Screws (33) into the Uprights and the Console Base. After all four Screws have been started, snugly tighten them.
Be careful not to overtighten the Screws.
Thread the Cable Tie (16) through the Clamp (61), around the two Wires (21), and through the end on the Cable Tie. Pull the Cable Tie tight and cut off the end.
6.Attach the Storage Latch (14) to the left Upright (11) with two Screws (33). Be careful not to overtighten the
Screws.
3 | 53 | 53 |
|
| 11 |
|
| 11 |
1 |
| 1 |
|
| |
A |
| A |
|
|
4a | 4b | 11 | |
| 1 |
| 41 |
|
|
| |
| 41 | 87 | 39 |
|
| ||
|
|
| |
5 | 11 |
|
|
|
|
| |
| 61 |
|
|
| 16 |
|
|
| 21 |
|
|
| Plastic Tie | Connectors | 46 |
|
|
| |
|
| 33 |
|
6 |
|
|
|
| 11 | 33 |
|
|
| 14 |
|
7.Make sure that all parts are tightened before you use the treadmill. Keep the included allen wrench in a secure place. The allen wrench is used to adjust the walking belt (see page 13). To protect the floor or carpet, place a mat under the treadmill.
6
