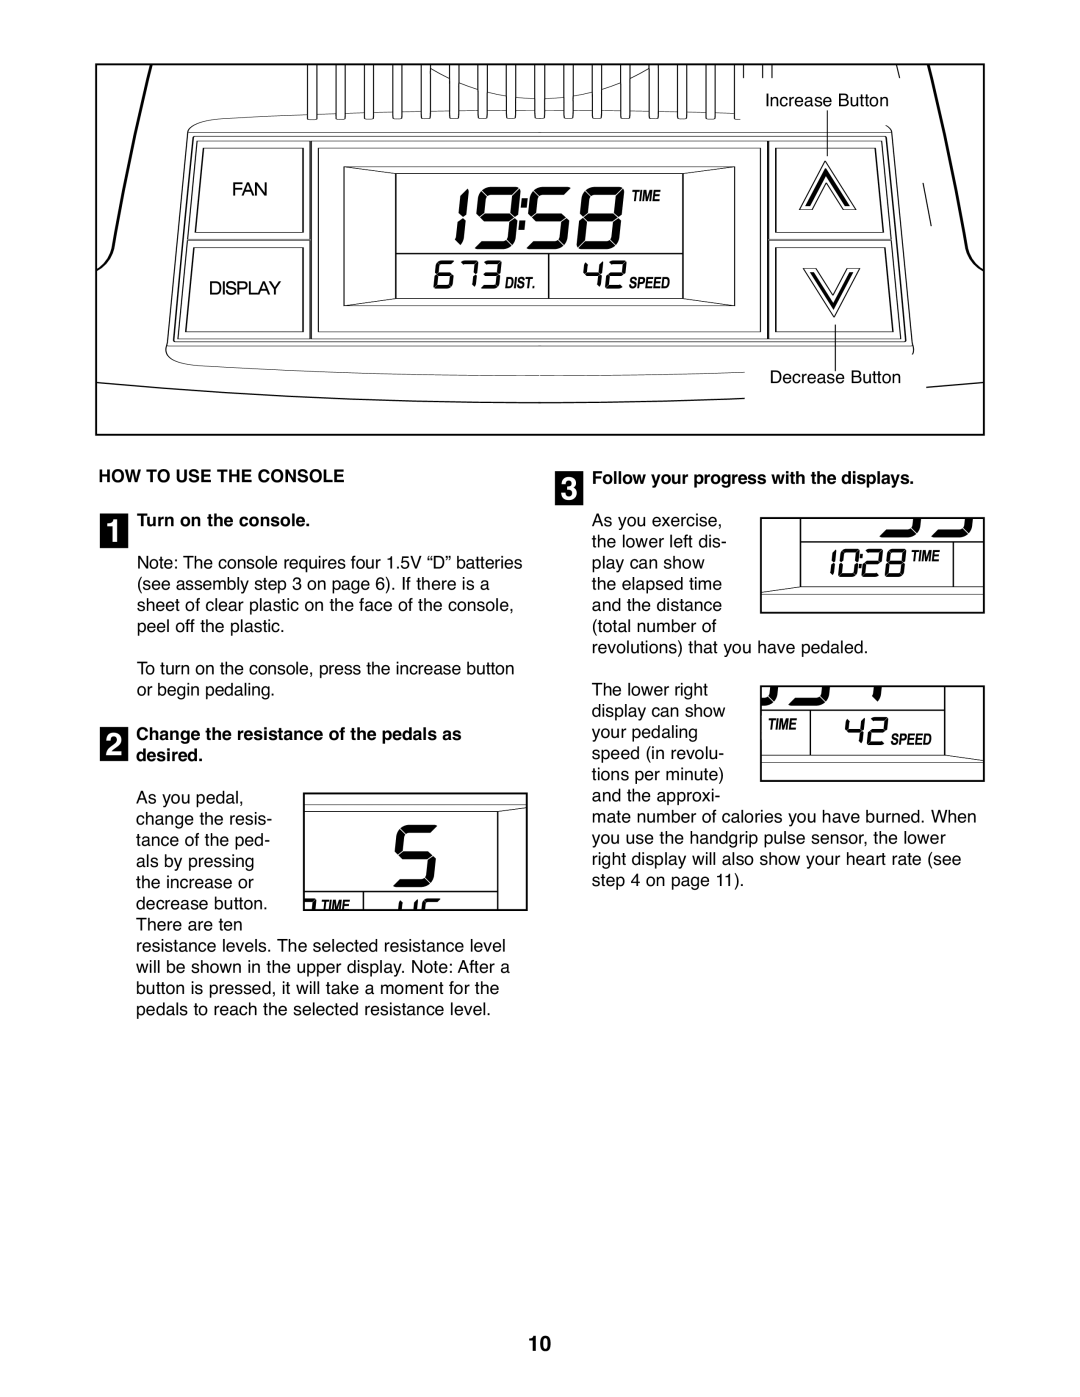
Increase Button |
Decrease Button |
HOW TO USE THE CONSOLE
| Turn on the console. | |||||
1 | ||||||
Note: The console requires four 1.5V “D” batteries | ||||||
| ||||||
| (see assembly step 3 on page 6). If there is a | |||||
| sheet of clear plastic on the face of the console, | |||||
| peel off the plastic. | |||||
| To turn on the console, press the increase button | |||||
2 | or begin pedaling. | |||||
desired.Change the resistance of the pedals as | ||||||
| As you pedal, |
| ||||
|
| |||||
| change the resis- |
|
|
|
| |
|
|
|
|
| ||
| tance of the ped- |
|
| |||
| als by pressing |
|
| |||
| the increase or |
|
| |||
| decrease button. |
|
|
|
| |
|
|
|
|
| ||
| There are ten |
|
|
| ||
| resistance levels. The selected resistance level | |||||
| will be shown in the upper display. Note: After a | |||||
| button is pressed, it will take a moment for the | |||||
| pedals to reach the selected resistance level. | |||||
Follow your progress with the displays.
As you exercise, the lower left dis- play can show the elapsed time and the distance (total number of
revolutions) that you have pedaled. The lower right
display can show your pedaling speed (in revolu- tions per minute) and the approxi-
mate number of calories you have burned. When you use the handgrip pulse sensor, the lower right display will also show your heart rate (see step 4 on page 11).
10