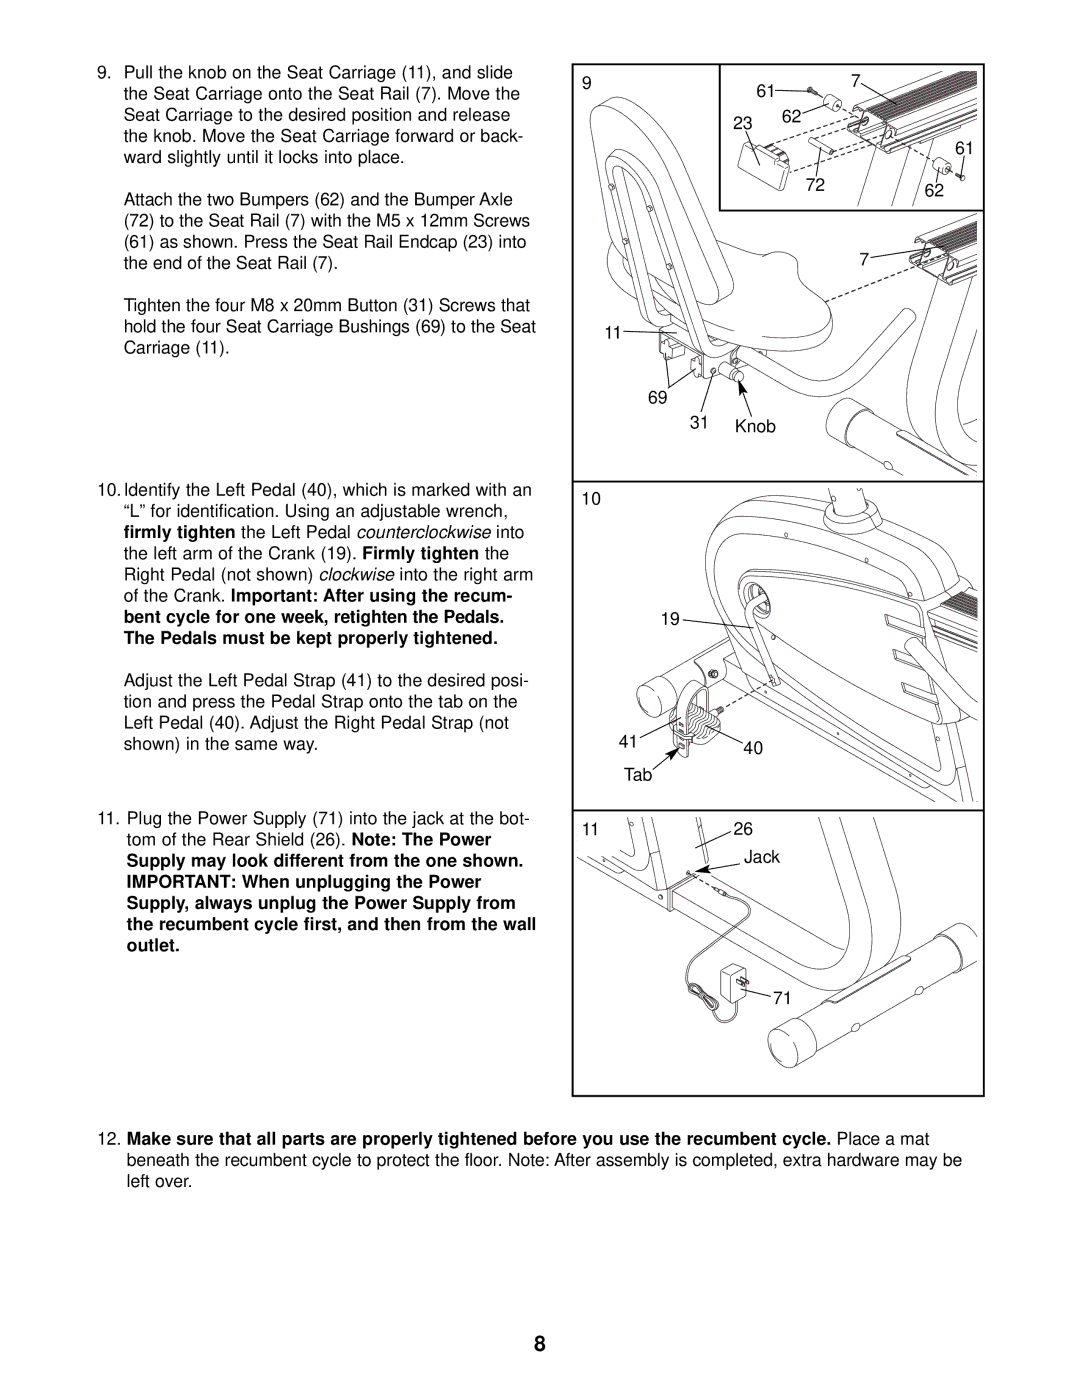
9. Pull the knob on the Seat Carriage (11), and slide | 9 |
| 61 |
|
| 7 |
the Seat Carriage onto the Seat Rail (7). Move the |
|
|
| |||
|
|
|
|
| ||
Seat Carriage to the desired position and release |
|
| 23 | 62 |
|
|
the knob. Move the Seat Carriage forward or back- |
|
|
|
|
| |
|
|
|
|
| 61 | |
ward slightly until it locks into place. |
|
|
|
|
| |
|
|
|
|
|
| |
Attach the two Bumpers (62) and the Bumper Axle |
|
|
|
| 72 | 62 |
|
|
|
|
| ||
|
|
|
|
|
| |
(72) to the Seat Rail (7) with the M5 x 12mm Screws |
|
|
|
|
|
|
(61) as shown. Press the Seat Rail Endcap (23) into |
|
|
|
|
| 7 |
the end of the Seat Rail (7). |
|
|
|
|
| |
Tighten the four M8 x 20mm Button (31) Screws that |
|
|
|
|
|
|
hold the four Seat Carriage Bushings (69) to the Seat |
| 11 |
|
|
|
|
Carriage (11). |
|
|
|
|
| |
|
|
|
|
|
| |
|
| 69 |
|
|
|
|
|
| 31 | Knob |
|
|
|
10. Identify the Left Pedal (40), which is marked with an | 10 |
|
|
|
|
|
“L” for identification. Using an adjustable wrench, |
|
|
|
|
| |
|
|
|
|
|
| |
firmly tighten the Left Pedal counterclockwise into |
|
|
|
|
|
|
the left arm of the Crank (19). Firmly tighten the |
|
|
|
|
|
|
Right Pedal (not shown) clockwise into the right arm |
|
|
|
|
|
|
of the Crank. Important: After using the recum- |
|
|
|
|
|
|
bent cycle for one week, retighten the Pedals. |
| 19 |
|
|
|
|
The Pedals must be kept properly tightened. |
|
|
|
|
|
|
Adjust the Left Pedal Strap (41) to the desired posi- |
|
|
|
|
|
|
tion and press the Pedal Strap onto the tab on the |
|
|
|
|
|
|
Left Pedal (40). Adjust the Right Pedal Strap (not |
| 41 |
|
|
|
|
shown) in the same way. |
| 40 |
|
|
| |
|
| Tab |
|
|
|
|
11. Plug the Power Supply (71) into the jack at the bot- | 11 |
| 26 |
|
|
|
tom of the Rear Shield (26). Note: The Power |
|
|
|
| ||
|
| Jack |
|
|
| |
Supply may look different from the one shown. |
|
|
|
|
| |
IMPORTANT: When unplugging the Power |
|
|
|
|
|
|
Supply, always unplug the Power Supply from |
|
|
|
|
|
|
the recumbent cycle first, and then from the wall |
|
|
|
|
|
|
outlet. |
|
|
|
|
|
|
|
|
| 71 |
|
| |
12.Make sure that all parts are properly tightened before you use the recumbent cycle. Place a mat beneath the recumbent cycle to protect the floor. Note: After assembly is completed, extra hardware may be left over.
8