ASSEMBLY
Assembly requires two persons. Set the treadmill in a cleared area and remove all packing materials. Do not dispose of the packing materials until assembly is completed. Note: The underside of the treadmill walking belt is coated with
Assembly requires the included allen wrenches | and your own phillips screwdriver | , | |
adjustable wrench | , wire cutters | , and needlenose pliers | . |
For help identifying the assembly hardware, refer to the PART IDENTIFICATION CHART below. Note: The assembly hardware and other small parts are packaged in separate part bags. Do not open the part bags until instructed to do so.
1” Tek Screw | 1/2” Silver Screw | 3/4” Screw | Crossbar Screw |
| |||
|
| ||
1” Bolt | 2” Bolt | 1/4” Star |
|
|
| 5/16” Star | |
|
| Washer | |
|
|
| Washer |
Wheel Bolt |
|
|
|
|
| 1/4” Washer |
|
3” Bolt |
| Wheel Nut |
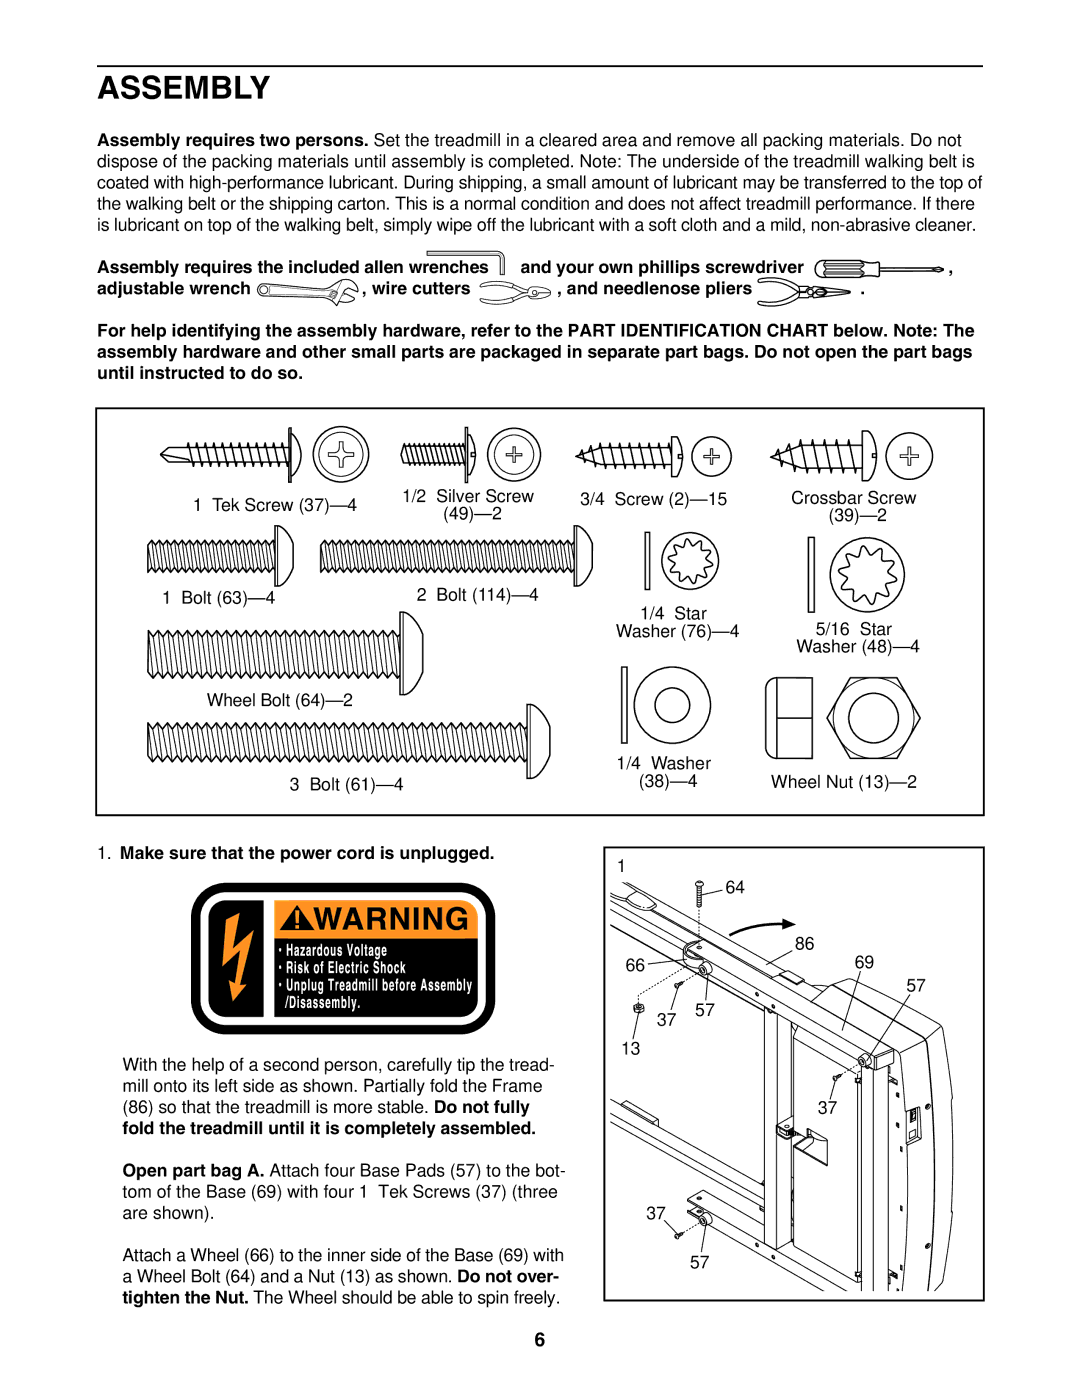
1. Make sure that the power cord is unplugged. |
|
|
1 |
|
|
|
| 64 |
|
| 86 |
66 |
| 69 |
|
| 57 |
| 37 | 57 |
13 |
|
|
With the help of a second person, carefully tip the tread- |
|
|
mill onto its left side as shown. Partially fold the Frame |
|
|
(86) so that the treadmill is more stable. Do not fully |
| 37 |
fold the treadmill until it is completely assembled. |
|
|
Open part bag A. Attach four Base Pads (57) to the bot- |
|
|
tom of the Base (69) with four 1” Tek Screws (37) (three |
|
|
are shown). | 37 |
|
Attach a Wheel (66) to the inner side of the Base (69) with |
| 57 |
a Wheel Bolt (64) and a Nut (13) as shown. Do not over- |
| |
|
| |
tighten the Nut. The Wheel should be able to spin freely. |
|
|
6