INSTALLATION (3) UA-PRO210
|
|
| Step 5: |
|
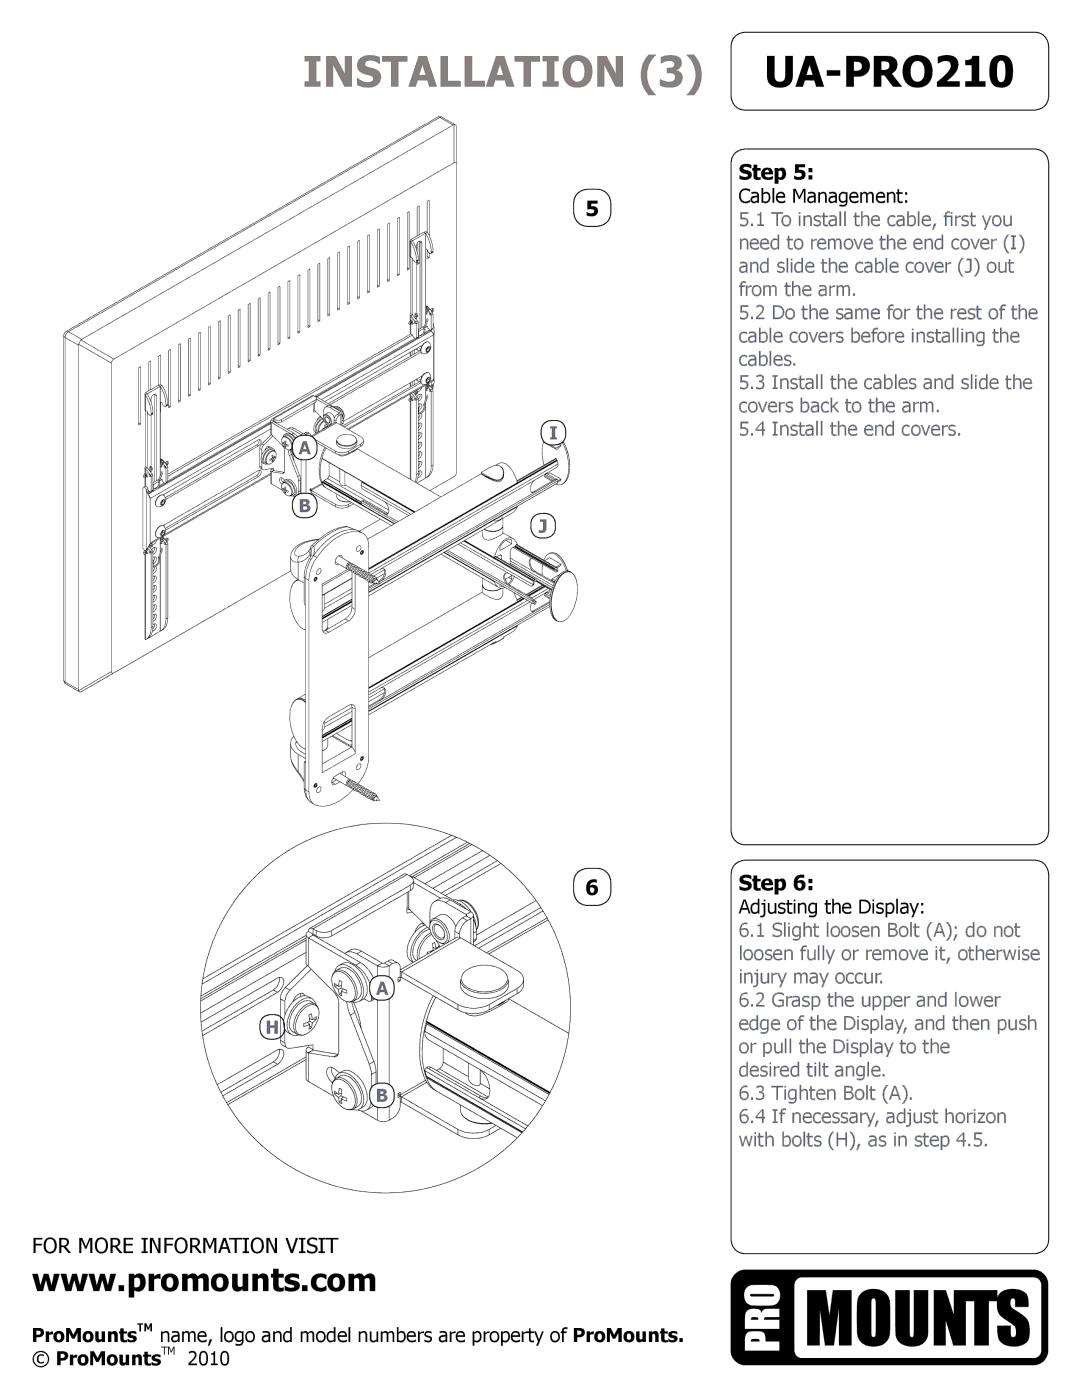
| 5 | Cable Management: |
|
| 5.1 To install the cable, first you | |
|
|
| |
|
|
| need to remove the end cover (I) |
|
|
| and slide the cable cover (J) out |
|
|
| from the arm. |
|
|
| 5.2 Do the same for the rest of the |
|
|
| cable covers before installing the |
|
|
| cables. |
|
|
| 5.3 Install the cables and slide the |
|
|
| covers back to the arm. |
A | I |
| 5.4 Install the end covers. |
|
|
|
B
J
6 | Step 6: | |
| Adjusting the Display: | |
| 6.1 Slight loosen Bolt (A); do not | |
| loosen fully or remove it, otherwise | |
A | injury may occur. | |
6.2 Grasp the upper and lower | ||
| ||
H | edge of the Display, and then push | |
| or pull the Display to the | |
| desired tilt angle. | |
B | 6.3 Tighten Bolt (A). | |
| 6.4 If necessary, adjust horizon | |
| with bolts (H), as in step 4.5. |
FOR MORE INFORMATION VISIT
www.promounts.com
ProMountsTM name, logo and model numbers are property of ProMounts. | 5 |
© ProMountsTM 2010 |
