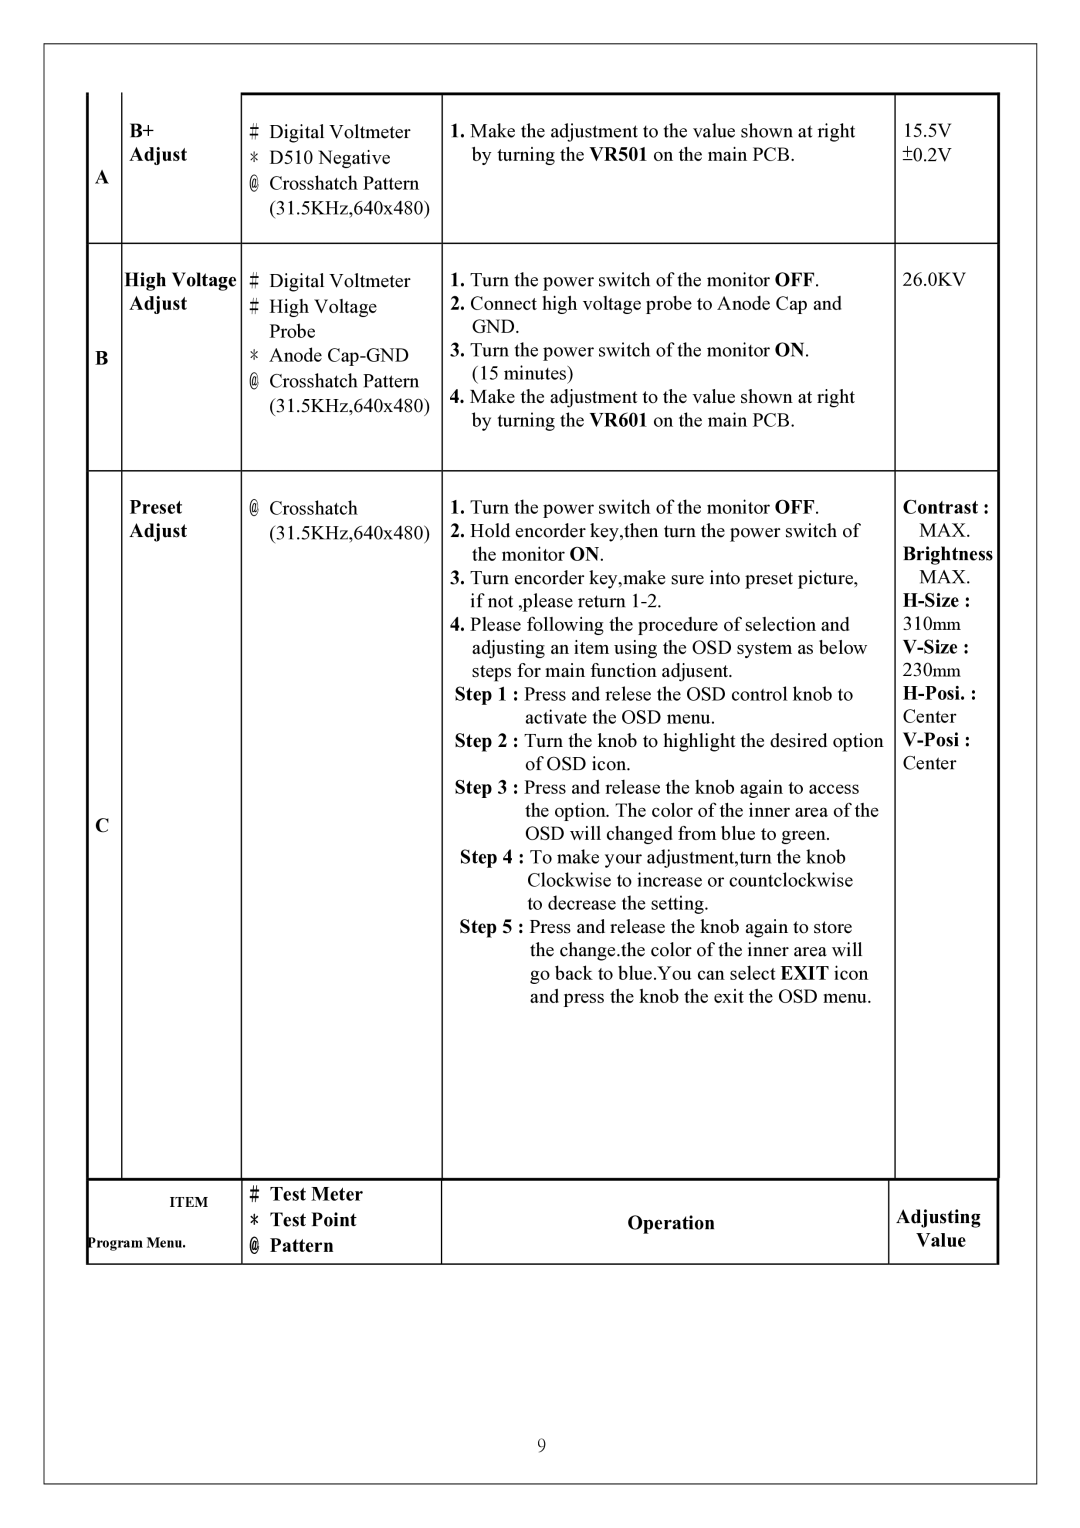
| B+ | ﹟Digital Voltmeter | 1. Make the adjustment to the value shown at right | 15.5V |
A | Adjust | ﹡D510 Negative | by turning the VR501 on the main PCB. | ±0.2V |
| ﹫Crosshatch Pattern |
|
| |
|
| (31.5KHz,640x480) |
|
|
|
|
|
|
|
| High Voltage | ﹟Digital Voltmeter | 1. Turn the power switch of the monitor OFF. | 26.0KV |
| Adjust | ﹟High Voltage | 2. Connect high voltage probe to Anode Cap and |
|
|
| Probe | GND. |
|
B |
| ﹡Anode | 3. Turn the power switch of the monitor ON. |
|
|
| ﹫Crosshatch Pattern | (15 minutes) |
|
|
| 4. Make the adjustment to the value shown at right |
| |
|
| (31.5KHz,640x480) |
| |
|
|
| by turning the VR601 on the main PCB. |
|
|
|
|
|
|
| Preset | ﹫Crosshatch | 1. Turn the power switch of the monitor OFF. | Contrast : |
| Adjust | (31.5KHz,640x480) | 2. Hold encorder key,then turn the power switch of | MAX. |
|
|
| the monitor ON. | Brightness |
|
|
| 3. Turn encorder key,make sure into preset picture, | MAX. |
|
|
| if not ,please return |
|
|
|
| 4. Please following the procedure of selection and | 310mm |
|
|
| adjusting an item using the OSD system as below | |
|
|
| steps for main function adjusent. | 230mm |
|
|
| Step 1 : Press and relese the OSD control knob to | |
|
|
| activate the OSD menu. | Center |
|
|
| Step 2 : Turn the knob to highlight the desired option | |
|
|
| of OSD icon. | Center |
|
|
| Step 3 : Press and release the knob again to access |
|
C |
|
| the option. The color of the inner area of the |
|
|
| OSD will changed from blue to green. |
| |
|
|
|
| |
|
|
| Step 4 : To make your adjustment,turn the knob |
|
|
|
| Clockwise to increase or countclockwise |
|
|
|
| to decrease the setting. |
|
|
|
| Step 5 : Press and release the knob again to store |
|
|
|
| the change.the color of the inner area will |
|
|
|
| go back to blue.You can select EXIT icon |
|
|
|
| and press the knob the exit the OSD menu. |
|
|
|
|
|
|
ITEM
Program Menu.
﹟Test Meter ﹡Test Point ﹫Pattern
Operation
Adjusting
Value
9