RIPPING |
|
|
|
|
|
Ripping is cutting wood lengthwise. This |
|
|
|
|
|
operation is performed the same as |
|
|
|
|
|
|
| A |
| ||
crosscutting with the exception of |
|
|
| ||
|
|
|
|
| |
supporting the workpiece. If the |
|
|
|
|
|
workpiece is supported on a large table, |
|
|
|
|
|
bench, or floor, several pieces of scrap |
|
|
|
|
|
stock approximately one inch thick |
|
|
|
|
|
should be placed beneath the workpiece |
|
|
|
|
|
to allow clearance for the protruding |
|
|
|
|
|
section of the blade. Large sheets of |
| Fig. 10 |
|
| |
paneling or thin plywood supported on |
|
|
|
|
|
|
|
|
|
| |
|
|
|
|
| |
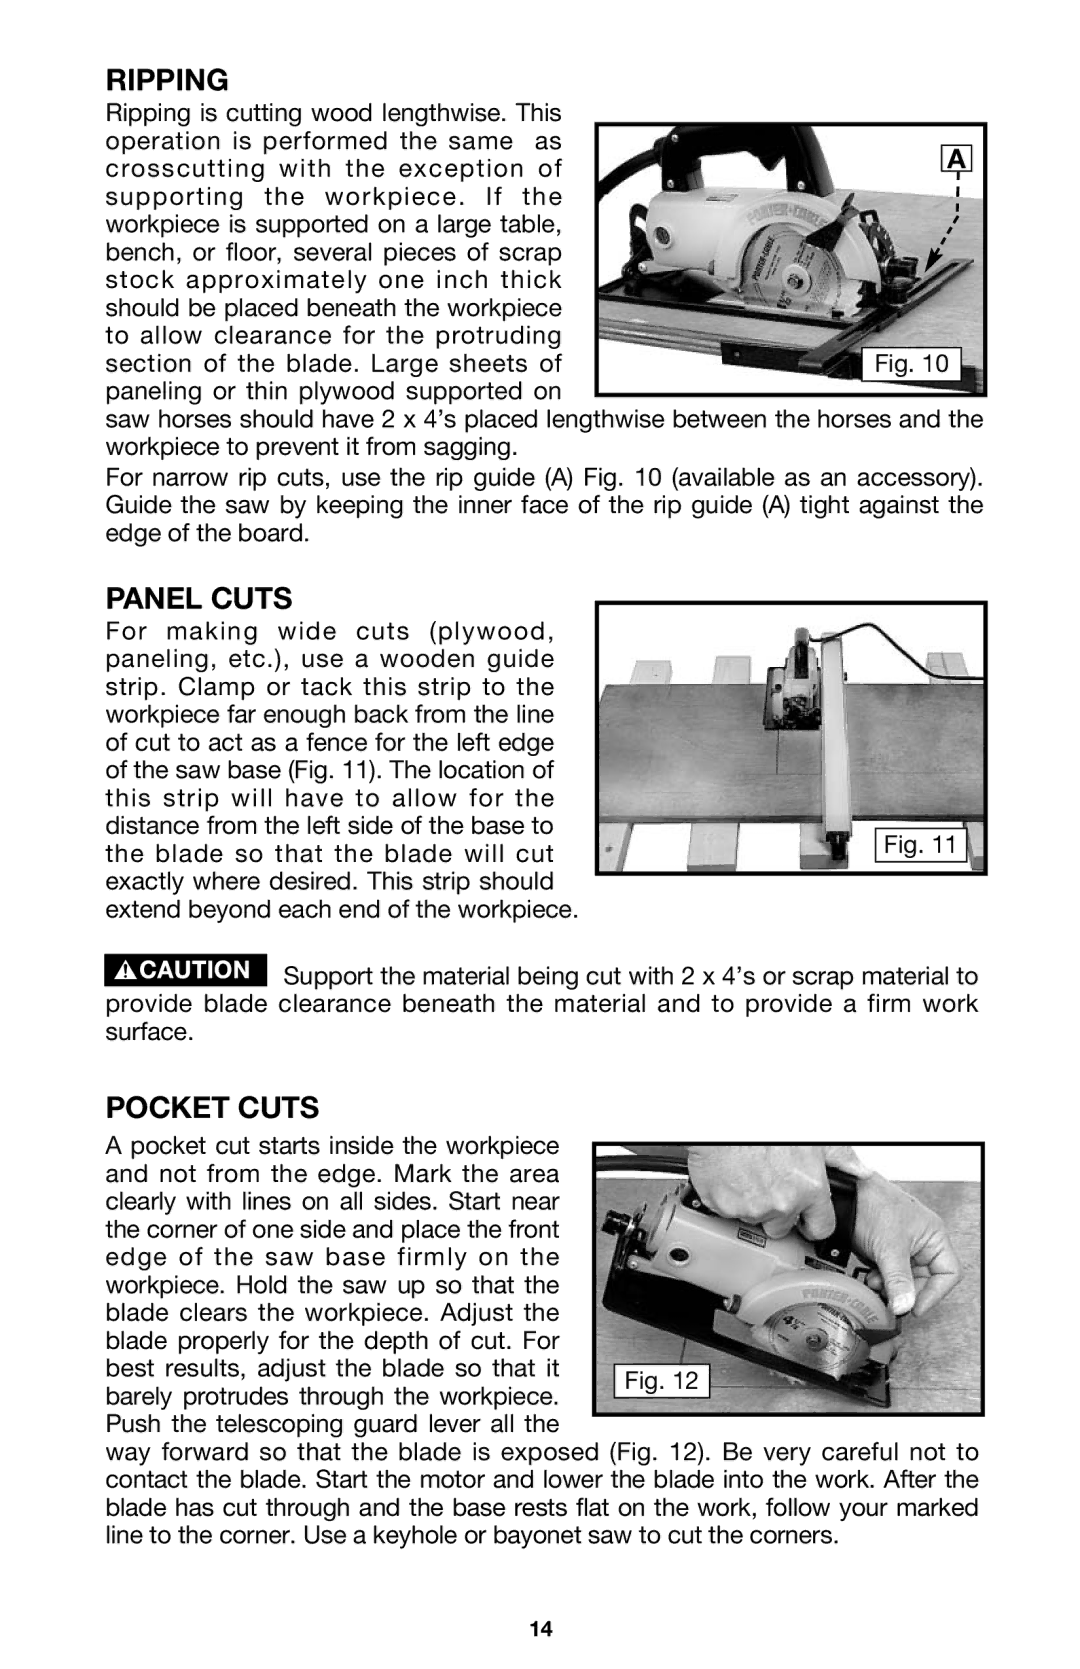
saw horses should have 2 x 4’s placed lengthwise between the horses and the workpiece to prevent it from sagging.
For narrow rip cuts, use the rip guide (A) Fig. 10 (available as an accessory). Guide the saw by keeping the inner face of the rip guide (A) tight against the edge of the board.
PANEL CUTS
For making wide cuts (plywood, paneling, etc.), use a wooden guide strip. Clamp or tack this strip to the workpiece far enough back from the line of cut to act as a fence for the left edge of the saw base (Fig. 11). The location of this strip will have to allow for the distance from the left side of the base to the blade so that the blade will cut exactly where desired. This strip should extend beyond each end of the workpiece.
Fig. 11
![]() Support the material being cut with 2 x 4’s or scrap material to provide blade clearance beneath the material and to provide a firm work surface.
Support the material being cut with 2 x 4’s or scrap material to provide blade clearance beneath the material and to provide a firm work surface.
POCKET CUTS
A pocket cut starts inside the workpiece and not from the edge. Mark the area clearly with lines on all sides. Start near the corner of one side and place the front edge of the saw base firmly on the workpiece. Hold the saw up so that the blade clears the workpiece. Adjust the blade properly for the depth of cut. For best results, adjust the blade so that it barely protrudes through the workpiece. Push the telescoping guard lever all the
way forward so that the blade is exposed (Fig. 12). Be very careful not to contact the blade. Start the motor and lower the blade into the work. After the blade has cut through and the base rests flat on the work, follow your marked line to the corner. Use a keyhole or bayonet saw to cut the corners.
14
