TO FOLLOW THE LINE OF CUT
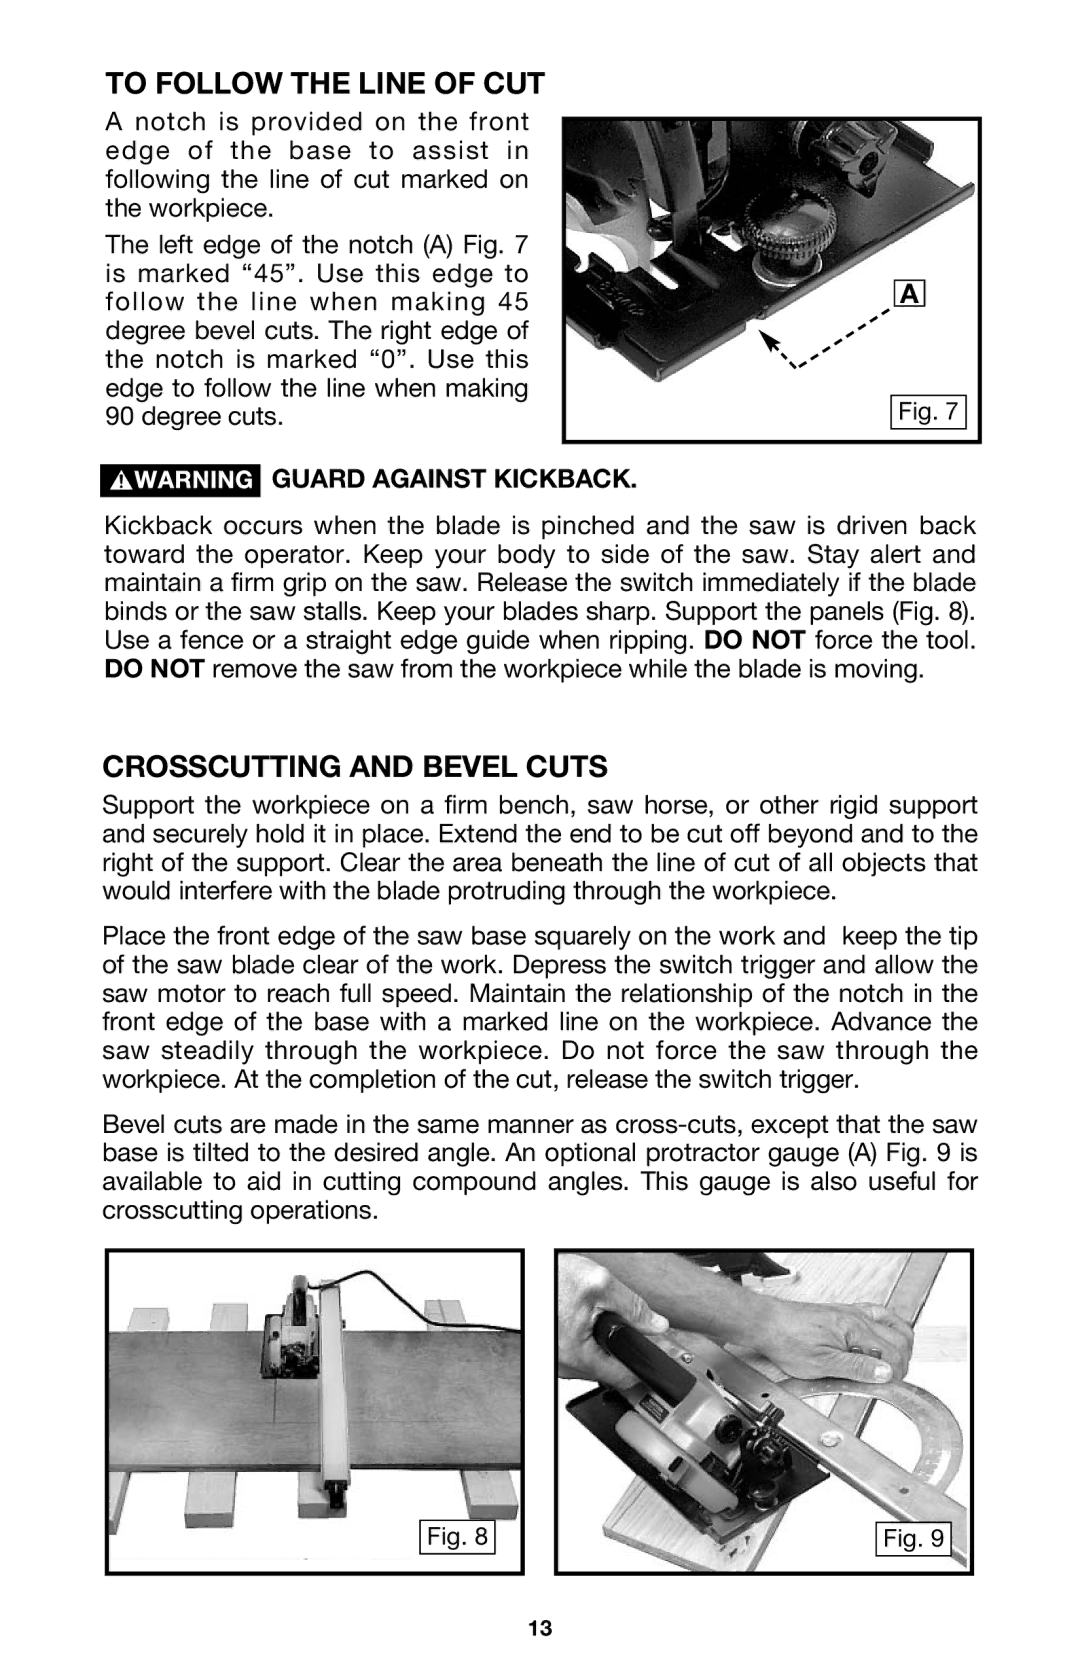
A notch is provided on the front edge of the base to assist in following the line of cut marked on the workpiece.
The left edge of the notch (A) Fig. 7 is marked “45”. Use this edge to follow the line when making 45 degree bevel cuts. The right edge of the notch is marked “0”. Use this edge to follow the line when making 90 degree cuts.
 GUARD AGAINST KICKBACK.
A
Fig. 7
Kickback occurs when the blade is pinched and the saw is driven back toward the operator. Keep your body to side of the saw. Stay alert and maintain a firm grip on the saw. Release the switch immediately if the blade binds or the saw stalls. Keep your blades sharp. Support the panels (Fig. 8). Use a fence or a straight edge guide when ripping. DO NOT force the tool. DO NOT remove the saw from the workpiece while the blade is moving.
CROSSCUTTING AND BEVEL CUTS
Support the workpiece on a firm bench, saw horse, or other rigid support and securely hold it in place. Extend the end to be cut off beyond and to the right of the support. Clear the area beneath the line of cut of all objects that would interfere with the blade protruding through the workpiece.
Place the front edge of the saw base squarely on the work and keep the tip of the saw blade clear of the work. Depress the switch trigger and allow the saw motor to reach full speed. Maintain the relationship of the notch in the front edge of the base with a marked line on the workpiece. Advance the saw steadily through the workpiece. Do not force the saw through the workpiece. At the completion of the cut, release the switch trigger.
Bevel cuts are made in the same manner as
Fig. 8
Fig. 9
13
