INSTALLATION
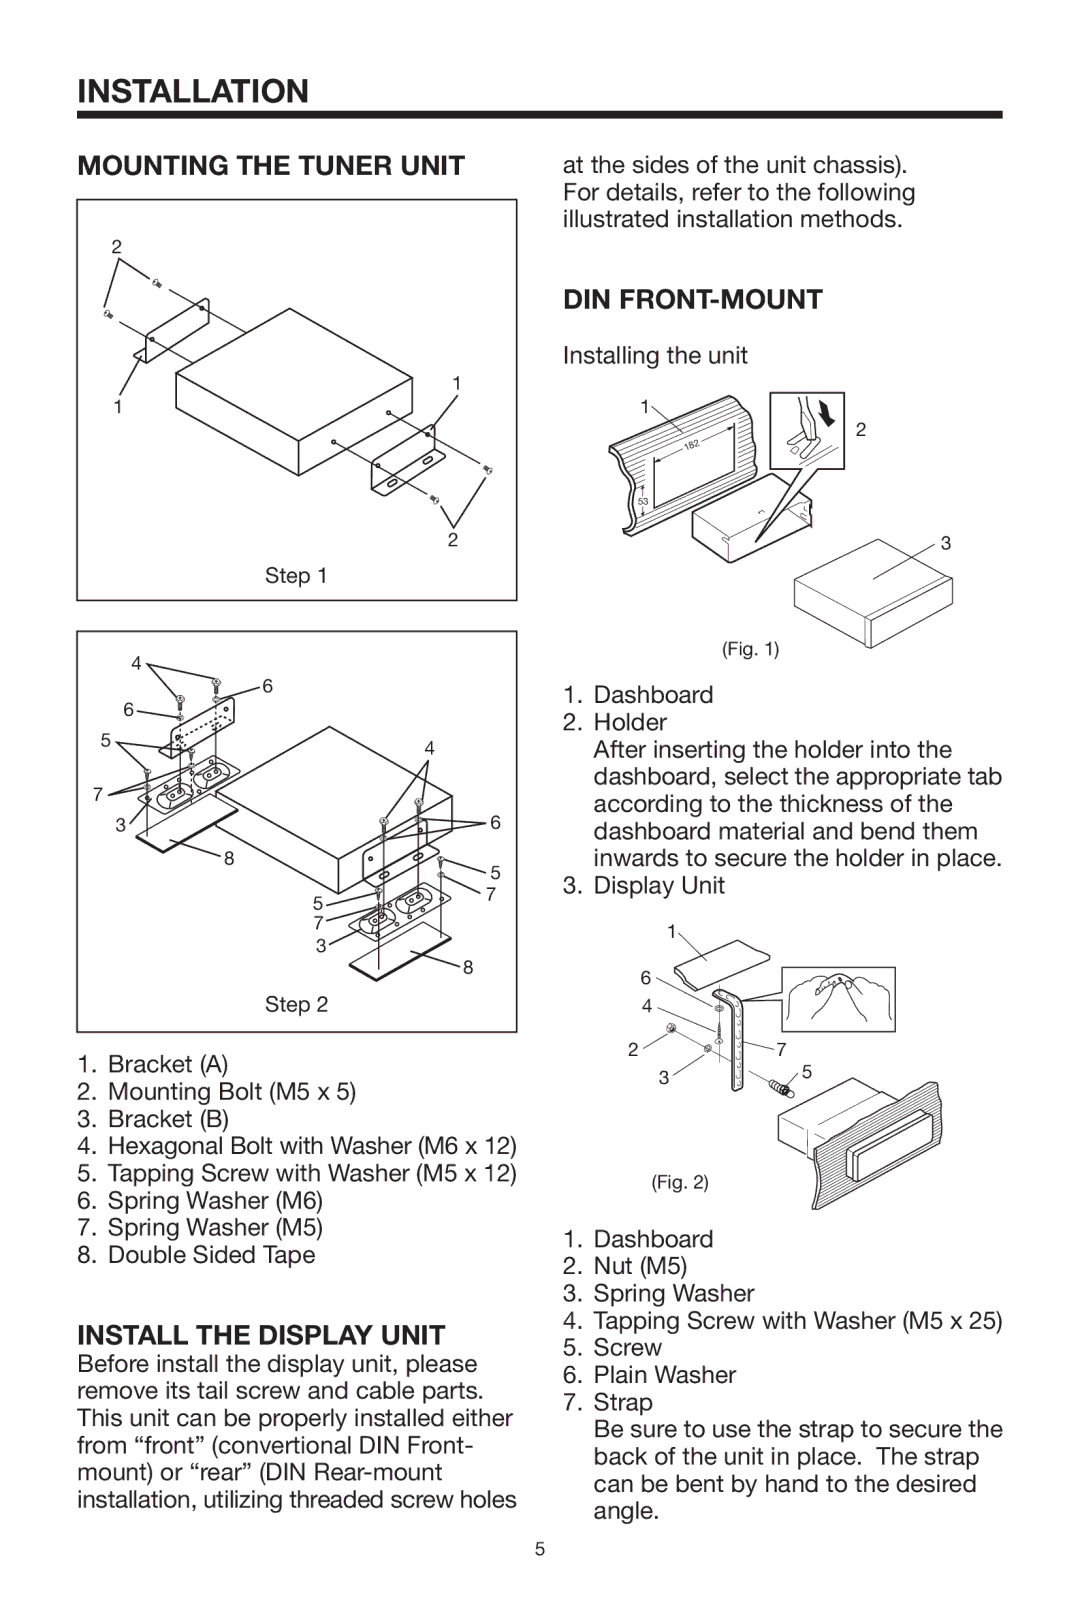
MOUNTING THE TUNER UNIT
2 |
|
|
|
| 1 |
1 |
|
|
|
| 2 |
| Step 1 |
|
4 |
|
|
| 6 |
|
6 |
|
|
5 |
| 4 |
|
| |
7 |
|
|
3 |
| 6 |
| 8 | 5 |
|
| |
| 5 | 7 |
|
| |
| 7 |
|
| 3 | 8 |
|
|
Step 2
1.Bracket (A)
2.Mounting Bolt (M5 x 5)
3.Bracket (B)
4.Hexagonal Bolt with Washer (M6 x 12)
5.Tapping Screw with Washer (M5 x 12)
6.Spring Washer (M6)
7.Spring Washer (M5)
8.Double Sided Tape
INSTALL THE DISPLAY UNIT
Before install the display unit, please remove its tail screw and cable parts. This unit can be properly installed either from “front” (convertional DIN Front- mount) or “rear” (DIN
at the sides of the unit chassis). For details, refer to the following illustrated installation methods.
DIN FRONT-MOUNT
Installing the unit
1
2
53
3
(Fig. 1)
1.Dashboard
2.Holder
After inserting the holder into the dashboard, select the appropriate tab according to the thickness of the dashboard material and bend them inwards to secure the holder in place.
3.Display Unit
1
6
4
2 | 7 |
35
(Fig. 2)
1.Dashboard
2.Nut (M5)
3.Spring Washer
4.Tapping Screw with Washer (M5 x 25)
5.Screw
6.Plain Washer
7.Strap
Be sure to use the strap to secure the back of the unit in place. The strap can be bent by hand to the desired angle.
5