INSTALLATION
Ceiling-on Installation
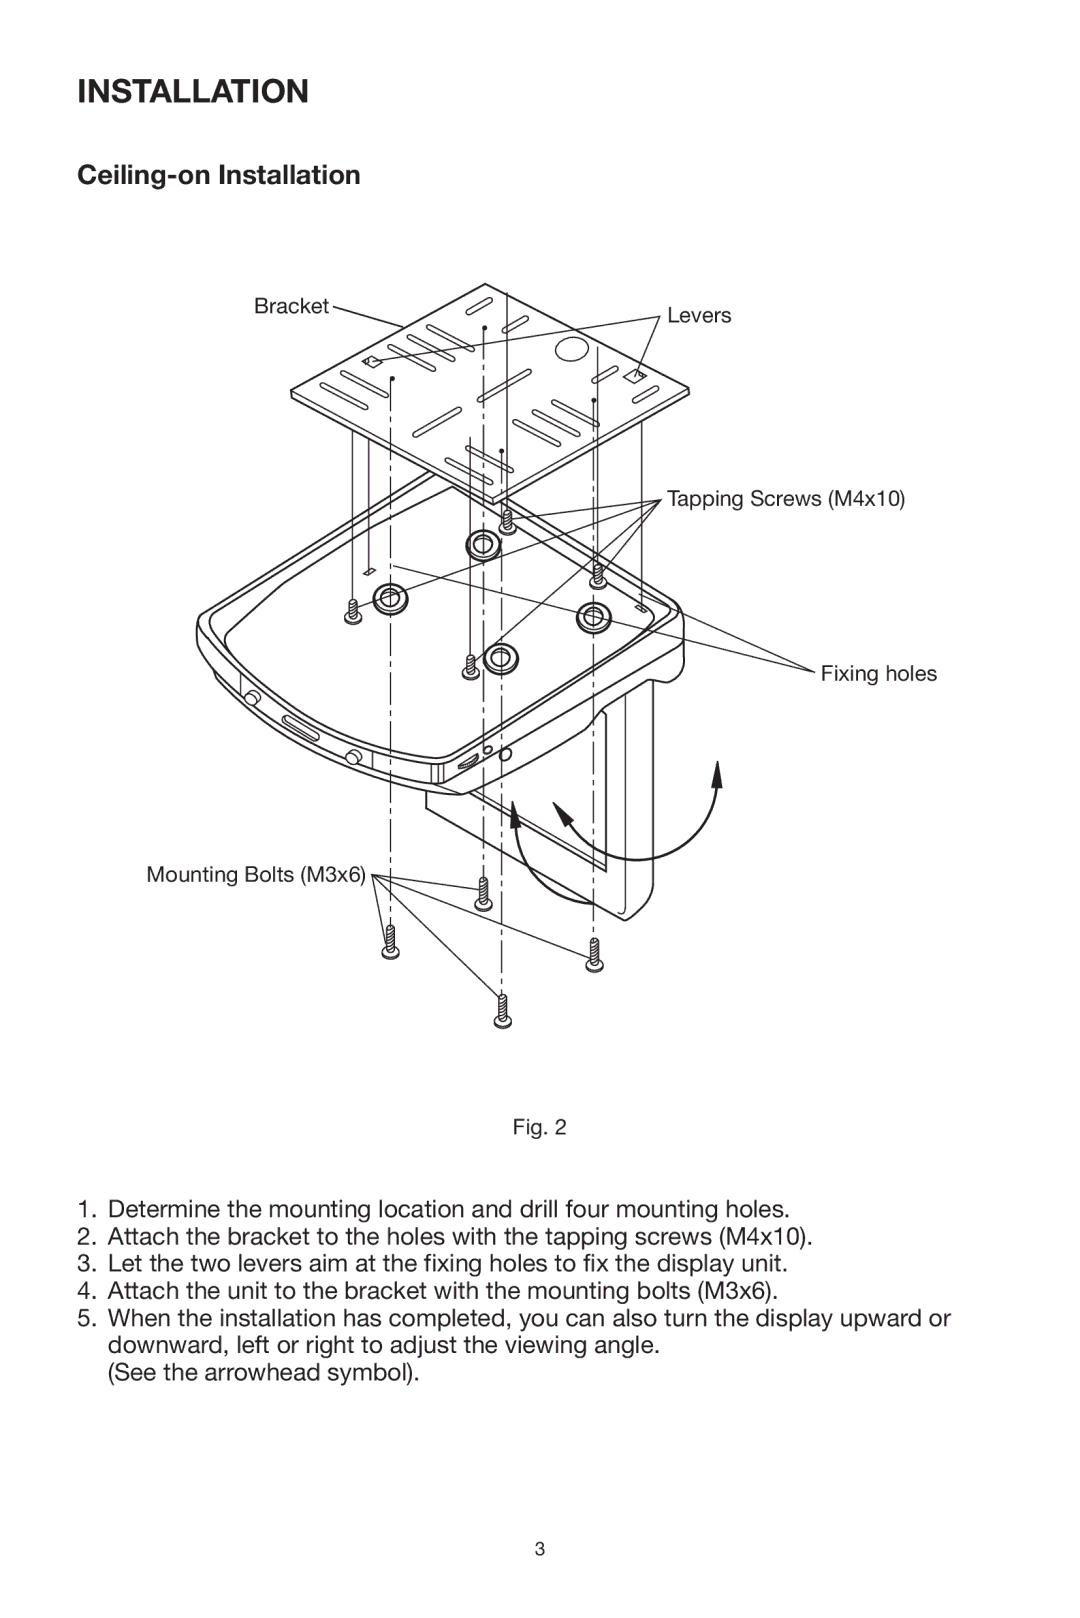
Bracket | Levers |
|
Tapping Screws (M4x10)
Fixing holes
Mounting Bolts (M3x6)
Fig. 2
1.Determine the mounting location and drill four mounting holes.
2.Attach the bracket to the holes with the tapping screws (M4x10).
3.Let the two levers aim at the fixing holes to fix the display unit.
4.Attach the unit to the bracket with the mounting bolts (M3x6).
5.When the installation has completed, you can also turn the display upward or downward, left or right to adjust the viewing angle.
(See the arrowhead symbol).
3