File list:
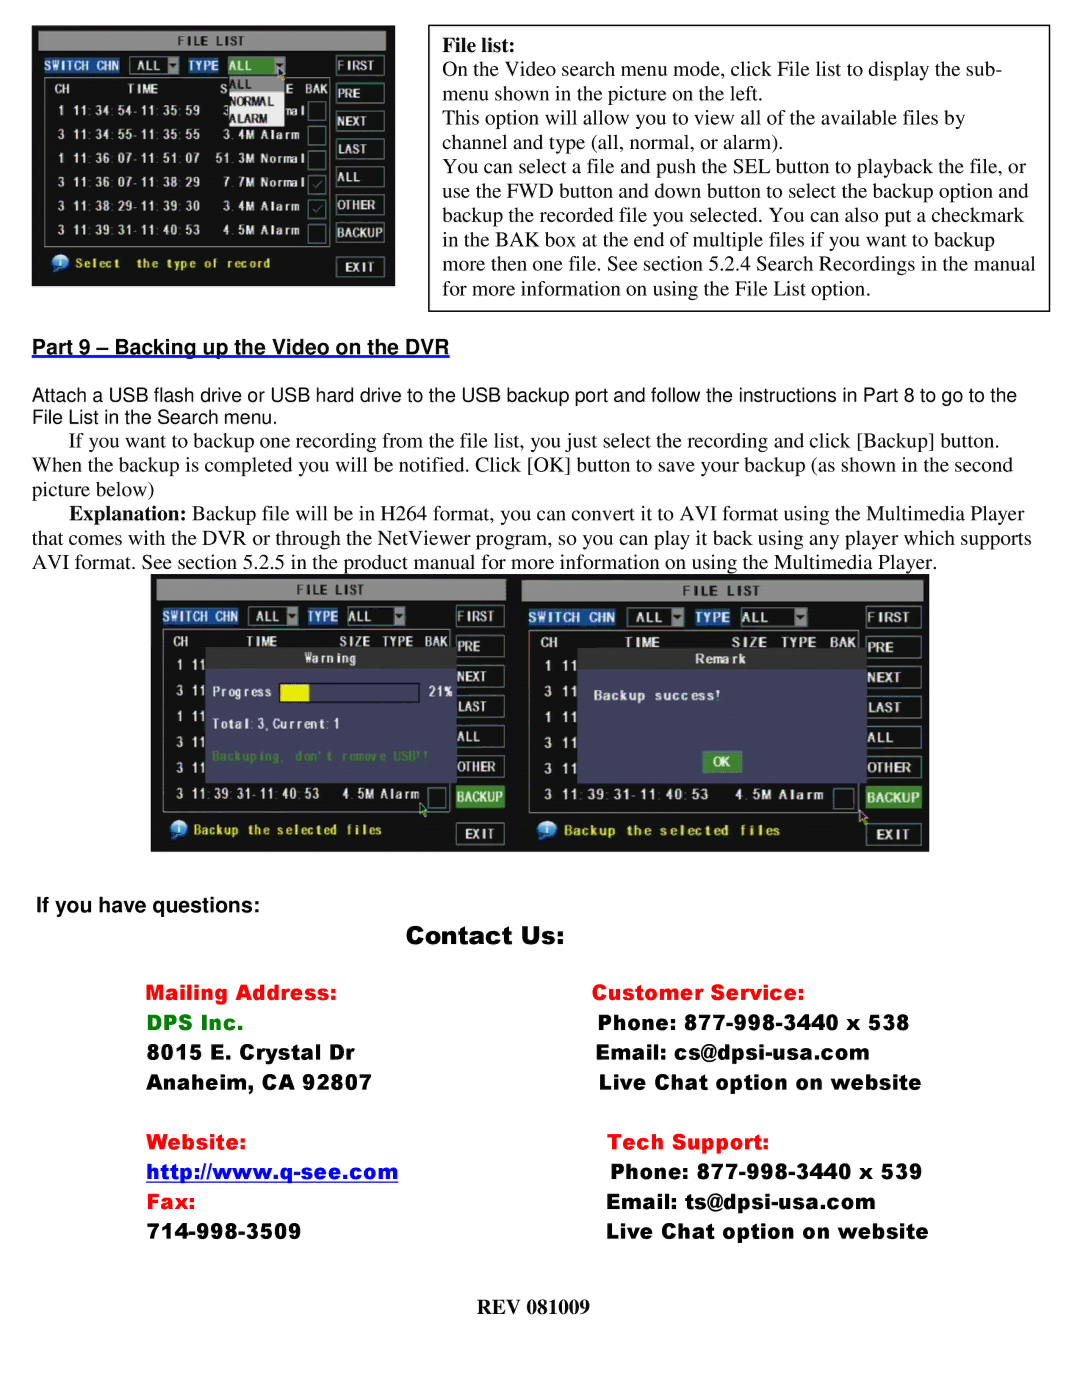
On the Video search menu mode, click File list to display the sub- menu shown in the picture on the left.
This option will allow you to view all of the available files by channel and type (all, normal, or alarm).
You can select a file and push the SEL button to playback the file, or use the FWD button and down button to select the backup option and backup the recorded file you selected. You can also put a checkmark in the BAK box at the end of multiple files if you want to backup more then one file. See section 5.2.4 Search Recordings in the manual for more information on using the File List option.
Part 9 – Backing up the Video on the DVR
Attach a USB flash drive or USB hard drive to the USB backup port and follow the instructions in Part 8 to go to the File List in the Search menu.
If you want to backup one recording from the file list, you just select the recording and click [Backup] button. When the backup is completed you will be notified. Click [OK] button to save your backup (as shown in the second picture below)
Explanation: Backup file will be in H264 format, you can convert it to AVI format using the Multimedia Player that comes with the DVR or through the NetViewer program, so you can play it back using any player which supports AVI format. See section 5.2.5 in the product manual for more information on using the Multimedia Player.
If you have questions:
| Contact Us: |
Mailing Address: | Customer Service: |
DPS Inc. | Phone: |
8015 E. Crystal Dr | Email: |
Anaheim, CA 92807 | Live Chat option on website |
Website: | Tech Support: |
Phone: | |
Fax: | Email: |
Live Chat option on website |
