|
| Service Bulletin |
Title: | Replacing HPR 122i woofers | |
Bulletin #: | HPR0002 | Issue Date: May 7, 2007 |
Models Affected: HPR 122i | Bulletin Revision: Rev. C | |
Production Range: March 2007 and earlier (see serial number date code guide below)
Description
In some HPR 122i powered loudspeakers manufactured prior to April 2007 (see Table 1; this bulletin applies to date codes I6 through C7, with the exceptions of GB7330741 through GB7330980, and GC733001 or later), the woofer voice coil has seized due to part of the magnet structure’s having shifted position.
NOTE: This type of failure is likely to affect only original drivers in some but not all HPR 122i units made during this time span. For those that do fail in this way, there is no singular cause, and the failures may occur at once or over some time. This condition is not repairable through reconing; instead, the entire driver must be replaced.
QSC recognizes that HPR users may need fast service, so we will ship a replacement driver overnight, free of charge, to any HPR owner in the US who has experienced this failure. (HPR owners outside the US must contact their QSC distributor.) The driver part number is
Replacing the driver requires only a Philips screwdriver and a 4 mm or 5/32” Allen wrench.
Instructions
Tools and materials required
•Philips (cross) screwdriver
•4 mm or 5/32” hex (Allen) wrench or bit
•12” replacement driver (QSC part #
•Gasket
Table 1. HPR 122i serial number date code
| G | X | X | 33xxxx | |
|
|
|
|
|
|
|
|
|
|
|
|
| Month | Year |
| ||
| A = Jan | 6 = 2006 |
| ||
| B = Feb | 7 = 2007 |
| ||
| C = Mar |
|
|
| |
| D = Apr |
|
|
| |
| E = May |
|
|
| |
| F = Jun |
|
|
| |
| G = Jul |
|
|
| |
| H = Aug |
|
|
| |
| I = Sep |
|
|
| |
| J = Oct |
|
|
| |
| K = Nov |
|
|
| |
| L = Dec |
|
|
| |
|
|
|
|
|
|
Procedure
1.Disconnect the loudspeaker’s power cord from the AC outlet.
2.Remove the front grille. There are 16
3.Remove the four hex
4.Carefully lift the driver from the enclosure. There will be two wires attached to the driver, so be careful to not strain them.
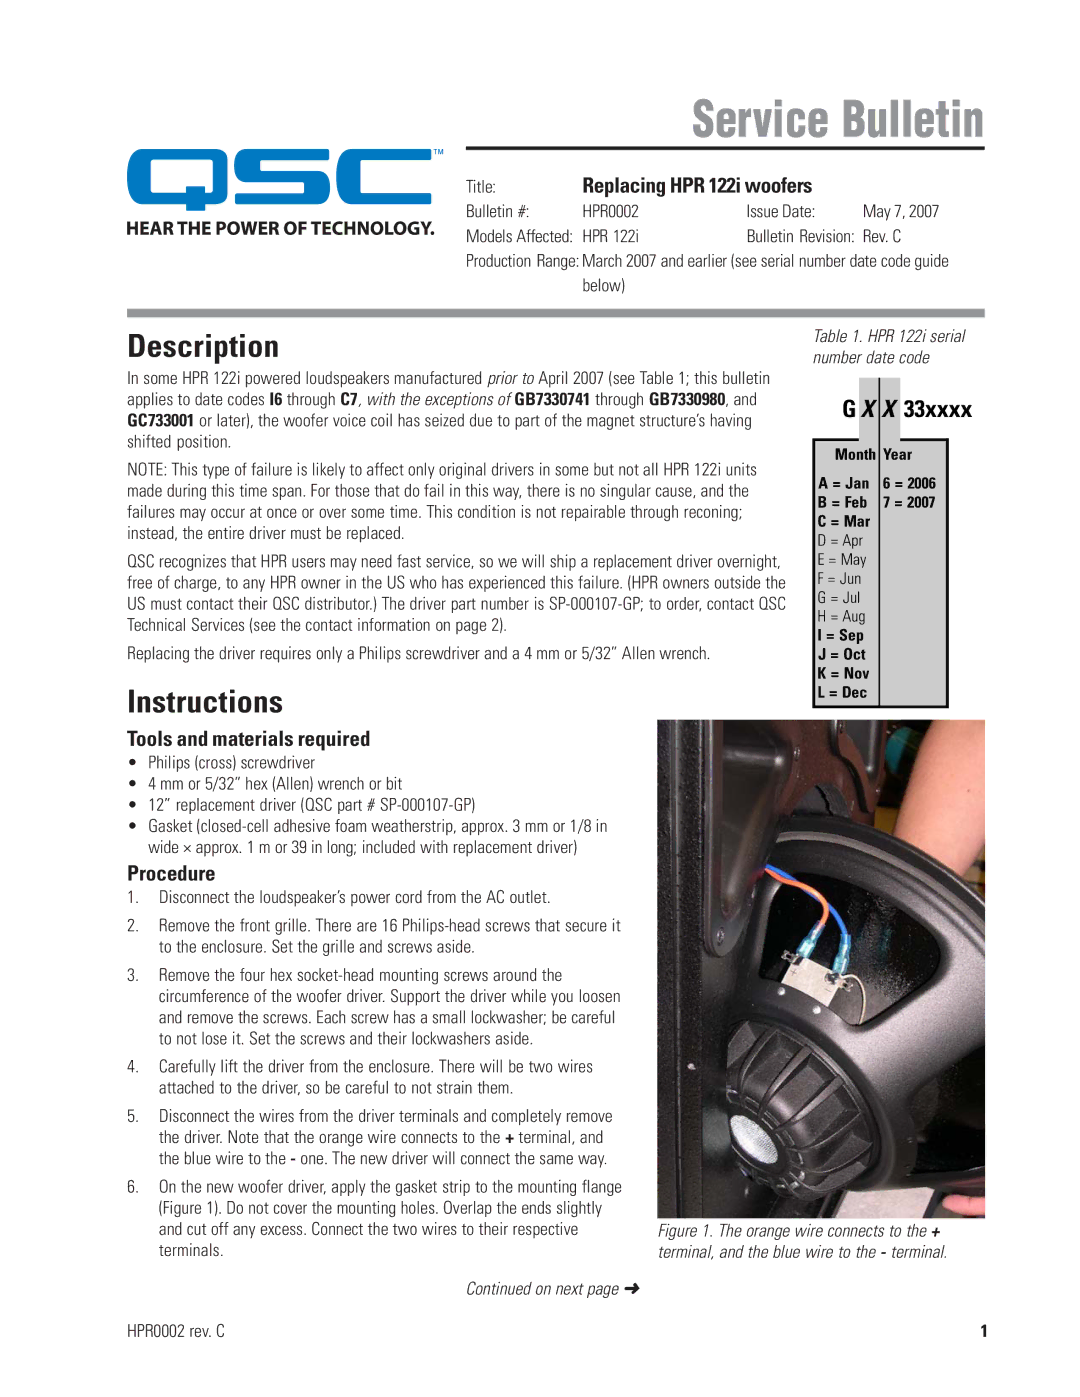
5.Disconnect the wires from the driver terminals and completely remove the driver. Note that the orange wire connects to the + terminal, and the blue wire to the - one. The new driver will connect the same way.
6.On the new woofer driver, apply the gasket strip to the mounting flange (Figure 1). Do not cover the mounting holes. Overlap the ends slightly and cut off any excess. Connect the two wires to their respective terminals.
Figure 1. The orange wire connects to the + terminal, and the blue wire to the - terminal.
Continued on next page ➜
HPR0002 rev. C | 1 |