
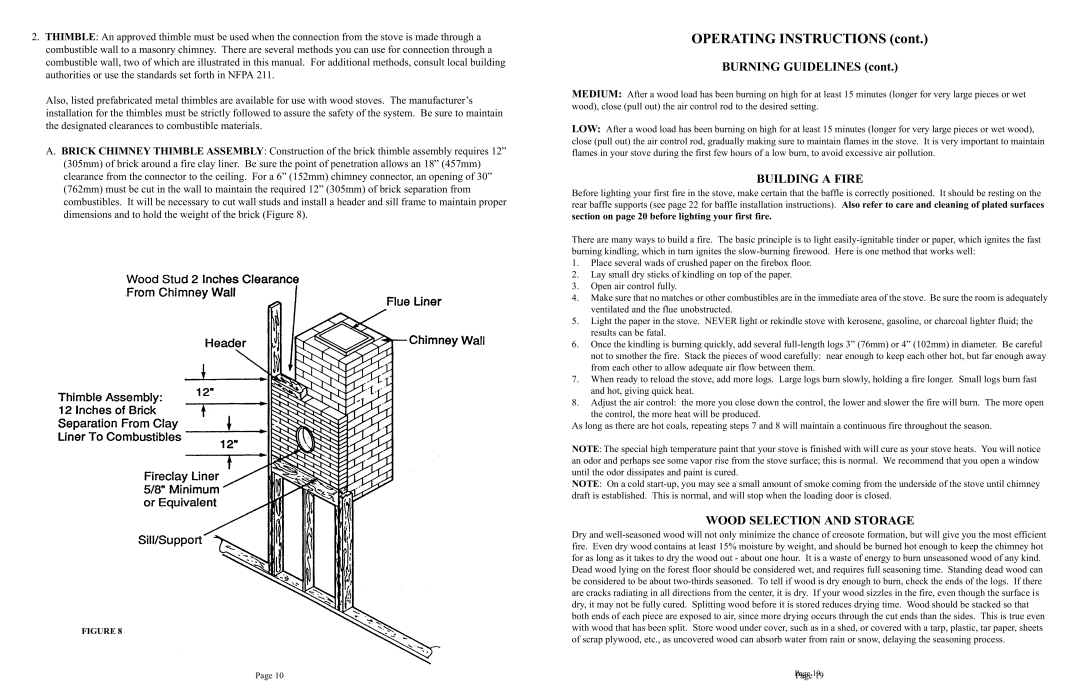
1900 specifications
The Quadra-Fire 1900 is a premier wood-burning stove that combines traditional craftsmanship with modern technology, delivering an exceptional heating experience for homes. Known for its efficiency and elegant design, the Quadra-Fire 1900 has become a popular choice among homeowners looking to enhance their living spaces with a reliable and effective heating solution.One of the standout features of the Quadra-Fire 1900 is its remarkable efficiency. With a heating capacity of up to 2,400 square feet, it is ideal for larger spaces, ensuring that warmth is evenly distributed throughout the room. The stove utilizes advanced combustion technology to maximize heat output while minimizing emissions, meeting stringent environmental standards and ensuring a cleaner burn.
The Quadra-Fire 1900 is equipped with a unique four-point burn system that enhances combustion performance. This system works by introducing air at multiple entry points, allowing for a more thorough burn of the wood fuel. This results in higher efficiency and less creosote buildup in the chimney, which means less maintenance for homeowners. Additionally, the stove features an adjustable damper that allows users to control the airflow and temperature, tailoring the heat output to their specific needs.
Another highlight of the Quadra-Fire 1900 is its impressive build quality. Constructed from high-quality materials, the stove embodies durability and reliability. The firebox is designed to withstand high temperatures and is lined with firebrick, which aids in heat retention and contributes to the overall efficiency of the unit. The sleek, modern design of the stove makes it an attractive focal point in any room, available in a range of finishes to complement various home decors.
For ease of use, the Quadra-Fire 1900 is designed with a large, easy-to-load door that provides ample access for refueling. The large viewing window features a clean burn technology that allows users to enjoy the aesthetic appeal of the flames while ensuring optimal performance and cleanliness.
In terms of safety, the Quadra-Fire 1900 includes several features that ensure peace of mind. An integrated blower option can be added for enhanced heat circulation, ensuring that warmth reaches every corner of the room. The stove also meets all EPA guidelines, promoting not only efficiency but also safety.
Altogether, the Quadra-Fire 1900 is a powerful, efficient, and beautifully designed wood-burning stove, making it an ideal heating solution for discerning homeowners looking to combine functionality with style. With its advanced technologies and user-friendly features, it remains a top choice in the world of wood stoves.