Manuals
/
Quantum Audio
/
Computer Equipment
/
Network Card
Quantum Audio
Scalar 50
installation instructions
Completing the Native Fibre Channel Installation
Models:
Scalar 50
1
14
24
24
Download
24 pages
57.84 Kb
11
12
13
14
15
16
17
18
Install
Configuration Stacked
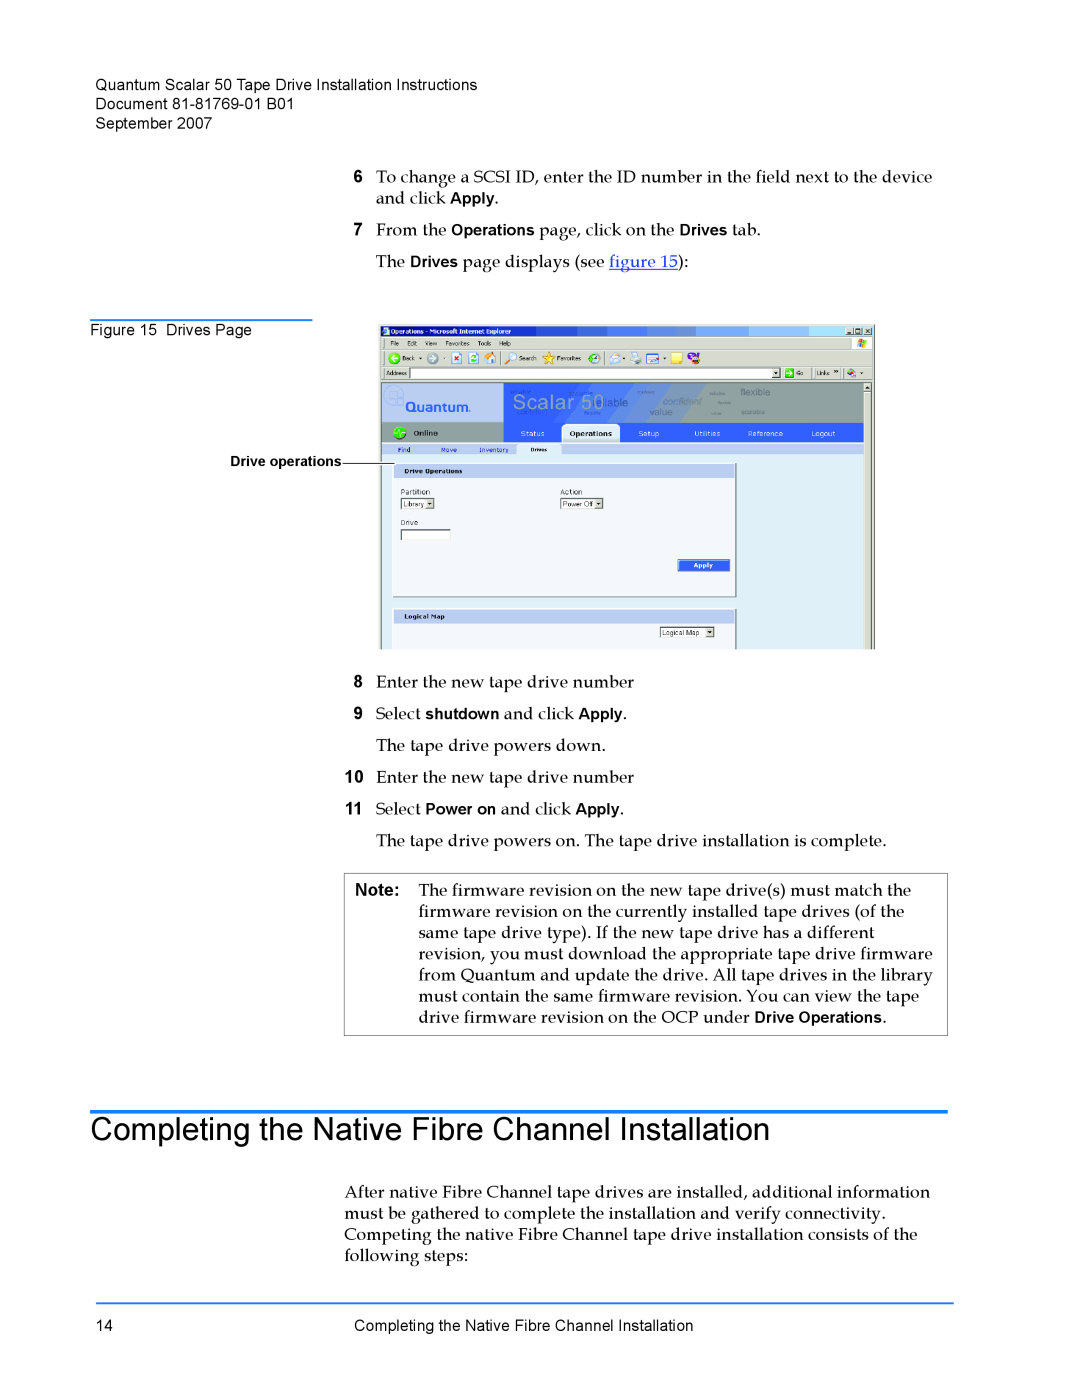
Setting the Tape Drive SCSI ID
Page 14
Image 14
Page 13
Page 15
Page 14
Image 14
Page 13
Page 15
Contents
Quantum Scalar Tape Drive Installation Instructions
COPYRIGHT STATEMENT
Quantum Scalar 50 Tape Drive Installation Instructions
Document 81-81769-01 B01 September
TRADEMARK STATEMENT
Cabling the Tape Drives Setting the Tape Drive SCSI ID
Introduction
Unpacking the Tape Drive Installing the Tape Drives
Completing the Native Fibre Channel Installation
Table 1 Tape Drive Upgrade Kits SDLT
Scalar 50 Tape Drive Upgrade Kits
Figure 2 Scalar 50 Cable Configuration Half-Height Drives
SDLT Part Number
Number
LTO Part
PC-KUCQA-YF LTO-3 HH SCSI, single drive
PC-KUC1A-YF LTO-3 HH SCSI, dual drive
Required Tools
Installing the Tape Drives
Unpacking the Tape Drive
Cabling the Tape Drives
Proceed to Cabling the Tape Drives
Fibre
Tape drives
Figure 7 Scalar 50 Cable Configuration Native Fibre
Channel Half-Height Drives
Scalar 50 slave library
Configuration Stacked
Document 81-81769-01 B01 September Figure 8 Scalar 50 Cable
Host computer
Setting the SCSI ID Using the OCP
Setting the Tape Drive SCSI ID
Setting the SCSI ID Using the OCP
Setting the SCSI ID from the Remote Management Pages
Setting the SCSI ID from the Remote Management Pages
3 Enter the username and password and click OK
Completing the Native Fibre Channel Installation
Determining the WWNs World Wide Names Verifying Library Connectivity
Using the Remote Management to Determine the WWNs
Determining the WWNs World Wide Names
Library/Tape Drive World Wide Name e.g
Figure 17 Setup Page
4 Click Setup from the contents frame
The management frame displays the Setup page see figure
5 Click on the SCSI/Fibre tab The SCSI/Fibre page displays see figure
World wide name
type
Tape drives
Media changer
Connect Via a Telnet Session
Verifying Library
Connectivity
Connect Via a Web Browser
Connect Via a Telnet Session
SCSI ID Assignment with Native Fibre Channel Tape Drives
Fibre Channel Connectivity Troubleshooting
Connect Via a Web Browser
SCSI ID Assignment with Native Fibre Channel Tape Drives
To display the SCSI ID assignments
Document 81-81769-01 B01 September
81-81769-01 B01
81-81769-01 B01
Top
Page
Image
Contents